You don't have to wait for the ice cream truck to make it's rounds to enjoy an Ice Cream Drumstick. With this simple Copycat Drumstick Ice Cream Cone recipe, you can enjoy this frozen treat whenever the craving strikes! Not to mention, homemade ice cream drumstick cones taste a million times better!
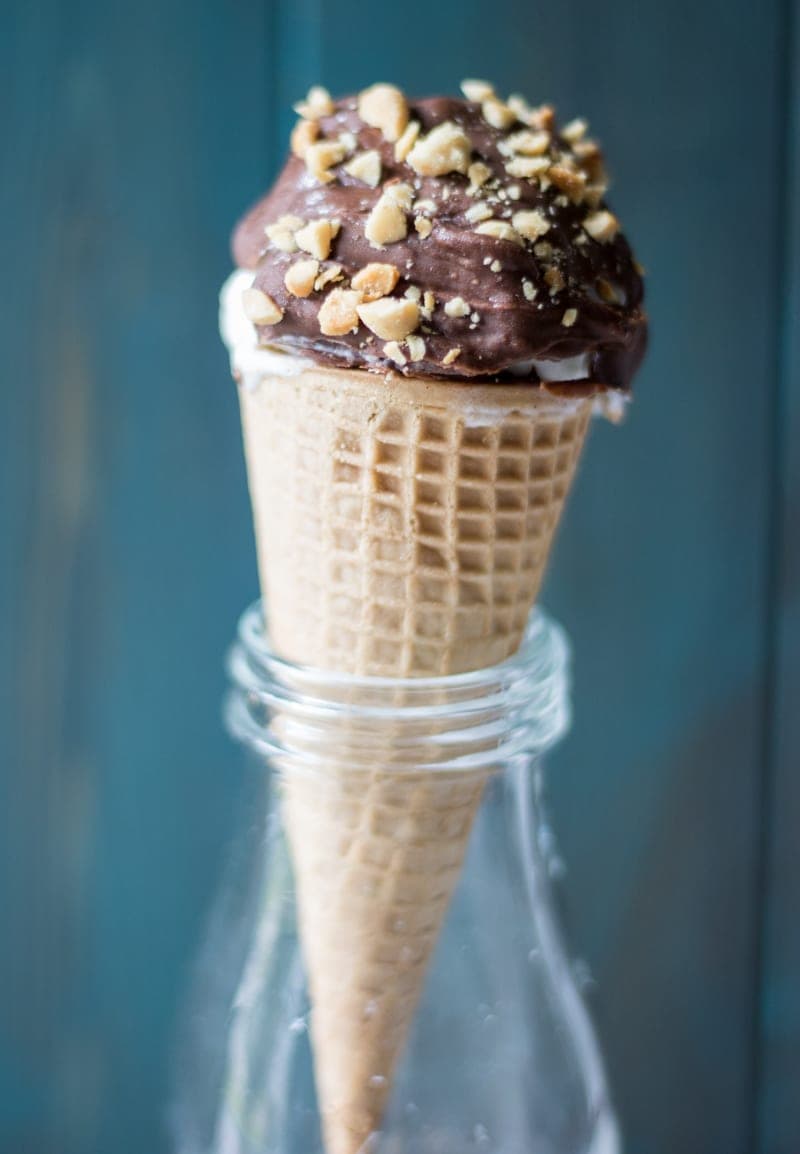
On the rare occasion I was allowed to get a treat from the Ice Cream Truck, I always choose one of two treats; a Fudgesicle or a an Ice Cream Drumstick.
To this day, I still adore both frozen treats. But instead of waiting for the ice cream truck to come by or stocking up at the grocery store, I prefer my own versions of these nostalgic treats. And just like my recipe for homemade fudgesicles, these Homemade Ice Cream Drumstick Cones taste so much better than anything store-bought!
Reasons to Love Copycat Drumstick Ice Cream Cones
- Money-Saver. Even if you are purchasing quality or allergy-friendly ingredients, you can make several drumstick ice cream cones for the price of one from the ice cream truck.
- Quality Control. My favorite thing about Homemade Ice Cream Drumsticks, is that YOU get to pick the ingredients. This means you can make this treat allergy-friendly and accommodate just about any dietary restriction.
- Endless Varieties. Keep it classic and use vanilla ice cream with a chocolate coating and chopped nuts, or get creative and use your favorite ice cream flavor or try adding chopped candies to the chocolate coating. Use your imagination.
- Easy, Kid-Friendly Dessert Recipe. Making homemade ice cream drumstick cones is the PERFECT activity for kids. The process is easy and super fun--what kid does not like to be in charge of scooping ice cream and sprinkling sprinkles?!
- Simply Delicious. Ice Cream Drumstick Cones have it all! The contrast between the creamy, soft ice cream, and the rich chocolate coating with crunchy nuts--PERFECTION!
What You Need To Make Drumstick Ice Cream Cones
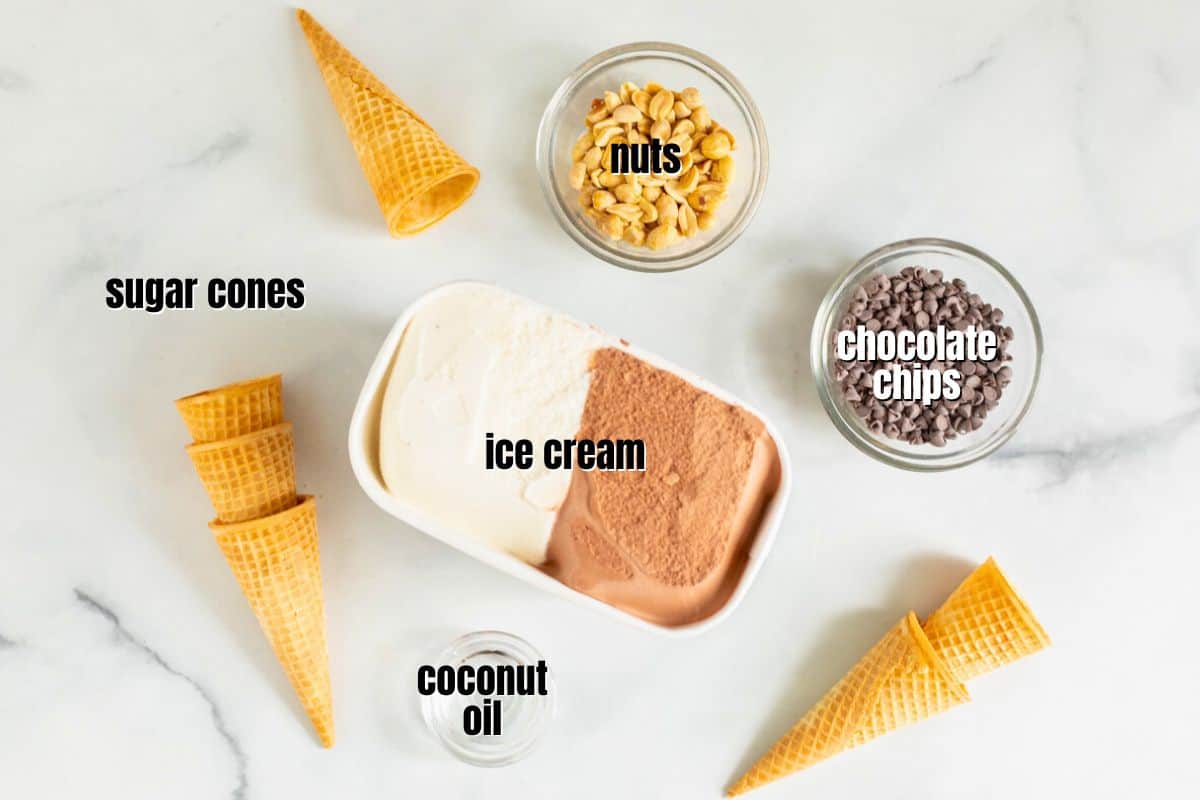
- Ice Cream Cones: For an authentic Drumstick Ice Cream Cone, use sugar cones or make a super-sized ice cream drumstick cones by using waffle cones.
- Ice Cream: Use any ice cream you like! Homemade vanilla ice cream, store-bought ice cream, or no-churn ice cream, are all great options.
- Chocolate: Use any chocolate you like. Either cut up a chocolate bar or use chocolate chips. Or get creative and use Another great option for these drumsticks is to use Homemade Strawberry Magic Shell from Go Dairy Free, in place of the chocolate for a strawberry version of this treat.
- Coconut Oil: Adding coconut oil to the melted chocolate will help the chocolate solidify quickly, forming a chocolate shell over the ice cream.
- Toppings: Crush up some peanuts or almonds, or skip nuts altogether. Sprinkles work in place of nuts if you are nut-free.
How to Make Copycat Ice Cream Drumstick Cones
The following tips are provided to help you achieve perfect results. You will find the detailed instructions in the recipe card at the bottom of this post.
Add Chocolate to the Bottom of the Cone
In order to keep your cone from becoming soggy, you want to coat the bottom with a bit of chocolate. Keep it simple and just drop a chocolate chip in the bottom of the cone, or brush some melted chocolate inside the cone.
Kristen's Tip
Place your ice cream cone into a glass jar to hold it upright while you fill the ice cream cone with chocolate and ice cream.
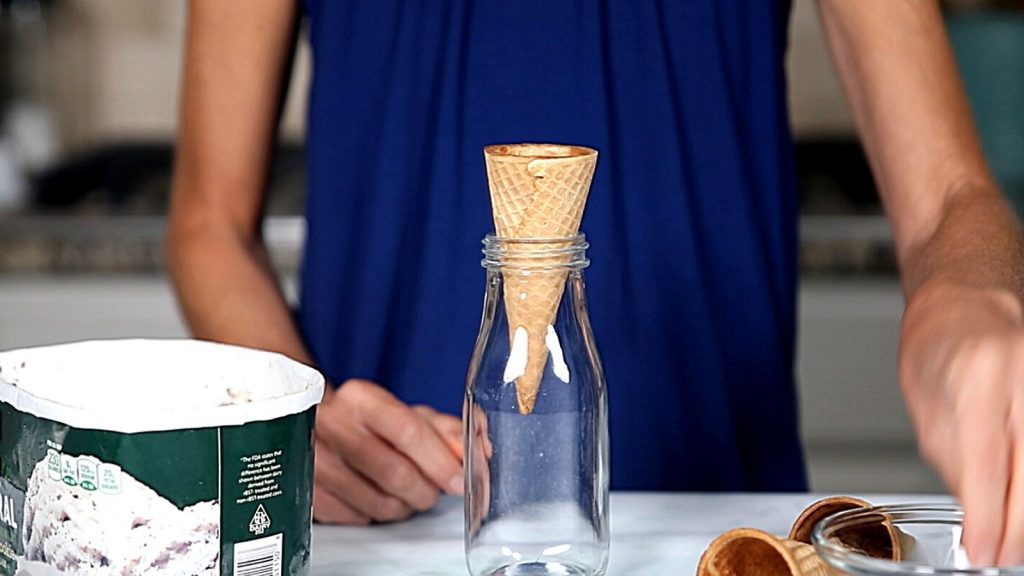
Fill Cones with Ice Cream
Fill the ice cream cones with ice cream, being sure to shape the top scoop to make a perfect dome around the cone. This will not only make the drumstick ice cream cone prettier and more authentic looking, but easier to coat with chocolate.
Freeze
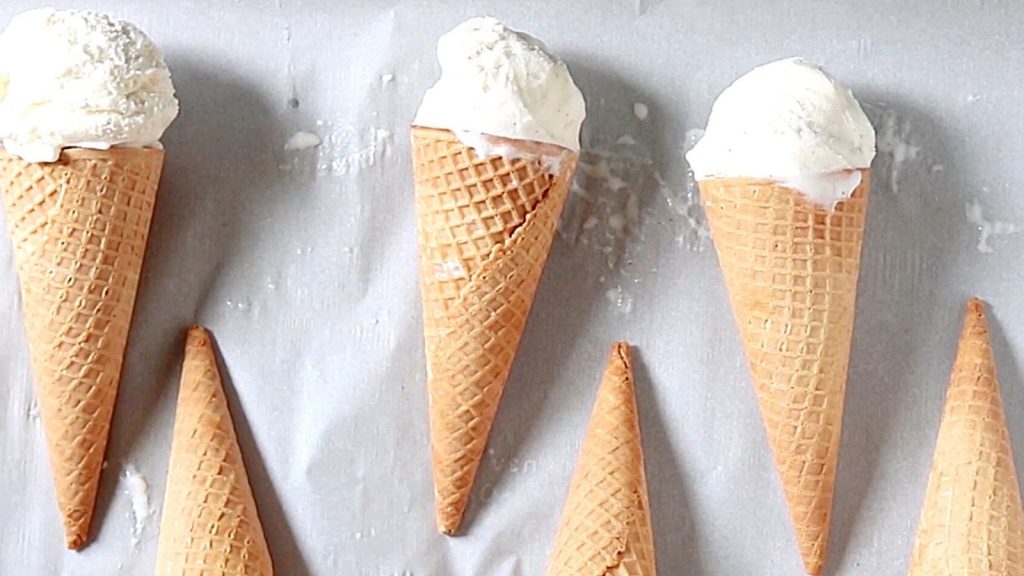
Once the cones have been filled with ice cream, place them on a baking tray lined with parchment paper and place the tray into the freezer for 30-60 minutes, or until the ice cream is frozen solid. Don't skip this step, or the ice cream will melt into your chocolate coating.
Melt Chocolate
Right before removing the prepared ice cream cones from the freezer, melt the chocolate for the topping by heating the chocolate in a microwave-safe bowl in 30-second intervals, stirring between each interval, until the chocolate has melted.
Add Coconut Oil to Melted Chocolate
Stirring in a bit of coconut oil into your melted chocolate will make the chocolate a lot thinner and will cause the chocolate to set up immediately on your ice cream, sort of like Magic Shell.
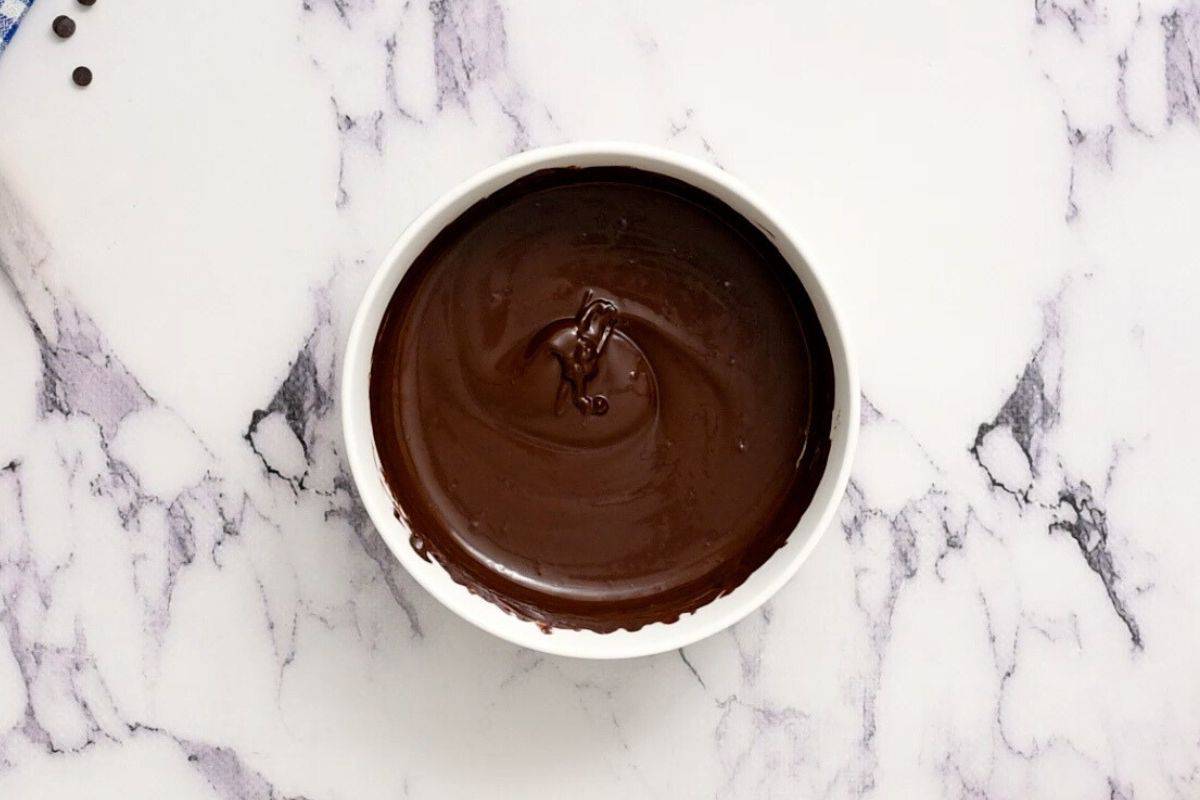
Coat Ice Cream with Chocolate
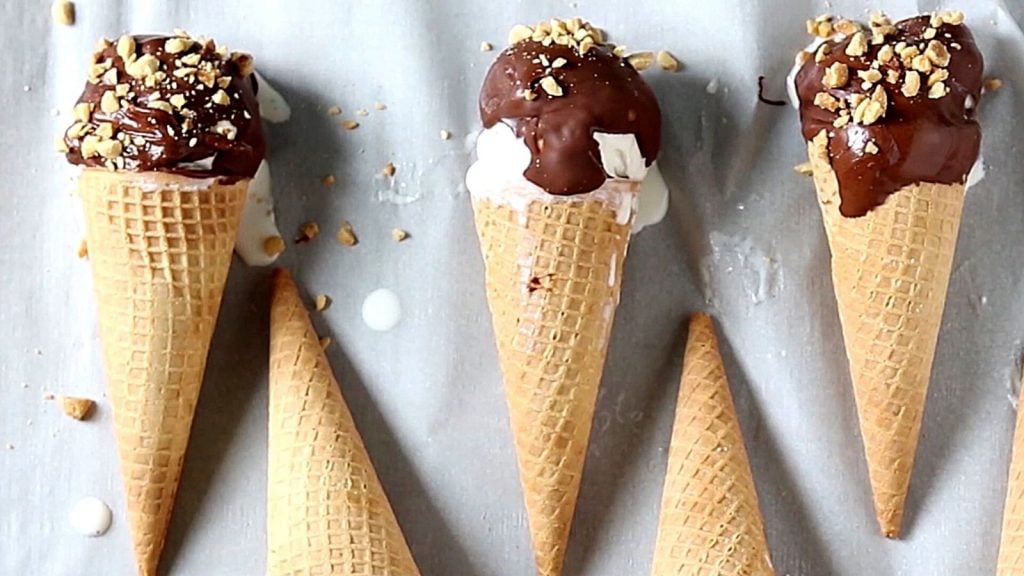
Do NOT be tempted to dip your ice cream into the melted chocolate, like you do for peanut butter balls when making homemade buckeyes. Because ice cream is a liquid, if it melts into the chocolate, the chocolate will seize up. It is best to grab one cone from the freezer at a time, and spoon the chocolate over the ice cream, letting the excess fall back onto a piece of parchment paper, NOT the bowl of melted chocolate.
Add Toppings
Immediately after coating the ice cream with chocolate, sprinkle chopped peanuts, or other desired toppings, over the chocolate before it sets up. Return the ice cream cone to the baking sheet in the freezer, grab another cone, and repeat the process.
Freeze until Solid
I recommend freezing your assembled drumstick ice cream cones for 15-30 minutes before serving, to ensure your ice cream is frozen solid again.
Allergy-Friendly Ice Cream Drumsticks
- Dairy-Free: Use dairy-free chocolate chips AND dairy-free ice cream.
- Gluten-Free: Use gluten-free ice cream cones and check your ice cream to ensure it is gluten-free. Some varieties of ice creams, such as cookie dough, can have added sources of gluten.
- Nut-Free: Skip adding nuts to the chocolate coating, and instead add sprinkles if desired. It is also important to carefully read over the ingredient label on your ice cream to determine if your ice cream is nut-free.
- Egg-Free: Use egg-free ice cream, such as my recipe for No-Churn Vanilla Ice Cream. Most sugar cones are egg-free, but be sure to check the ingredient label to ensure there has been no cross-contamination. And be cautious using waffle cones, as some brands are made with eggs.
More Delicious Summer Dessert Recipes
- Cherry Crumb Pie
- Blackberry Crisp
- Watermelon Granita
- Blueberry Crumb Bars
- Peach Crisp
- Frozen Yogurt Bark
- Peach Cobbler
If you enjoyed these Homemade Drumstick Cones, I would love for you to leave a comment and review below.
Homemade Ice Cream Drumstick Cones
Ingredients
- 6 sugar cones
- 48 ounces ice cream any variety
- 16 ounces chopped semi-sweet chocolate or chocolate chips
- ½ tablespoon coconut oil melted
- ½ cup chopped nuts or sprinkles optional
Instructions
- Line a cookie sheet with parchment or wax paper and be sure there is room to fit it in the freezer.
- Place one chocolate chip or morsel into the bottom of each cone. (Alternatively, brush the cone with melted chocolate and let the chocolate harden before adding ice cream.)
- Fill each ice cream cone ice cream, finishing with a perfect half-sphere on top of each cone (use your hands, if needed to shape.) Place the ice cream cones on the prepared cookie sheet and freeze until solid, about an hour.
- Heat the remaining chocolate chips in a microwave-safe bowl in 30 seconds intervals, stirring between each interval, until the chocolate is completely melted and has a smooth consistency. Stir in the coconut oil.
- Remove one ice cream cone from the freezer at a time, and working quickly, spoon the melted chocolate over the ice cream to coat. Immediately sprinkle with chopped peanuts or sprinkles, if desired.
- Place the assembled ice cream cone back on lined sheet, grab another cone, and repeat the process. Once the ice cream drumstick cones are assembled, freeze for 30 minute before serving.
- After 30 minutes, serve or place prepared drumstick cones into an airtight freezer-safe container for up to 2 weeks.


Reba
I always crave these so making them at home is the absolute best. Mine turned out great!
Kristen Chidsey
Fabulous! It is a great way to satisfy that craving.
Kristyn
My moms always had these in the freezer growing up, but these are more fun & delicious!! My kids love to help make them & the reward is greater!
Kristen Chidsey
Isn't it so fun to make?! And such a precious memory as well as a sweet treat. Thanks for sharing 🙂 I love hearing you and your kids enjoyed.
jess
This was everything that I wanted it to be and more! thank you so much for sharing this amazing recipe!
Trang
Drumsticks are my childhood favorite too! I actually still buy them all the time. My son is allergic to dairy and I didn't realize until now that I can make my own at home for him using your recipe and then subbing it with dairy free chocolate like you recommended. Thank you!
Kristen Chidsey
I am so happy you discovered this recipe and your son can enjoy now!
Julie Blanner
Love this! I remember eating these as a kid, and my girls loved helping me make them! We will definitely be making this again.
Kristen Chidsey
I love hearing your girls helped out--such a fun activity (and yummy too!)
Stephanie
Ice cream drumsticks were my absolute favorite growing up so I was worried these wouldn't be as good. I should never had worried. I loved your DIY version SO MUCH!!!
Kristen Chidsey
YAY!!! I am so glad you enjoyed so much!
Taryn
Thank you!!!! I have a child with a nut allergy who looks longingly at store bought drumsticks. I can just leave off the nuts now.
Kristen Chidsey
I love when children (or adults) are able to enjoy treats without worry!! I am so glad you found this recipe.
Colleen
Yum! Love this DIY version! Happy Foodie FriDIY!
Kristen Chidsey
Thanks Colleen!
Julie
I can't wait to give these a try!
Kristen Chidsey
You will LOVE them Julie!!