• Skip to primary navigation
  • Skip to main content
  • Skip to primary sidebar
A Mind "Full" Mom
  • Recipe Index
    • Breakfast Recipes
    • Main Courses
      • 30-Minute Meals
      • Easy Pork Recipes
      • Beef Recipes
      • Soup, Stew, and Chili Recipes
      • Sandwiches, Burgers, and Wraps
      • Vegetarian Recipes
    • Slow Cooker Recipes
    • Instant Pot
    • Appetizers
    • Beverage Recipes
    • Breads and Muffins
    • Allergy Friendly Recipes
      • Dairy Free
      • Gluten Free
      • Paleo
      • Vegan
      • Low Carb
    • Pasta
    • Snacks
    • Side Dishes
    • Desserts
  • Instant Pot
    • Start Here: Instant Pot 101
    • All Instant Pot Recipes
    • Healthy Instant Pot Recipes
    • Sign Up for Instant Pot Tips and Recipes
  • About Me
    • Contact
    • Work With Me
    • Cystic Fibrosis
  • Free Instant Pot Secrets
  • Free Meal Plans
menu icon
go to homepage
subscribe
search icon
Homepage link
  • Recipes
  • Instant Pot
  • About Me
  • Subscribe to Newsletters
  • Free Instant Pot Secrets
  • Free Meal Plans
    • Email
    • Facebook
    • Instagram
    • Pinterest
    • Twitter
  • ×

    Home » Real Food » Breads and Muffins » Cranberry Walnut Bread

    Cranberry Walnut Bread

    By Kristen Chidsey | 80 Comments | Published November 24, 2019 | Updated November 4, 2021 *This post may include amazon links. As an Amazon Associate, I earn from qualifying purchases.

    Pin
    Share
    Jump to Recipe Print Recipe
    There is nothing better than a slice of this Cranberry Walnut Bread when it is warm from the oven! Sweet and chewy, studded with dried cranberries and walnuts, this bread is the perfect base for sandwiches, breakfast casseroles, or just to eat toasted. This no knead dutch oven bread may take a bit of time to make, but it is almost completely hands off. This No Knead Cranberry Walnut Bread is a copycat version of Panera and so easy to make a home! Not to mention cheaper!

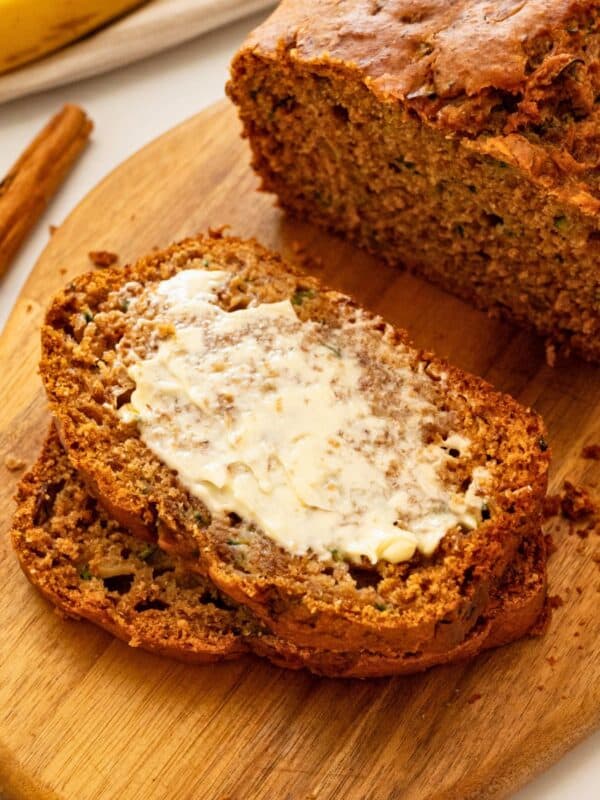
    Sweet, chewy, and studded with dried cranberries and walnuts, this Dutch Oven Cranberry Walnut Bread and comes together with minimal effort.

    Baked Cranberry Walnut Bread on counter next to dried cranberries and walnuts.

    Copycat Cranberry Walnut Bread

    After trying Panera's Cranberry Walnut Bread years ago, I have been recreating the bread at home with spectacular results, using my Dutch Oven Bread recipe as a starting point.

    Studded with dried cranberries and chopped walnuts, this cranberry walnut bread is chewy and yeasty, and downright FABULOUS!

    The bonus is that this recipe for Cranberry Walnut Bread only takes minutes of hands-on prep and costs pennies to make--much less expensive than Panera!

    However, you slice it (ha! ha!) this bread is good! And good for you!!

    Ingredients

    • Flour: I use whole white wheat flour for this recipe. I have tried using 100% whole wheat and that overwhelmed the flavor of the cranberries and walnuts. However, you can use a mixture of 100% whole wheat flour and all-purpose flour with success. I would just use half of each.
    • Yeast: Use regular dry active yeast (not quick rise yeast) and be sure that your yeast has not expired. If it is not fresh, your bread will not proof and will be dense and flat when baked.
    • Salt: I always use kosher salt when baking bread. If you only have table salt, that will work, but I highly recommend kosher salt for flavor.
    • Dried Cranberries: Be sure you used dried cranberries, not fresh cranberries. The dried cranberries will plump up slightly as the bread rises and add just the right amount of tart sweetness.
    • Walnuts: Use unsalted, toasted walnuts for the best flavor. And chop the walnut pieces up into small pieces so that no bite is overwhelmed with a piece of walnut.

    Notes on Equipment

    • Dutch Oven Pan: There is no substitution to using a heavy-bottomed dutch oven pan fitted with a lid for this recipe. It creates the perfect environment for cooking the bread and if well-seasoned/cared for, the bread will not stick to your pan.
    • Parchment Paper: Parchment paper is completely optional, but it does make transfering the bread to your pan easier. It will also help prevent your bread from sticking to your pan. Just be sure your parchment paper is safe up to temperatures of 450 degrees F--some brands are only safe up to 400 degrees F.

    How to Make Cranberry Walnut Bread

    Dutch oven bread is one of the easiest ways to prepare bread at home. There is no need to proof the yeast or knead the dough, making this recipe incredibly easy.

    Plan Ahead: It does take time for the bread dough to proof, so I highly recommend prepping this dough the night before you intend to bake it. I will often take 5 minutes to mix it together while I am preparing dinner and then the dough is ready to bake the next morning.

    • In a large mixing bowl toss the yeast, flour, salt, cranberries, and walnuts together.
    • Add in the water and mix together with a wooden spoon or spatula until the dough comes together. Expect the dough to be sticky and wetter than dough of traditional homemade bread.
    Bowl with cranberry walnut bread dough mixture.
    • Once the dough is combined, cover with a clean kitchen towel or plastic wrap and let sit at room temperature for 12-18 hours. The yeast will activate and the bread will get yeasty and bubbly.
    Bowl with Cranberry Walnut Bread dough after rising.
    • Turn the risen bread dough out onto parchment paper LIGHTLY dusted with flour. With floured hands, quickly shape the dough into a circle.
    • Let the dough rest on the parchment paper while the oven preheats.
    Bread dough shaped in circle on parchment paper.
    • Place the dutch oven pan into the oven BEFORE turning the oven on to preheat. It is crucial to let the pan preheat as well--this will give this cranberry walnut bread it's chewy, crispy exterior.
    • Once the pan is preheated, carefully place the prepared dough into the pan and cover with the lid. If using parchment paper, you can simply pick up the parchment paper and place into the dutch oven (as long as your parchment paper is safe up to 450 degrees F). If you don't have parchment paper, just place the bread dough directly to the dutch oven, scored side up. DO NOT USE wax paper or a silicone baking sheet as the temperature of the oven is too hot for either! And really you should never use wax paper in the oven.
    • Bake the bread covered for 30 minutes and then uncover to continue baking for 20 minutes, which will help to crisp up the exterior of the bread.
    Baked Cranberry Walnut Bread in dutch oven.
    • Once baked, let the bread cool slightly in the pan and then turn out and finish cooling on a cooling rack. Allow bread to cool for 30 minutes before slicing.
    Sliced Cranberry Walnut Bred on cutting board next to butter.

    Serving Suggestions

    There is nothing better than a slice of this Cranberry Walnut Bread when it is warm from the oven, but this bread can be used in so many ways.

    • Create a sweet and savory sandwich by using the cranberry walnut bread as a base for a ham or turkey sandwich.
    • Make a delicious grilled cheese sandwich, by layering slices of sharp cheddar cheese inbetween two slices of buttered cranberry walnut bread and then pan-frying until the bread is toasted and the cheese is melted.
    • Use chunks of this Cranberry Bread to create a sweet and savory Ham and Egg Breakfast Casserole or for a delicious spin on French Toast Casserole.

    Storing the Bread

    Once the Cranberry Walnut bread is fully cooled, store the bread in an airtight sealed container or bag, at room temperature for 3-4 days.

    To freeze Cranberry Walnut Bread, allow the bread to cool fully after being baked. Wrap well in plastic wrap, then a layer of foil, and then place in a freezer-safe bag. Store in the freezer for up to 1 month. Defrost at room temperature for 12 hours before serving.

    Preventing the Bread from Sticking

    If your dutch oven pan is good-quality, you should have no issue with this dough sticking to the pan. However, some people have reported this issue. To prevent this from happening, use parchment paper, or be sure to dust your bread with flour before transferring the bread dough to the pan. I don't recommend greasing the pan, as the oil can burn at the high temperature the bread is baked at.

    More Homemade Bread Recipes

    • Whole Wheat Cinnamon Raisin Bread
    • Homemade Italian Bread
    • Honey Whole Wheat Bread
    • Whole Wheat Dutch Oven Bread

    If you enjoyed this simple recipe for Cranberry Walnut Bread, I would love for you to leave a review and comment below.

    Cranberry Walnut Bread sliced on wooden cutting board

    Cranberry Walnut Bread

    Sweet and tender, studded with dried cranberries and walnuts, this Dutch Oven Cranberry Walnut Bread is one of the easiest ways to make homemade bread. No kneading, no proofing--just mix, rise, and bake! It is the perfect base for sandwiches, breakfast casseroles, or just to eat toasted.
    4.89 from 18 votes
    Print Pin Rate
    Course: Bread
    Cuisine: American
    Prep Time: 5 minutes
    Cook Time: 50 minutes
    Proofing: 12 hours
    Total Time: 12 hours 55 minutes
    Servings: 16 slices
    Calories: 100kcal
    Author: Kristen Chidsey

    Ingredients

    • 3 cups white wheat flour or unbleached all-purpose flour
    • 1 teaspoon dry active yeast
    • ½ cup dried cranberries
    • ½ chopped walnuts
    • 1 ½ teaspoons salt
    • 1 ½ cups luke warm water
    Prevents your screen from going dark while preparing the recipe.

    Instructions

    • In a large mixing bowl, mix together flour, yeast, salt, cranberries, and walnuts. Add in water and mix well with a wooden spoon.
    • Cover with plastic wrap or a clean kitchen towel and set in a draft-free spot to rise for 12-18 hours undisturbed.
    • After the proofing time has passed, turn the dough out onto parchment paper that has been sprinkled lightly with flour and quickly shape into a circle. It will be sticky, so you may want to flour your hands as well. And try to not overwork the dough--just a rustic circle is all you are going for. Let the dough rest, while the oven preheats.
    • Place the dutch oven fitted with its lid in the oven. Preheat to 450 degrees F. (Let the pan preheat in the oven.)
    • Once the pan is preheated, carefully remove it from the oven and then carefully place the prepared dough into the pan and cover with the lid. If using parchment paper that is safe up to 450 degrees F, you can simply pick up the parchment paper and place into the dutch oven. If you don't have parchment paper, just place the bread dough directly to the dutch oven. DO NOT USE wax paper or a silicone baking sheet.
    • Bake for 30 minutes covered. Remove the lid and bake for an additional 20 minutes.
    • Remove bread from dutch oven and let cool on a wire rack completely before slicing and serving.

    Equipment Needed

    • 3.5 to 6 quart Dutch Oven

    Notes

    Flour: Use all-purpose or whole white wheat flour. To measure the flour, scoop the flour out with a spoon and then place it in a measuring cup--this will ensure you don't use too much flour. 
    Nuts: Feel free to omit the walnuts from this bread to make it nut-free or swap out walnuts for pecans if desired.
    Yeast: Be sure to use regular yeast, not quick-rise yeast, and be sure your yeast is not expired. 
    Note on Bread Sticking: If your dutch oven pan is good-quality, you should have no issue with this dough sticking to the pan. However, some people have reported this issue. To prevent this from happening, use parchment paper, or be sure to dust your bread with flour before transferring the bread dough to the pan. I don't recommend greasing the pan, as the oil can burn at the high temperature the bread is baked at.sticking to the pan. However, some people have reported this issue. To prevent this from happening, use parchment paper, or be sure to dust your bread with flour before transferring the bread dough to the pan. I don't recommend greasing the pan, as the oil can burn at the high temperature the bread is baked at.
    Storage: Once fully cooled, store bread in a sealed container, or bag, at room temperature for up to 3 days. This bread can also be frozen for up to 1 month if wrapped in plastic wrap and then foil and then placed into a freezer-safe bag. 
    Pan: Anywhere from a 3.5 to a 6-quart dutch oven with a lid will work to bake this bread. I use a 4.5 quart myself. 
    Baking at a high altitude? Check out these adjustments that you may need to follow. 

    Nutrition

    Calories: 100kcal | Carbohydrates: 21g | Protein: 3g | Fat: 1g | Saturated Fat: 1g | Sodium: 219mg | Potassium: 32mg | Fiber: 1g | Sugar: 3g | Calcium: 4mg | Iron: 1mg
    Liked this Recipe? Tag me Today!Snap a picture and tag #amindfullmom on Instagram - I would love to see!
    Pin
    Share
    « Instant Pot Mashed Sweet Potatoes
    Thanksgiving Leftover Recipes »

    About Kristen Chidsey

    Hi, I am Kristen, creator of A Mind "Full" Mom. I believe that making a wholesome family meal does not need to be hard or expensive! I love nothing more than to share with you delicious solutions for your hungry family.

    Reader Interactions

    Comments

    1. Amy

      February 19, 2022 at 11:36 am

      5 stars
      First time making and this came out great! A few errors on my part but was able to fix those errors. Did not realize yeast should not be near salt. Be careful when putting ingredients together. Used water that may have been too hot, yeast that may not have been fresh enough. After an easy mix of ingredients, set aside for 18 hr proof. After the 18 hrs, dough had not risen at all. Looked the same as when I mixed it. Decided to consult the Internet rather than throw it away. Took 1 tsp of new yeast and put it in 1/4 cup of water that read 100-110 degrees. Also added a sprinkle of sugar (maybe 1/8 tsp) to the water before adding the yeast. Set aside covered with a towel for 10 min. Water was foamy, a good sign! Added it to the dough along with some extra flour (a few Tablespoons) to get the right consistency. Back to proofing. This time the dough had risen, and I was able to proceed with the recipe as written. My loaf was golden brown after 30 minutes, so I loosely put foil over the top for the last 20 minutes, no cover on Dutch Oven. Can’t believe how delicious it came out - crisp, crusty outside and soft and moist inside. We loved it!

      Reply
    2. Tayyibah Amatullah

      November 07, 2021 at 10:07 pm

      Would gluten free flour work? Like Bob's baking flour or King Arthur's all purpose gluten free flour?

      Reply
      • Kristen Chidsey

        November 08, 2021 at 6:46 am

        Hi Tayyibah! This is one recipe I have not tested using a 1:1 gluten-free flour blend. I highly doubt it would work in this recipe, but if you do experiment with it, please let us know if it turns out.

        Reply
    3. DeeAnne

      September 11, 2021 at 8:42 pm

      5 stars
      Should I add Vital Wheat Gluten to this recipe?

      Reply
      • Kristen Chidsey

        September 12, 2021 at 7:25 am

        I don't find it necessary, however, you can add 2 tablespoons for a lighter loaf.

        Reply
    4. Spring

      April 03, 2021 at 9:02 am

      Have you tried using freshly ground white wheat or just purchased whole white wheat flour? How would the proportions change? I want to mill the flour fresh but I know the high bran content can change a recipe.

      Reply
      • Kristen Chidsey

        April 03, 2021 at 9:31 am

        I mill my own flour all the time. The recipe should not change if you measure out the flour correctly.

        Reply
    5. Pat

      January 18, 2021 at 6:24 pm

      I love the look and the sound (and the anticipation!) of this bread, but can it be made without a dutch oven? Any suggestions?

      Reply
      • Kristen Chidsey

        January 19, 2021 at 6:58 am

        Hi Pat! I personally have not made this recipe without using a dutch oven. However, I have had readers share with me that they had success. They shaped into 2 loaves (keep in mind this dough is VERY wet and harder to work with), let them rest for 30 minutes, scored the top, and then baked at 475 on a sheet pan for 40-45 minutes.

        Reply
    6. Alison

      November 23, 2020 at 2:27 pm

      4 stars
      First loaf used equal amounts of whole wheat flour and white flour. Let rest to proof for 12 hours. The yeast was still fresh (does not expire for another 3.5 months and has been stored properly). Baked in a round dutch oven with lid. But the loaf turned out flatter than desired. Looks like biscotti when sliced.
      I think my dutch oven may be larger than the one others have used and that may have contributed to the dough spreading out instead of rising taller. If I use the dutch oven method again may double the recipe.
      Second loaf used 1 cup whole wheat flour and 2 cups of white flour. Baked in a loaf pan with a water bath in the oven. Still did not rise as high as I would have liked. The steam from the water bath helped form the crusty crust. The flavor is good. I think If I make it again I will need to play with the recipe to see if I can get the desired height and density. Probably changing the ratio of whole wheat flour and white flour maybe decreasing the salt and adding some sugar for the yeast to eat on while proofing.

      Reply
      • Kristen Chidsey

        November 25, 2020 at 7:44 am

        Hi Alison! Most people have great success with this recipe as written, but I would love to hear how your experiments go.

        Reply
    « Older Comments

    Leave a Reply Cancel reply

    Your email address will not be published. Required fields are marked *

    Recipe Rating


    This site uses Akismet to reduce spam. Learn how your comment data is processed.

    Primary Sidebar

    Meet A Mind "Full" Mom

    welcomeHi! I'm Kristen. I want to welcome you into my kitchen and my REAL, imperfect life. Let me share with you tips and tricks to help you make healthy eating a reality for your family in the chaos of life and on the constraints of a budget. Read more

    Instant Pot Favorites

    jar of plain yogurt next to instant pot

    Instant Pot Yogurt

    Perfect Hard Boiled Eggs Sliced Open on cutting board

    Instant Pot Hard Boiled Eggs

    Shredded Pot Roast with carrots and Potatoes in white bowl next to Instant Pot.

    Instant Pot Pot Roast

    Whole Chicken on cutting board

    Instant Pot Rotisserie Chicken

    Bowl of Cold Start Yogurt

    Instant Pot Cold Start Yogurt

    Inner pot of instant pot filled dried beans

    Instant Pot Beans

    4 chicken breasts cooked inside instant pot.

    Instant Pot Chicken Breast (Fresh or Frozen)

    How to use the instant pot as a slow cooker

    How to Use Your Instant Pot as a Slow Cooker

    Reader Favorites

    Bowl of Baked Meatballs.

    The Best Baked Meatballs

    slice of egg cheese overnight breakfast casserole with sausage

    Hashbrown Breakfast Casserole

    Creamy and Cheesy Chicken and Rice in yellow casserole dish

    Creamy and Cheesy Chicken and Rice

    Baked Potato on White Plate

    Instant Pot Baked Potatoes

    Chili seasonings labled on wooden board

    DIY Chili Seasoning

    Plate of chicken and bok choy stir fry topped with cilantro.

    Stir-Fried Chicken and Bok Choy

    Platter of Instant Pot Wings next to ranch dressing

    Instant Pot Chicken Wings

    Bowl of slow cooker oatmeal topped with maple syrup and nuts

    Slow Cooker Maple Brown Sugar Oatmeal

    Taco Meat in skillet with wooden spoon

    The Best Taco Meat Recipe

    Homemade Chicken Tenders on platter.

    Homemade Chicken Tenders

    FEATURED ON

    featured

    Footer

    Featured on:

    Websites AMind"Full"Mom has been featured on

    ↑ back to top

    About

    • Privacy Policy

    Newsletter

    • Sign Up! for emails and updates

    Contact

    • Contact
    • Work with me

    DISCLAIMER: THE SITE DOES NOT PROVIDE MEDICAL ADVICE AND IS FOR INFORMATION PURPOSES ONLY. IT IS NOT INTENDED TO BE A SUBSTITUTE FOR PROFESSIONAL MEDICAL ADVICE OR TREATMENT. AFFILIATE LINKS TO PRODUCTS I GENUINELY LOVE ARE OFTEN INCORPORATED IN MY POSTS. THANK YOU FOR YOUR SUPPORT.

    Copyright © 2020 · A MIND "FULL" MOM