This post may contain affiliate links. Please see our disclosure policy.

These Mini Cheesecakes with Vanilla Wafers are a bite-sized dessert made for entertaining. With a creamy cheesecake filling and a simple cookie crust, they deliver all the flavor of classic cheesecake without the stress of a water bath or slicing messy pieces for a crowd.
I've been making these mini cheesecakes for potlucks and holiday parties for decades and have never once brought home leftovers. Like my raspberry cheesecake bars and lemon cheesecake bars, they are a handheld treat perfect for parties, holidays, baby showers, or a casual Friday night with friends.

Key Takeaways: Mini Cheesecakes
- Serves: Makes 48 mini cheesecakes and can easily be halved or doubled
- Easy Prep: Uses one bowl with 15 minutes of prep
- Chill Before Serving: Ready after 2 hours, ideal after 12
- Customizable: Top with fruit, chocolate, caramel, or candy toppings
- Why this Recipe Works: Using vanilla wafers as the crust gives these mini cheesecakes a buttery, lightly sweet base that requires no crushing or mixing, making them faster to prepare while perfectly complementing the rich, creamy cheesecake filling.
Recipe Highlights
Kristen's Keys

There is nothing complicated when it comes to making bite-sized cheesecakes. In fact, they are much easier than classic cheesecake. But after decades of making them for numerous potlucks and bridal showers, I have a few tips you will want to keep in mind.
- Use room temperature cream cheese and eggs. Cold ingredients create a lumpy batter that never fully smooths out. If you forget to plan ahead, place the wrapped cream cheese and eggs in lukewarm water for 15-20 minutes.
- Use mini vanilla wafers. For a bite-sized treat that fits perfectly in a mini cupcake liner, opt for mini vanilla wafers. If you can't find them, follow modifications for using regular size Nilla wafers.
- Do not overbake. The edges should look set while the centers still jiggle slightly. They will continue cooking as they cool in the pan.
- Chill for at least 2 hours before serving. Cheesecake always tastes better cold, and the texture becomes much richer and creamier after chilling.
Happy Cooking! xo Kristen
Notes on Ingredients
Just a few ingredients are all you need to whip up this bite-sized dessert.

- Cream Cheese: Use full-fat or reduced-fat block cream cheese for the best texture. Skip fat-free cream cheese here, it does not bake well and tends to become grainy.
- Vanilla Wafers: Mini vanilla wafers fit perfectly into mini muffin tins and create an effortless crust with zero extra prep. If you only have regular wafers, use a standard muffin tin instead and the modifications provided.
- Lemon Juice: A small amount balances the sweetness and brightens the cheesecake flavor. Fresh lemon juice is great, but bottled works perfectly fine here too.
- Optional Toppings: Fresh berries, homemade whipped cream, chocolate syrup, caramel sauce, crushed candies, lemon curd, jam, or fruit pie filling all work beautifully.
How to Make Mini Cheesecakes with Vanilla Wafers
With the help of mini vanilla wafers, these mini cheesecakes come together quickly, yet still deliver that rich and creamy bite you crave in cheesecake. Here is how to make them:
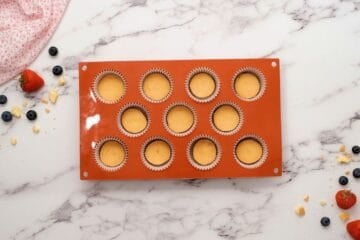
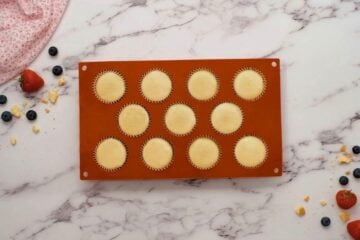
Step One: Prepare Muffin Tin
Line the pan with mini muffin liners and then pop in a single mini vanilla wafer into each cavity of the muffin tin to form the crust.

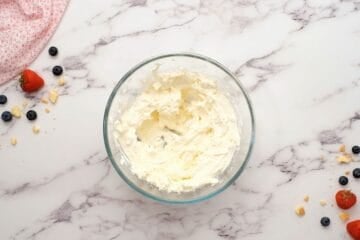
Step Two: Prepare Cheesecake Batter
In a large mixing bowl, beat the softened cream cheese until smooth and fluffy. Ensuring your cream cheese is silky and creamy now will help prevent over mixing later.
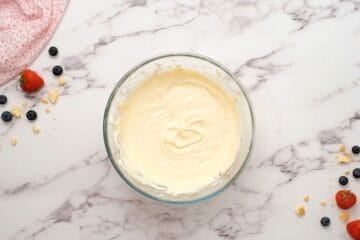
Add the eggs, sugar, vanilla extract, and lemon juice. Mix just until combined and smooth. Overmixing now adds too much air and can cause the cheesecakes to puff dramatically and then sink.


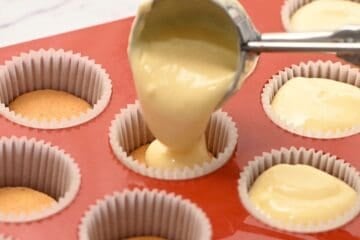
Step Three: Fill Muffin Cups
Use a small cookie scoop or ½ tablespoon measuring spoon to evenly divide the batter among the muffin cups so that they are about ⅔rds of the way full. A cookie scoop makes the process fast and efficient.

Step Four: Bake
Bake at 350°F until the cheesecakes are slightly puffed up, the edges are set, but the centers still jiggle slightly. The tops of the cheesecake should not brown, but stay light and fluffy.

Step Five: Chill
Let the cheesecakes cool in the pan for about 10 minutes. Then carefully remove them from the pan, let cool completely to room temp, then place them in a sealed container and store them in the fridge for at least 2 hours, or until completely chilled.
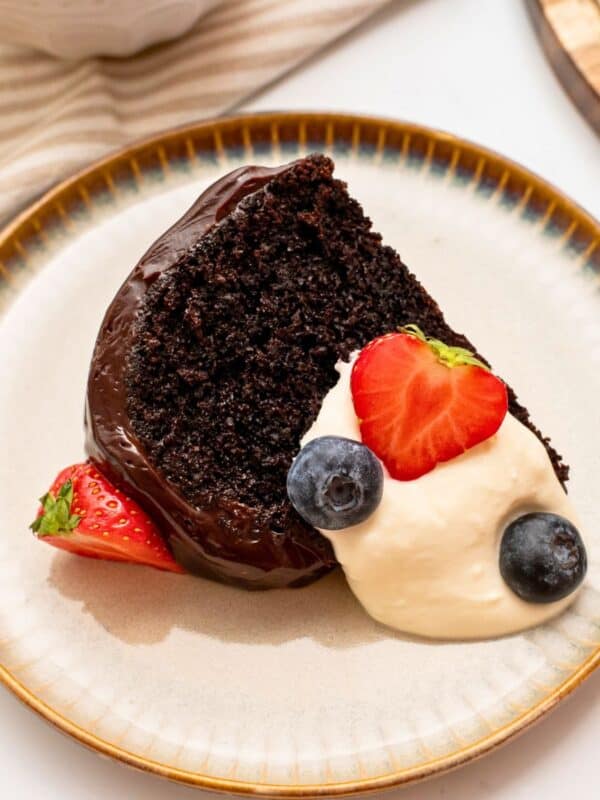
Step Six: Serve
Serve plain or top with your favorite toppings. For holidays, I like using fun sprinkles or seasonal toppings like:
- Strawberries and blueberries for summer
- Mini eggs for Easter
- Crushed candy canes and a drizzle of chocolate syrup at Christmas
- Cherry pie filling for Valentine's Day

Recipe Variations
- Scale the Recipe: Feel free to cut the recipe in half for a small gathering or to enjoy as a family. You can also double this recipe for a larger party.
- Use a Graham Cracker Crust: Combine 1 cup of graham cracker crumbs with 2 tablespoons of granulated sugar and 3 tablespoons of melted butter until the mixture resembles coarse sand. Press 2 teaspoons of the mixture into each lined cup in a mini muffin tin and bake at 350℉ for 5 minutes. Add the cheesecake batter and bake and chill as recipe directes.
- Use Standard Vanilla Wafers: Line 15 regular sized muffin cups with a cupcake liner. Place a single vanilla wafer in the bottom of each cup. Fill each cup ¾ full with the cheesecake batter and bake at 350℉ (175℃) for 20-22 minutes.
Storage Instructions
- Refrigerate: Let the mini cheesecakes cool to room temperature then transfer to an airtight container and store in the fridge for up to 4 days.
- Freeze: Place cooled mini cheesecakes on a baking sheet, flash freeze until frozen to the touch, then transfer to a freezer-safe bag or container. Store in the freezer for up to 2 months and defrost in the refrigerator before serving.
More Favorite Desserts for a Crowd
These bite-sized cheesecakes are party perfect! But every party needs more than one treat. Round out your dessert menu with one of the following favorites:
- Texas Sheet Cake: rich, fudgy, and feeds a crowd
- Blueberry Pie Bars: handheld treat easier to make than pie
- Chocolate Bundt Cake: easy, knockout dessert
- Blondies with Browned Butter: the brown butter takes these bars over the top
- Easy Key Lime Pie: incredibly refreshing dessert and so easy to make
Did you make this recipe?
If you enjoyed this recipe, please leave a comment with a 5-star review at the bottom of the post. Thank you!
Mini Cheesecakes with Vanilla Wafers

Video
Ingredients
- 48 mini vanilla wafers
- 2 (8-ounce) packages full-fat cream cheese, room temperature
- 2 large eggs, room temperature
- ½ cup granulated sugar
- 1 teaspoon vanilla extract
- 1 teaspoon fresh lemon juice
Instructions
- Preheat the oven to 350℉ (175℃) and line 48 cups in mini muffin tins with mini cupcake liners. Place 1 mini vanilla wafer into each cupcake liner, pushing down gently if needed.

- In a large mixing bowl or stand mixer, beat the cream cheese on medium speed until light and fluffy and completely smooth.
- Add 2 large eggs, ½ cup granulated sugar, 1 teaspoon vanilla extract, and 1 teaspoon fresh lemon juice to the cream cheese and mix again on medium speed until just incorporated. If needed, scrape down the sides and briefly mix again until smooth.
- Using a mini cookie scoop or a ½ tablespoon measuring spoon, portion out the batter evenly among the muffin cups. The batter should just cover the vanilla wafer and fill the muffin cup about ⅔rds of the way full.
- Bake for 12-15 minutes or until the cheesecakes' sides are set and slightly puffed up and the center is still a TINY bit jiggly, being careful to not overbake.
- Remove the cheesecakes from the oven and place the pan on a cooling rack to cool for 10 minutes. Carefully remove the cheesecakes from the pan and cool for another 10-20 minutes, or until cool to the touch.
- Place the cheesecakes into a sealed container and store them in the fridge for at least 2 hours, or until completely chilled, before serving.
- Serve plain or with fresh fruit, pie filling, chocolate, whipped cream, etc.

Equipment
Notes
Nutrition
Nutrition information is automatically calculated, so should only be used as an approximation.


These are perfectly delicious bite-size treat! And the Nilla wafers made it so simple. 🙂
Love hearing you enjoyed, Ellyn! Thanks for sharing!
hello and thanks for your delicious looking recipes. do you recommend any egg substitutes? thanks. I found you because i saw a youtube short of yours where you melted chocolate chips into creamy chocolate in a glass bowl over an instant pot. that was so brilliant and easy. that was time melting chocolate was successful for me. as i am also not a microwave person. thanks again
Hi Howard! I am thrilled you found my tip for melting chocolate helpful 🙂 As for egg substitutes, I often use a flax egg for baking breads and muffins (1 tablespoon ground flaxseed mixed with 3 tablespoons water, let sit for 5 minutes.) But for cheesecake, that is not a good option, as it will make the bites a bit grainy. I would instead use plain Greek yogurt, keeping in mind the cheesecakes won't set up quite as well.