This post may contain affiliate links. Please see our disclosure policy.
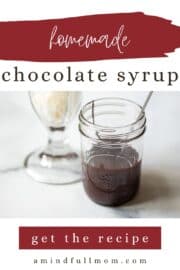
Replace the famous brown bottle of Hershey's chocolate syrup with this EASY recipe for homemade chocolate syrup. It comes together using just 5 simple ingredients in less than 5 minutes, and tastes so much better than store-bought!
Looking for more simple chocolate treats? Check out my recipes for Homemade Peanut Butter Cups, Microwave Fudge, Easy Chocolate Bark and Homemade Hot Chocolate.

Make Life Sweeter with Homemade Chocolate Syrup

Whether served over no-churn ice cream, used to make chocolate milk, or as part of a brownie sundae complete with homemade brownies and homemade whipped cream, chocolate syrup just makes life (or at least desserts) better!
But the BEST chocolate syrup is homemade chocolate syrup.
Using just 5 pantry staples, this chocolate syrup recipe takes just 5 minutes to make. It leave the fillers, preservatives, and high fructose corn syrup on the shelves, allergy-friendly, and costs less than a bottle of Hershey's chocolate syrup. Talk about a sweet treat.
Happy Cooking! xo Kristen
Recipe Highlights
5 Simple Ingredients
To make chocolate syrup, you only need cocoa powder, sugar, salt, vanilla, and water. All things you likely have on hand.

How to Make Homemade Chocolate Syrup
The following tips are provided to help you achieve perfect results. You will find the ingredient quantities and detailed instructions in the recipe card at the bottom of this post.
- Sift Cocoa Powder. To keep the chocolate syrup super smooth, it is best to sift your cocoa powder directly into a small saucepan. This will allow the cocoa to dissolve into the syrup easier and prevent lumps from forming.
- Combine Cocoa with Water and Sugar. Whisk the sugar and water into the cocoa powder and then gently heat this mixture over medium heat, whisking constantly, until the sugar is fully melted and the syrup is glossy.

- Add Flavor. To enhance the flavor of the chocolate syrup, whisk in the vanilla and salt. Yes, just a pinch of salt goes a long way to bring out the flavor of the chocolate.

- Let Chill Before Using. Chocolate syrup will never be as thick as hot fudge, but it will thicken as it chills. Let cool to room temperature, then transfer to an airtight glass jar or container. Refrigerate for at least 2 hours before using to thicken and intensify the flavor of the chocolate syrup.

Ways to Use Chocolate Syrup
Let your imagination and taste buds guide you and use Copycat Hershey's Chocolate Syrup to your heart's content. Or let the following ideas inspire you.
- With Ice Cream: Drizzle chocolate syrup over homemade ice cream or swirl in no-churn ice cream.
- Make Chocolate Milk: Prepare Homemade Chocolate Milk by adding anywhere from 1 teaspoon up to 1 tablespoon of chocolate syrup into milk or non-dairy milk and whisking well.
- Dress Up Oatmeal: Drizzle over instant pot oatmeal, steel-cut oats, or add to overnight oats to add a sweet treat to breakfast.
- In Place of Maple Syrup: Homemade chocolate syrup is delicious over whole wheat pancakes, homemade crepes, French toast, or whole wheat waffles.
- Make a Yogurt Parfait: Serve plain yogurt or coconut yogurt with berries and chocolate syrup for delicious snack.
- Dress Up Coffee: Use the chocolate syrup to make a peanut butter mocha or drizzle over whipped cream on top of a homemade latte or peppermint mocha.
Did you make this recipe?
If you enjoyed this recipe, please leave a comment with a 5-star review at the bottom of the post. Thank you!
Homemade Chocolate Syrup

Ingredients
- ½ cup unsweetened cocoa powder
- ¾ cup granulated sugar
- ½ cup water
- ⅛ teaspoon kosher salt, (just a pinch)
- 1 teaspoon pure vanilla extract
Instructions
- Using a fine mesh strainer, sift ½ cup unsweetened cocoa powder over a all saucepan. Whisk in ¾ cup granulated sugar and ½ cup water.
- Bring the mixture to a gentle simmer over medium heat, whisking constantly. Once simmering, reduce the heat to low and continue to simmer for 2-3 minutes or until glossy.
- Remove the pan from the heat and stir in the ⅛ teaspoon kosher salt and 1 teaspoon pure vanilla extract.
- Allow the chocolate syrup to cool slightly and then transfer it to a glass jar. The chocolate syrup will thicken as it cools.
- Store the syrup in the refrigerator for up to 2 weeks.
Notes
Nutrition
Nutrition information is automatically calculated, so should only be used as an approximation.


Could this be frozen if unable to consume within 2 weeks?
Hi Jennelle! Technically, yes, the syrup can be frozen (up to 2 months). That said, there will be change in texture. The syrup will never be quite as smooth and silky. Be sure to thaw in the fridge and then whisk vigorously (or even blend on low) to become reincorporated.
Delicious!!! I made it exactly as written and it turned out great. I use it to make cafe mocha’s. It is rich and makes a perfect cup. I made a second batch and added a tablespoon of peanut butter, so yummy!
Oh a peanut butter mocha sounds incredible! One of my favorites.
Can you use raw sugar to make this chocolate syrup
Absolutely
This was so easy to make and delicious. We used it for some ice cream sundaes!
That is my favorite way to use it as well Ashley!
This is my new go-to for ice cream. It was so good!
So happy to hear you enjoyed!
This was a huge hit with the grand kids in their milk they loved it no more buying it in the store what an economical find thanks!
I am so glad your grandkids enjoyed.
So so yummy. While I'm in social isolation here at home with my kids... you'd better believe we will have more of this! So easy to put together with ingredients I already have on hand. Thanks for shelf-stable ingredient recipes.