This post may contain affiliate links. Please see our disclosure policy.

Made with a classic graham cracker crust, a light and airy cheesecake filling, and a tangy sour cream topping, this is the ultimate Cheesecake recipe.

My Nana's Famous Cheesecake Recipe
While I love, homemade desserts like Homemade Brownies, From-Scratch Banana Pudding, and Cherry Crumb Pie, cheesecake is my absolute favorite.
From Instant Pot Cheesecake to Mini Cheesecakes to Lemon Cheesecake Bars, I adore cheesecake. But my all-time favorite cheesecake recipe is from my Nana and has been in my family for over a century. There are SO many reasons to love this cheesecake!

- Light and Airy. Instead of being dense and thick, like classic New York-style cheesecake, this homemade cheesecake is light, creamy, and fluffy. It has the same airy, cloudlike consistency as a no-bake cheesecake, yet this recipe is made without whipped topping. It is simply perfect.
- A Unique Stand-Out Finish. A slightly sweetened sour cream topping is added to the cheesecake for a tangy finish that perfectly balances out this recipe's sweetness.
- Stunning Results. Making cheesecake is not hard, but it is more time-consuming than some other recipes. However, the effort is so worth the results and it is guaranteed to impress!
- Make-Ahead Dessert. Cheesecake is best if served after being chilled for at least 12 hours, as this gives the cheesecake time to set up fully and for the flavors to meld together. Making homemade cheesecake one of the best make-ahead dessert recipes.
Happy Cooking! xo Kristen
Recipe Highlights
Notes on Ingredients & Equipment

- Springform Pan: A 9-inch springform pan is essential for making a cheesecake. Technically you can use a 9-inch cake pan, but it is next to impossible to slice pretty slices from a cake pan.
- Cream Cheese: Do NOT use fat-free cream cheese for cheesecake. Neufchatel or ⅓ less fat cream cheese works fine, but regular, full-fat cream cheese is best. It is also essential for the cream cheese to be at room temperature so that it incorporates evenly into the batter.
- Sour Cream: Sour cream may sound like an odd topping, but the little bit of tang helps to balance this cheesecake. Just be sure to use full-fat, not fat-free sour cream.
- Eggs: Instead of beating whole eggs into the cheesecake batter, this recipe calls for folding stiff egg whites into the batter, after mixing the egg yolks into the cream cheese batter. It makes this cheesecake so light and fluffy.
- Sugar: Use granulated sugar in the batter, crust, and sour cream topping.
- Lemon Juice: Don't overlook the addition of fresh lemon juice in this cheesecake. The acidity helps to balance the sweetness of the overall dessert.
- For the Crust: This recipe calls for a traditional graham cracker crust mixed with butter and sugar. Feel free to use chocolate graham crackers, vanilla wafers, or even gingersnaps in place of the graham crackers.
How To Make Homemade Cheesecake
The following tips are provided to help you achieve perfect results. You will find the ingredient quantities and detailed instructions in the recipe card at the bottom of this post.
- Prepare Graham Cracker Crust. I recommend preparing the crust in a food processor, as you can easily process whole graham crackers with sugar and melted butter to resemble wet sand. Once processed, press the mixture into a 9-inch springform pan, pressing it into a firm even layer. Bake the crust for 10 minutes, to help the crust set up and harden before adding the cheesecake batter.

- Beat Egg Whites. Whipping the egg whites and then folding those whipped egg whites into the batter keeps this cheesecake light and fluffy.

- Prepare Batter. It is crucial to beat the ingredients together until smooth and creamy. I have found the best way to do this is to add the ingredients in thirds, as this allows everything to incorporate together perfectly. Once the batter comes together, gently fold the whipped egg whites into the batter.

- Bake The Cheesecake. The trick to baking a cheesecake so that no cracks form on the surface is to bake low and slow in a moist environment. To create a moist environment, it is best to place a pan with water on the rack below the cheesecake while it bakes. The steam from the water will keep the cheesecake light and fluffy while it bakes.
- Prepare Sour Cream Topping. The sour cream topping adds a tangy frosting to the cheesecake. It takes a good cheesecake and makes it phenomenal! Carefully spread the sour cream mixture to the partially baked cheesecake and continue to bake for 10 minutes, or until the edges of the cheesecake are well set and the center has a slight wobble.

- Chill the Cheesecake. Cheesecake is best if served after being chilled for at least 12 hours, as this gives the cheesecake time to set up fully and for the flavors to meld together. First, allow the cheesecake to cool to room temperature for 30 minutes, then gently loosen the sides of the cheesecake from the pan using a butter knife. Cover the pan with a clean towel and plastic wrap and chill thoroughly in the refrigerator.
Serving Suggestions
I highly recommend removing the cheesecake from the refrigerator and allowing it to come to room temperature for 30 minutes before serving. This will allow the flavors to pop.
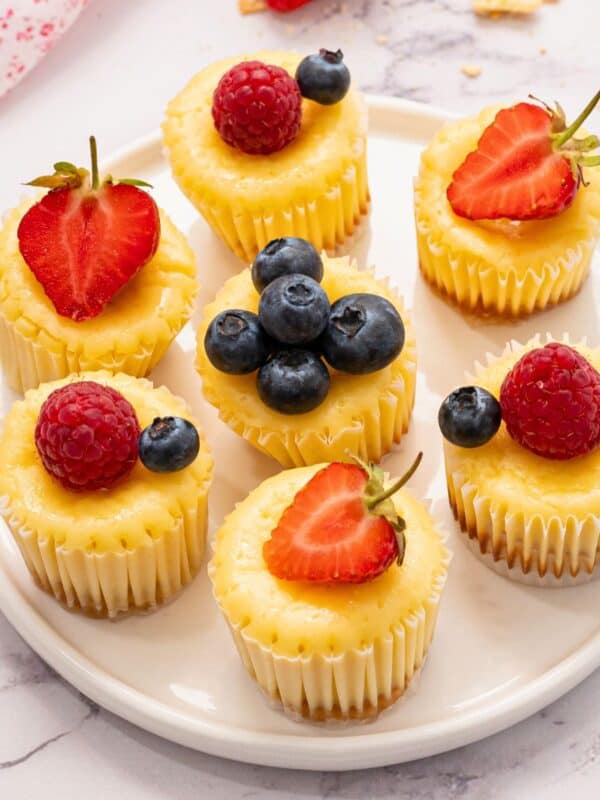
Serve plain, or top with pie filling, fresh fruit, homemade chocolate syrup, homemade hot fudge sauce, caramel sauce, and/or fresh whipped cream.

How to Store Cheesecake
- Refrigerate: There is a TRICK to storing the cheesecake to prevent condensation from forming on the top of the cheesecake. To store, lightly drape a kitchen towel over the sides of the springform pan. Then cover with plastic wrap over the kitchen towel. Store the cheesecake this way in the refrigerator for up to 4-5 days in the fridge.
- Freeze: Alternatively, you can freeze leftover cheesecake. I recommend slicing the cheesecake into individual slices, wrapping each slice in plastic wrap, and then placing the wrapped slices into a freezer-safe bag. Freeze for up to 3 months. Place a slice in the refrigerator for 6-12 hours before enjoying.
More Favorite Dessert Recipes
If you tried this Homemade Cheesecake recipe, I would love for you to leave a review and comment below!
The Best Cheesecake Recipe

Video
Ingredients
Cheesecake Graham Cracker Crust
- 1½ cups graham cracker crumbs, ~1 sleeve of whole graham crackers
- 3 tablespoons unsalted butter, melted
- 2 tablespoons sugar
Cheesecake Filling
- 3 large eggs, separated
- 3 (8-ounce) packages of cream cheese, at room temperature
- ¾ cup granulated sugar, divided
- 1 tablespoon vanilla extract
- 1 teaspoon lemon juice, optional, but encouraged
Sour Cream Topping
- 1 cup sour cream
- 1 tablespoon granulated sugar
- ½ teaspoon vanilla extract
Instructions
- Preheat oven to 300℉/150℃. Position one rack in the center of the oven and another rack below that.
- In a food processor fitted with an s-blade, process 1 sleeve of graham crackers to form 1½ cups graham cracker crumbs. Once processed, add 2 tablespoons sugar and pulse to combine. With the food processor running, add 3 tablespoons unsalted butter (melted butter) through the lid. Process until graham crackers look like wet sand.
- Press the graham cracker mixture into the bottom of a 9-inch springform pan. Bake for 10 minutes on the center rack in the oven.
- While the crust is baking, whip the whites from 3 large eggs using a stand mixer or handheld mixer until stiff peaks have formed. You will know stiff peaks have formed when the egg whites will stick off the beaters and hold shape. Set aside.
- In a separate large mixing bowl, combine 1 package of cream cheese, 1 egg yolk, and ¼ cup sugar until creamy, using a handheld mixer. Add in another package of cream cheese, egg yolk, and ¼ cup sugar and beat until smooth. Add in the final package of cream cheese, egg yolk, and ¼ cup sugar and beat until creamy and smooth.
- Add in 1 tablespoon vanilla extract and 1 teaspoon lemon juice and mix until combined.
- Gently fold egg whites into cream cheese mixture, being careful to not over mix or deflate egg whites.
- Pour cream cheese mixture into prepared crust. Gently tap the pan on the counter to remove air bubbles.
- Place a shallow baking dish on the rack positioned below the center of the oven. Pour hot water into the pan until it is halfway full. Place the cheesecake on the center rack, above the baking dish filled with water, and bake for 45 minutes.
- While cheesecake is baking, mix together the 1 cup sour cream, 1 tablespoon granulated sugar, and ½ teaspoon vanilla extract in a small mixing bowl.
- After 45 minutes, remove the cheesecake from the oven and gently spread the sour cream mixture on top of cheesecake. Return to oven and bake for an additional 10 minutes.
- Remove the cheesecake from the oven and cool the cheesecake for 30 minutes in springform pan. After 30 minutes, use a butter knife to gently loosen the sides of the cheesecake from the pan. Cover with a clean towel (to absorb condensation), and cover with plastic wrap. Refrigerate for 12 hours before enjoying.
- Cheesecake is best if served after being brought to room temperature for 20-30 minutes.
Equipment
Notes
Nutrition
Nutrition information is automatically calculated, so should only be used as an approximation.


Has anyone tried this using Splenda instead of sugar? My husband is diabetic, but loves cheesecake, so it would be nice to be able to make something that suits his dietary needs.
Do you have to line or grease the sides of the pan?
No 🙂 There is enough butter in crust it does not stick.
Hi! I made this last Saturday. Omg it was the secret I was missing.
I made mine an oreo cheesecake and made an oreo crust. But folding the egg whites at the end, is AMAZING.
Thank you again
Happy Holidays
YAY! I am so glad you found this recipe and tried out my secret. It is a game-changer!
Hi, I was just wondering if I could leave out the sour cream topping. If so, would I just leave the cake in the oven after the initial 45 minutes? Or should I add the 10 minutes from the sour cream's bake time to the 45?
Hi Piper! You can certainly leave off the sour cream topping. You would need to bake for a total of 55 minutes. Enjoy!
Thank you so much for the quick reply! I'm excited to try this for my Dad's birthday 🙂
I made this for our 4th of July party and everyone loved it, including me! Thank you so much for sharing this recipe!
Thank you for taking the time to let us all know how much you enjoyed. I am so happy you and your guests loved this recipe Katrina.
Just wondering if the temperature is supposed to be increased to 350 degrees. I baked this for 1 hour and 20 minutes and it still was not done at 300 degrees.
Hi Sheila. The temperature is 300 degrees F for the entire baking process and that is key to achieving the best texture. Could it be that you used a smaller springform pan than 9-inches? You also want to keep in mind that the cheesecake will be slightly jiggly but set in the center when it has finished baking.
Whoa, adding whipped egg whites to the batter is genius! This is one spectacular cheesecake!!!
Thank you Liz! That is my Nana's trick and it really does keep this light and fluffy.
Always love a good cheesecake recipe. Cheesecake is my favorite dessert, Will be trying this out for sure.
Did I miss your instruction on the size of springform pan to use? Would like to try this recipe!
Hi Chris--I will be sure to make that clear. This is for a 9 inch springform pan. I hope you enjoy as much as we do!