This post may contain affiliate links. Please see our disclosure policy.
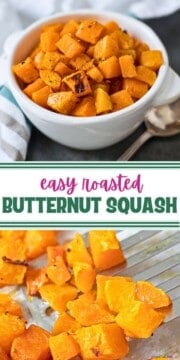
This Roasted Butternut Squash recipe yields roasted squash that is crispy on the outside, tender on the inside, evenly cooked, and perfectly seasoned.
Roasted Squash is a delicious and healthy side dish, but also is a fabulous addition to salads as proven in my recipe for Roasted Butternut Squash Salad.

Roasted vegetables has to be the MVP of easy vegetable side dishes!
With just minutes of prep and a handful of ingredients, roasting just about ANY vegetable transforms it into something incredible.
And today, we are specifically talking about the magic that happens when butternut squash is roasted.
As the squash roasts, it becomes tender on the inside and slightly crispy on the outside. The oven caramelizes the squash, bringing out its natural sweet undertones and ultimately intensifying the nutty, earthy flavor of butternut squash.
It is one of the easiest, tastiest ways to prepare butternut squash.
A Few Helpful Tips Before We Start
- Save Time with Pre-Chopped Squash: Surprisingly, pre-chopped butternut squash, is often similarly priced to whole squash and will significantly cut down on prep-time!
- Flavor the Way YOU Like! Keep it simple with salt and pepper, or change it up with one of the variations I offer in this post or use your favorite seasoning blend.
- Oil Matters. You want to use an oil that can withstand high heat, like extra virgin olive oil or avocado oil. Coconut oil works as well but will yield a nutty taste.
- Don't Overcrowd the Pan. You want the ensure the butternut squash roasts, not steams. Bake in a single layer, using two pans if needed.
- Preheat Oven Fully. Ensure the oven is fully preheated to prevent the squash from browning too quickly.
How to Roast Butternut Squash
The following tips are provided to help you achieve perfect results. You will find the ingredient quantities and detailed instructions in the recipe card at the bottom of this post.
- Line a Rimmed Baking Sheet. Parchment paper prevents sticking and reduces the amount of oil you need.
- Peel and Cube if Needed. If not using pre-chopped butternut squash, wash and dry the squash. Use a vegetable peeler to to remove the squash. Cut the squash in half, remove the seeds and dice into 1-inch cubes.
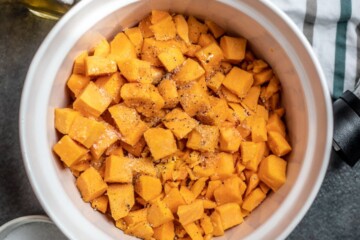
- Season Squash. Toss the squash with oil and seasonings of choice.
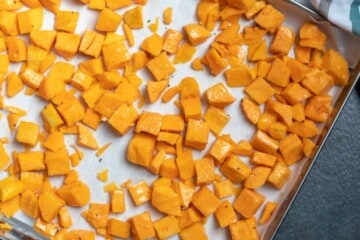
- Roast. Spread the squash out onto the prepared baking sheet in a single layer and roast for 20 minutes.
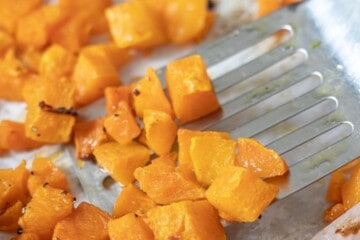
- Flip halfway through roasting. This will ensure each side browns and caramelizes evenly.
- Roast Until Tender. Continue to roast the squash until browned, slightly caramelized, and fork-tender.

Flavor Variations for Roasted Squash
- Thyme Butternut Squash: add 1 tablespoon minced fresh thyme leaves
- Cinnamon Brown Sugar Butternut Squash: add 2 tablespoons brown sugar and 1 teaspoon ground cinnamon
- Maple Butternut Squash: add 2 tablespoons maple syrup
- Garlic Butternut Squash: add 5-7 whole cloves of peeled garlic cloves
- Spiced Butternut Squash: add 1 teaspoon smoked paprika and ½ teaspoon garlic powder.
Serving Suggestions
- Serve as a healthy side dish to meals such as Bacon-Wrapped Pork Tenderloin or Blackened Mahi Mahi.
- Use the roasted squash in place of roasted sweet potatoes, such as Sweet Potato Burritos, or add it to Vegetarian Enchiladas
- Add the roasted squash to breakfast hashes, omelets, pasta, and Instant Pot Risotto, or use it as a taco filling.
- Add Roasted Butternut Squash to Roasted Butternut Squash Salad or Harvest Quinoa Salad
Storage Instructions
- Refrigerate: Cooled, roasted butternut squash can be stored in an air-tight container for up to 4 days in the refrigerator.
- Freeze: Once the squash is roasted, allow it to cool right on the parchment-covered sheet pan. Pop the sheet pan into the freezer and allow it to freeze until solid. This should take about an hour. Once frozen solid, remove the squash from the parchment paper, place it into a freezer-safe bag, and freeze for up to 3 months.
- Reheat: In order to retain the crispy edges of the squash of roasted squash, I strongly recommend reheating the squash in the oven. Preheat the oven to 400 degrees Fahrenheit and cook for 10-15 minutes in the refrigerator and 25-30 minutes in the freezer.
More Roasted Vegetable Recipes
- Roasted Parmesan Broccoli
- Roasted Fall Vegetables
- Roasted Brussels Sprouts
- Roasted Acorn Squash
- Roasted Red Potatoes
- Roasted Asparagus
- Roasted Carrots
If you tried this recipe for roasted butternut squash, be sure to leave a review and let us know what flavor option you enjoyed!
Roasted Butternut Squash

Ingredients
- 1 medium butternut squash, about 4 pounds, or 36 ounces chopped butternut squash
- 1½ tablespoons extra virgin olive oil, or avocado or coconut oil
- 1 teaspoon kosher salt
- ½ teaspoon freshly ground black pepper
Instructions
- Preheat the oven to 400℉/205℃ and line a rimmed baking sheet with parchment paper or grease the pan well with olive oil.
- If needed, wash and dry 1 medium butternut squash. Remove the skin with a vegetable peeler. Cut in half lengthwise and remove and discard seeds. Cube the squash into 1-inch pieces.

- Toss the butternut squash cubes with 1½ tablespoons extra virgin olive oil, 1 teaspoon kosher salt, and ½ teaspoon freshly ground black pepper until the squash is evenly seasoned. Feel free to add in seasonings of your choice at this step.

- Spread the squash out evenly onto the prepared pan, ensuring there is enough space around the squash to allow it to evenly brown.
- Roast for 20 minutes, remove the pan from the oven and flip the squash over. Roast for at least another 20 minutes, or until squash is tender and browned slightly.

Equipment
Notes
- Thyme Butternut Squash: add 1 tablespoon minced fresh thyme leaves
- Cinnamon Brown Sugar Butternut Squash: add 2 tablespoons brown sugar and 1 teaspoon ground cinnamon
- Maple Butternut Squash: add 2 tablespoons maple syrup
- Garlic Butternut Squash: add 5-7 whole cloves of peeled garlic cloves
- Spiced Butternut Squash: add 1 teaspoon smoked paprika, ½ teaspoon garlic powder.
Nutrition
Nutrition information is automatically calculated, so should only be used as an approximation.


Such an easy and healthy vegetable! The listing of variations for flavorings was first class. Love the simplicity!!
Trying to find the recipe for stuffed butternut squash you had listed in the weekly meal plan
Here you go: Stuffed Butternut Squash. Sorry you were having issues finding 🙂
This was fantastic! Perfectly cooked.
I am so glad you enjoyed!
The BEST way to eat butternut squash! Really brings out the depth of flavor.
I totally agree! Glad you enjoyed Lisalia!
This is one vegetable that I really love any kinda way!
Thanks for sharing!
One of my favorites too Jennifer 😉
We love butternut squash in the fall, and this is our absolute favorite recipe to use! Thanks so much for sharing it!
YAY!!! Sometimes simple is best!