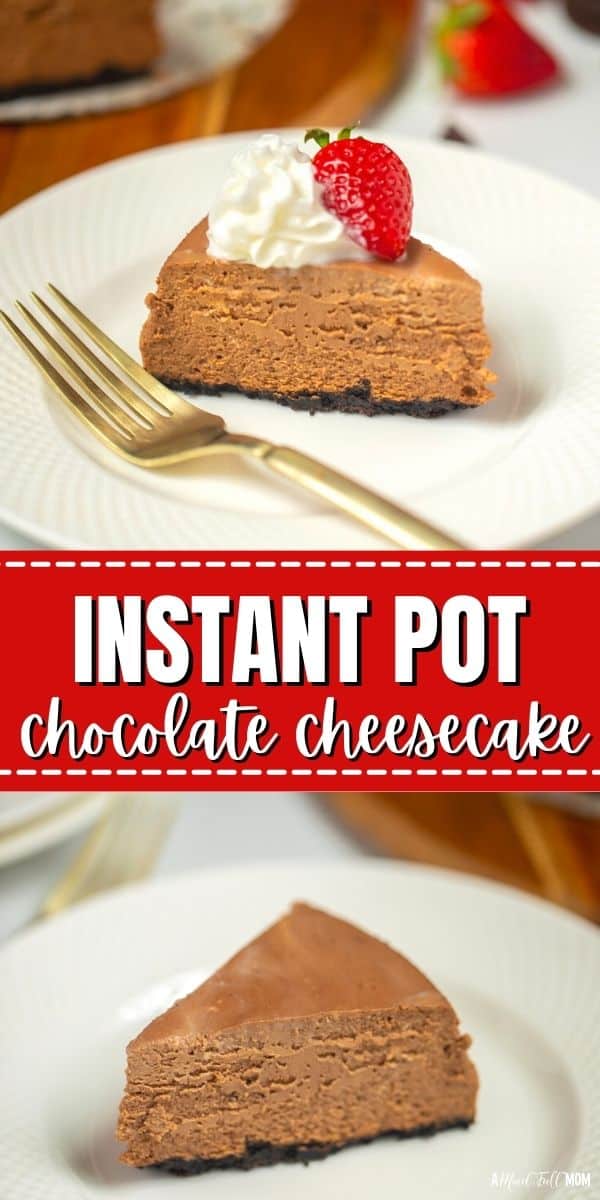
Instant Pot Chocolate Cheesecake made with an Oreo Cookie Crust, and a rich, creamy, chocolate filling makes an outrageously delicious Instant Pot dessert recipe.
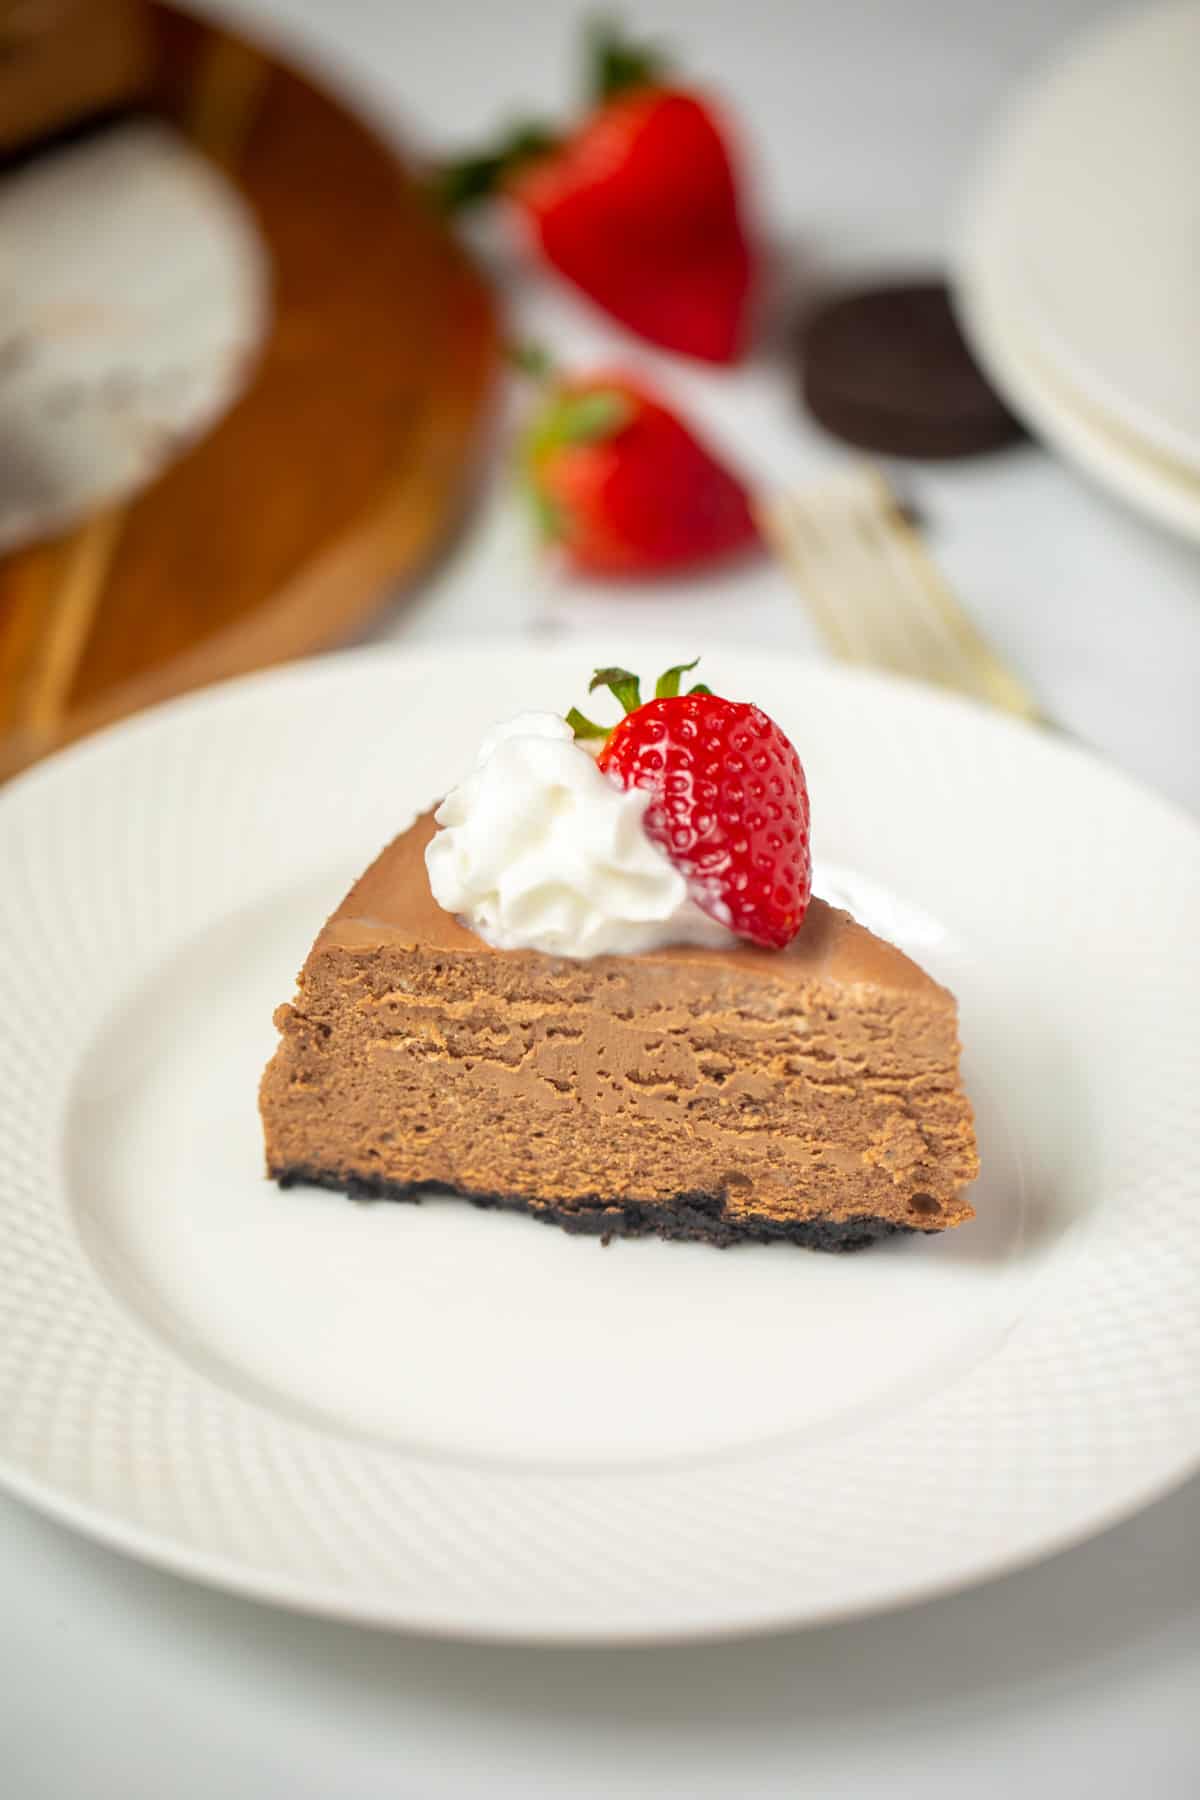
While I love classic Instant Pot Cheesecake, Instant Pot Pumpkin Cheesecake, and Instant Pot Carrot Cake Cheesecake, this Chocolate Cheesecake has stolen my heart.
From the chocolate cookie crust to the rich creamy chocolate filling, this cheesecake is perfection and just like my decadent recipes for Instant Pot Lava Cakes, and Dark Chocolate Panna Cotta perfect for anyone who loves chocolate.
Why This is The Best Recipe
My recipe for Instant Pot Chocolate Cheesecake stands out above the rest for several reasons.
- It is made with real chocolate that has been melted using coffee. This is not the time for cocoa powder, we want real creamy, melted chocolate for the cheesecake batter. And don't be scared of the coffee. Just like in my homemade brownie recipe, coffee is a secret ingredient added to help enhance the chocolate flavor.
- Sour cream is added to the batter. The sour cream gives this cheesecake a bit of tang, which balances out the rich chocolate and sweet notes in the cheesecake. It also helps the batter to be oh-so-creamy.
- It is made in the Instant Pot. An instant pot is a perfect vessel to cook a cheesecake. For traditional cheesecakes, I bake them in a water bath to cook in moist heat. With an electric pressure cooker, it mimics those conditions--in a much more controlled way. This means that cheesecake made in the Instant Pot has the most creamy, perfect consistency--and is less prone to cracking on the surface.
- No additional sugar is added. This chocolate cheesecake gets all of its sweetness from the melted chocolate and cookie crust. This results in a perfectly balanced dessert that is not overly sweet.
Notes on Ingredients
- Cream Cheese: Be sure to use ROOM temperature cream cheese, as this will help your batter be smooth and creamy. Full-fat or reduced-fat cream cheese are both able to be used, but DO NOT use fat-free cream cheese, as the consistency will be the same.
- Sour Cream: Again the sour cream helps to balance out the flavors. Use full fat or reduced fat, but DO NOT use fat-free sour cream.
- Chocolate: This recipe calls for semi-sweet chocolate. It is best to use chocolate chips or chocolate chunks, as they will melt quickly. Do not use bittersweet chocolate or milk chocolate, as the cheesecake will not be soft enough.
- Coffee: You can use decaf or regular coffee. Instant coffee works as well.
- Chocolate Sandwich Cookies: I recommend a chocolate cookie crust for this cheesecake--AKA an Oreo crust. You can use any brand of chocolate sandwich cookies you like. There are great organic brands that don't use high-fructose corn syrup.
How to Make Instant Pot Chocolate Cheesecake
Step One: Melt Chocolate
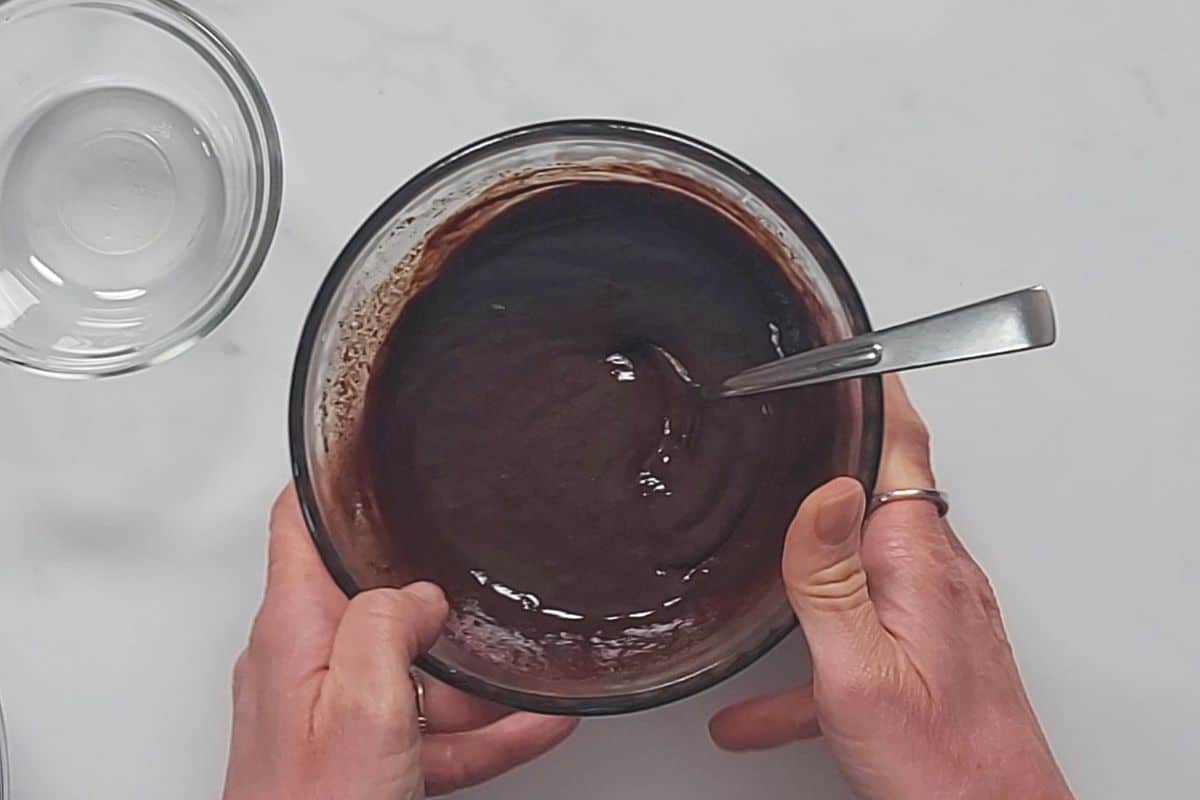
Start this recipe by melting the chocolate to use for the cheesecake batter, which will give the melted chocolate enough time to cool before adding it to the batter. If you were to add while hot, the batter may curdle.
- Pour hot coffee over the chocolate and stir until the chocolate is melted. If you are having issues with your chocolate melting, microwave for 30 seconds and then stir again, until creamy and smooth. Then, set this mixture aside to cool while preparing the crust.
Step Two: Prepare Crust
You can opt to freeze the crust or bake the crust. I prefer baking the crust for a crisper crust, but the option is yours.
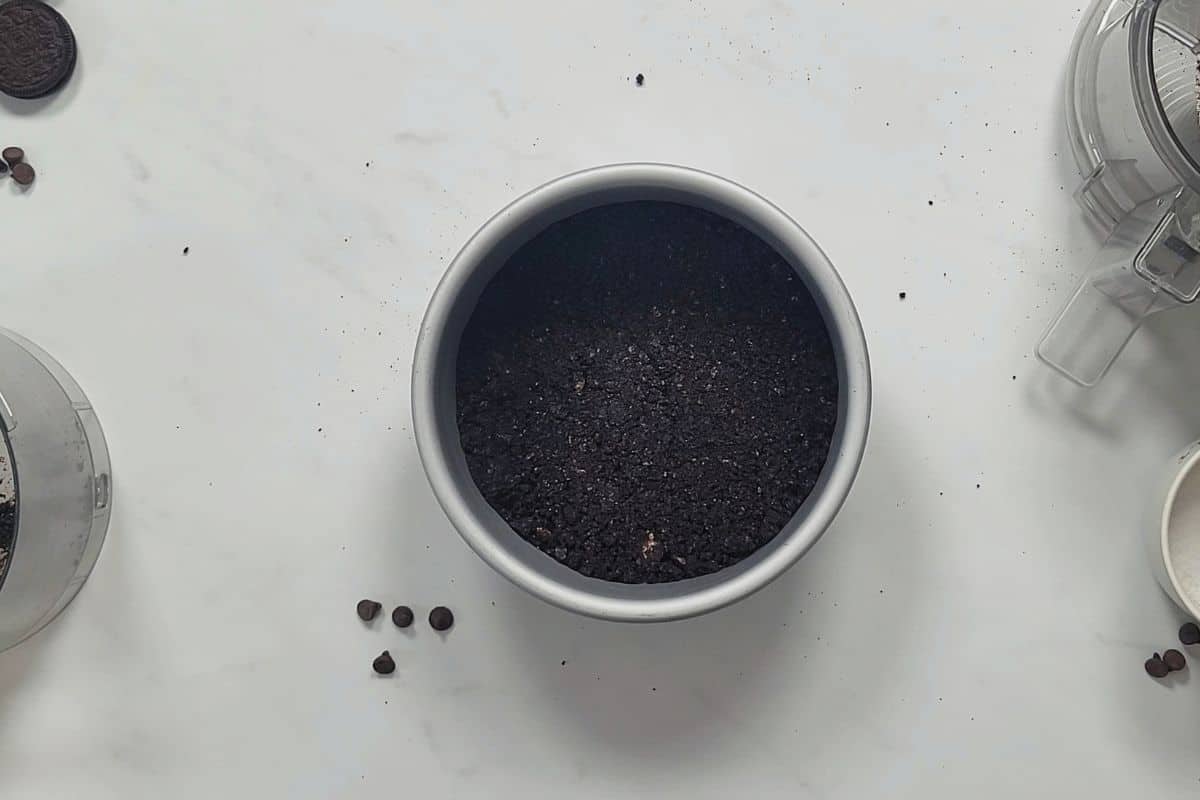
- Process the chocolate cookies in a food processor fitted with a metal S blade until they turn into fine crumbs. Alternatively, place the cookies in a gallon-sized freezer bag and use a rolling pin to crush them.
- Add the melted butter to the cookie crumbs and using the food processor, pulse until the crumbs have been moistened. Alternatively, mix the cookie crumbs and melted butter together in a medium mixing bowl.
- Pour the cookie mixture into a 7x3 inch springform pan and evenly spread it out on the bottom of the pan.
- Place the crust into the freezer while preparing the cheesecake batter or bake the crust for 10 minutes at 325 degrees, if you prefer a crunchier crust.
Step Three: Prepare Cheesecake Batter
The most important thing to remember for the perfect cheesecake batter is to be sure your ingredients are at room temperature. If not your batter will be lumpy. Unfortunately, I have experience with this! Don't rush the process.
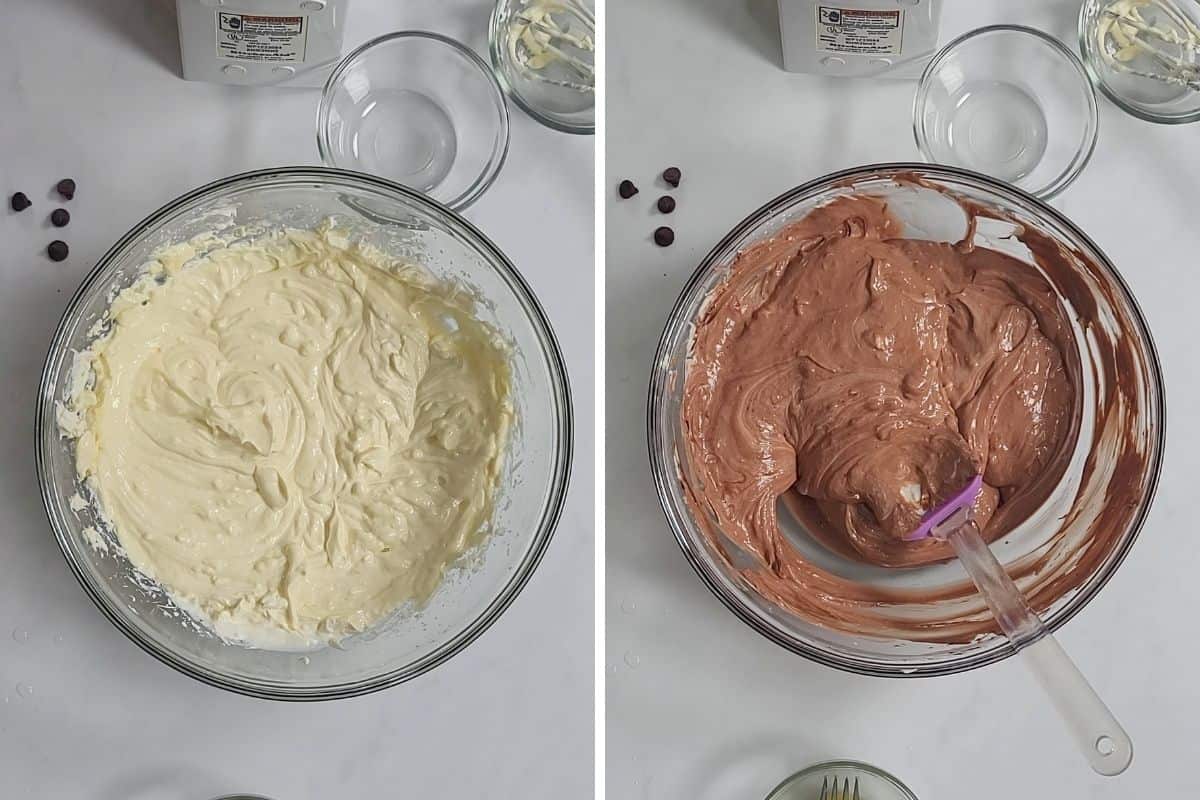
- In a large bowl, mix cream cheese, cornstarch, and vanilla with a handheld mixer on medium-low speed until smooth, being careful to not overmix, as this incorporates a lot of air into the cheesecake.
- On low speed, mix the sour cream into the batter until just combined, this should only take 15-20 seconds.
- In a small bowl whisk 1 egg, then add to the cheesecake batter and mix on low speed to just lightly combine. Repeat with the second egg. Remember to be careful to not over-mix! Overmixing your batter once the eggs are added can result in a curdled consistency.
Step Four: Assemble
At this point, the crust should be baked or frozen for long enough, it is time to assemble the cheesecake.
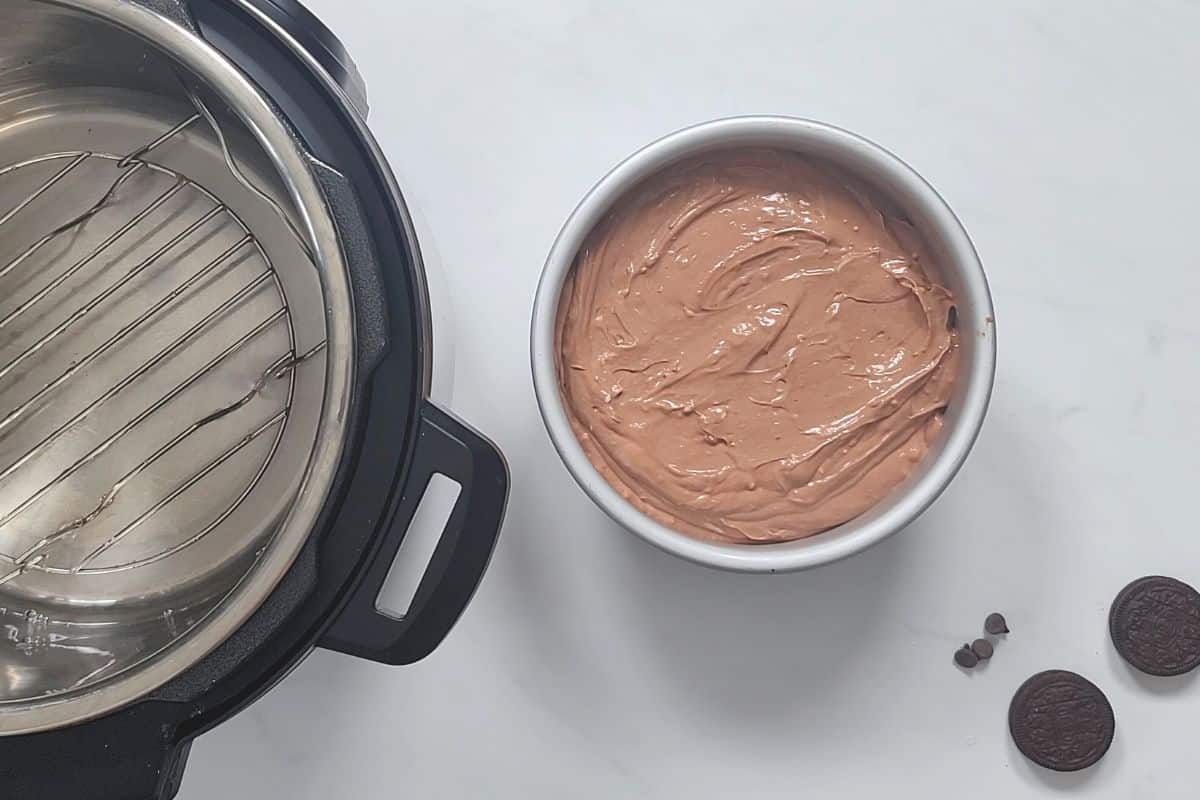
- Pour the batter into the springform pan on top of the crust. Tap the filled pan gently on the counter to bring air bubbles to the surface and pop with a fork or a toothpick.
Step Five: Pressure Cook
While you CAN bake the cheesecake without covering it with foil, for this chocolate version, I have found it is best to add a layer of foil. I have provided cooking times for both options.
- Place a trivet inside the inner pot of the pressure cooker, pour in 1.5 cups of cold tap water, and carefully place the cheesecake on the inner rack.
- Set to pressure cook for 45 minutes on high pressure if covered with foil and 35 minutes if uncovered.
- Once cook time has elapsed, allow pressure to release naturally until the lid unlocks or the float valve floats down on its own. If you do a quick release of pressure your cheesecake may crack and won't set up as velvety as if you let the pressure release naturally, so don't skip that part.
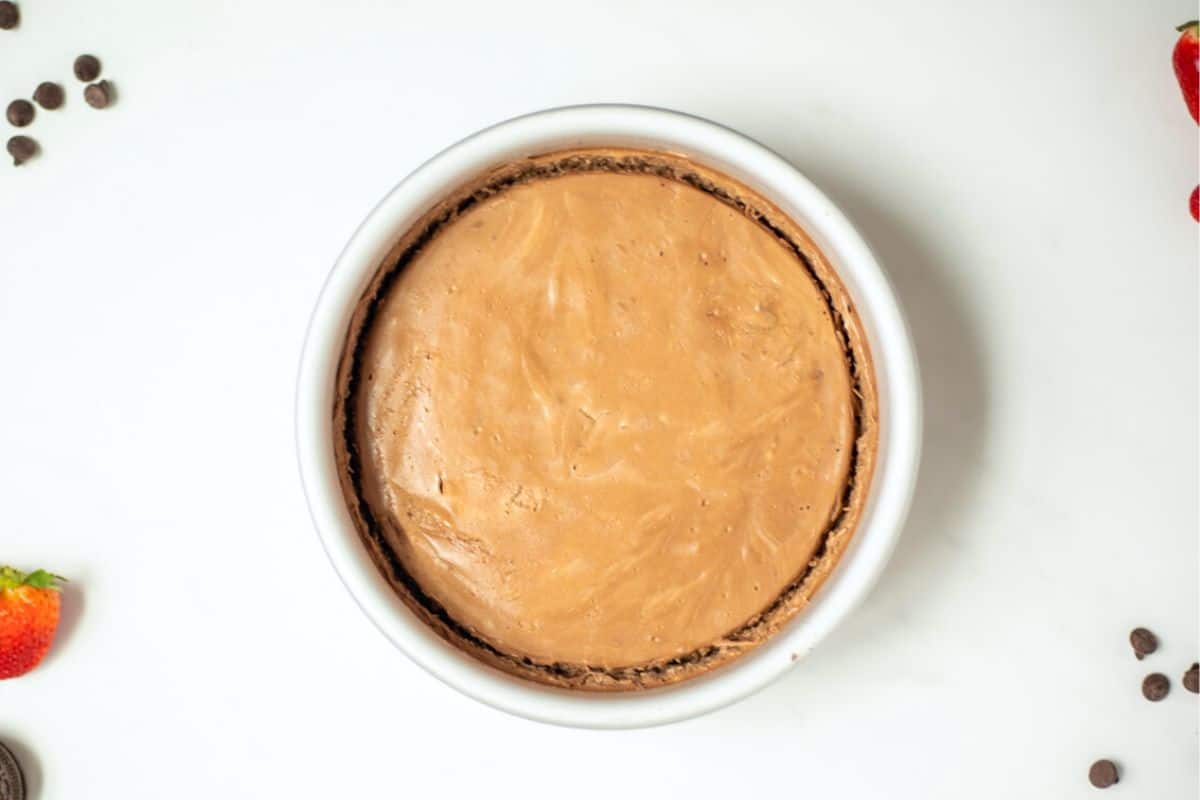
- Carefully remove the cheesecake from the instant pot and allow it to rest for 10 minutes.
- Remove the foil, and if any moisture is present on the surface of the cheesecake, dab it with a paper towel. And gently loosen the cheesecake from the side of the springform pan using a knife.
Step Six: Chill
Cheesecake is always best if refrigerated for at least 12 hours before serving. This allows the flavors time to really meld together and the cake to fully cool.
- Cover the cheesecake with a clean kitchen towel and then a layer of plastic wrap and refrigerate for at least 12 hours before serving, overnight is best. Using a kitchen towel helps to prevent condensation from forming on the cheesecake while being refrigerated. However, feel free to simply cover it with plastic wrap or foil.
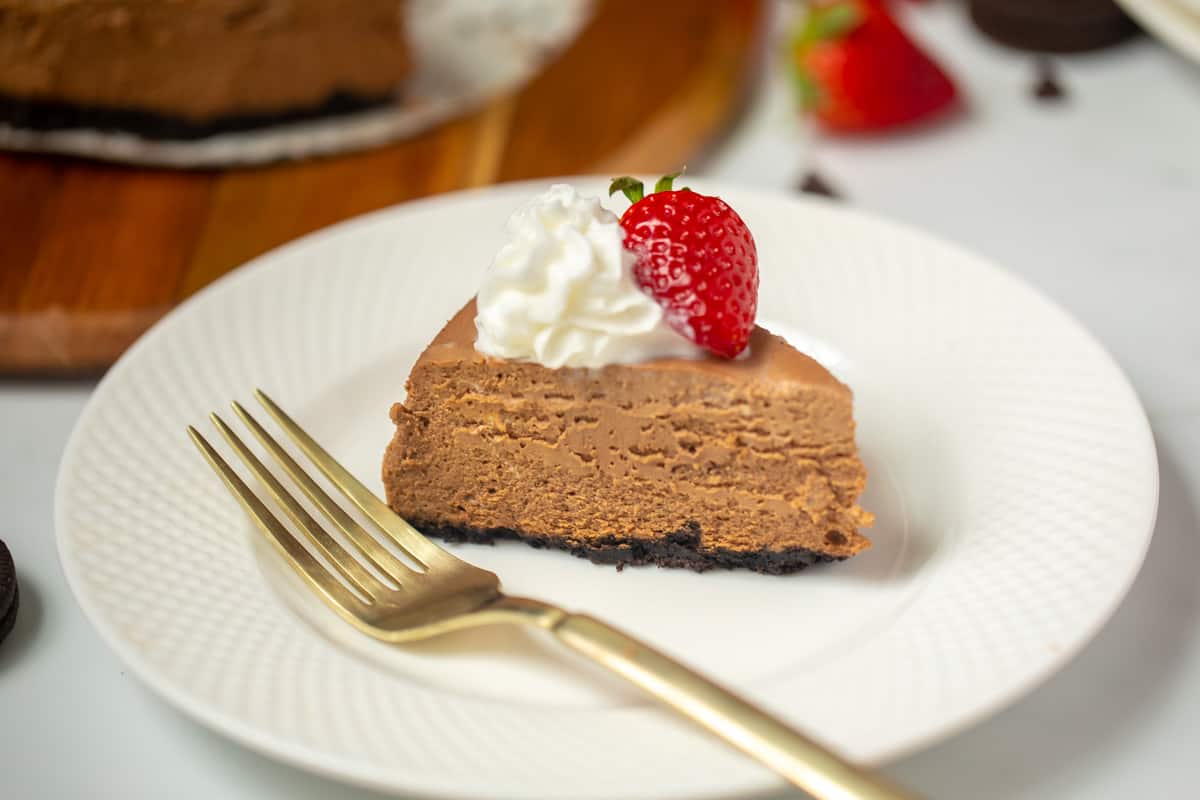
- Slice and serve plain or with whipped cream and chocolate syrup if desired.
How to Store Cheesecake
Instant Pot Chocolate Cheesecake can be kept in the refrigerator for 4 days or can be frozen for up to 30 days. Just be sure to defrost in the refrigerator, NOT the microwave, as that will ruin the cheesecake's texture.
Variations on Chocolate Cheesecake
- Mint Chocolate Cheesecake: Add ½ teaspoon of mint extract to the cheesecake batter.
- Caramel Toffee Chocolate Cheesecake: Top Baked Cheesecake with caramel sauce and toffee bits.
- Bailey's Chocolate Cheesecake: Use ¼ cup of warm Bailey's to melt chocolate in place of the coffee.
- Mocha Cheesecake: Use espresso in place of coffee for a stronger coffee flavor in the finished product.
- Gluten-Free Chocolate Cheesecake: Use gluten-free chocolate sandwich cookies if you need to make a gluten-free chocolate cheesecake.
Recipe FAQs
Feel free to use 1 cup of graham crackers or chocolate wafer crumbs in place of the chocolate cookies.
The coffee helps to bring out the chocolate flavor. There is a slight undertone of coffee, but it is barely detectable.
More Delicious Dessert Recipes
If you love chocolate and you love cheesecake, this Instant Pot Chocolate Cheesecake is a MUST-make. And be sure to leave a comment letting us all know how much you enjoyed it--I love hearing from you!
Instant Pot Chocolate Cheesecake
Ingredients
Chocolate Crust
- 12 chocolate sandwich cookies
- 3 tablespoons melted butter
Chocolate Cheesecake Batter
- 1 cup semisweet chocolate chips
- ¼ cup coffee hot and strong
- 16 ounces cream cheese softened
- ⅓ cup sour cream at room temperature
- 1 tablespoon cornstarch
- 1 teaspoon vanilla extract
- 2 large eggs at room temperature
Instructions
- Place the chocolate chips in a medium bowl and pour the hot coffee over the chocolate. Stir the mixture, until the chocolate has fully melted, heating for 30 seconds in the microwave if needed, and set aside to cool.
- For the crust of the cheesecake, process the cookies in a food processor fitted with an s-blade, until they turn into fine crumbs. Add the melted butter to the food processor and process until the mixture resembles wet sand.
- Lightly grease or line a 7-inch springform pan with parchment paper and then pour the cookie crumble into the pan. Using your hands or a cup, form an even layer on the bottom of the springform pan. Place the crust into the freezer while preparing the cheesecake batter. Alternatively, you can bake the crust for 10 minutes at 325 degrees F.
- In a large bowl, mix cream cheese, cornstarch, and vanilla with a handheld mixer on medium-low speed until smooth, being careful to not overmix, as this incorporates a lot of air into the cheesecake. On low speed, mix the sour cream and cooled chocolate mixture into the batter until just combined, this should only take 15-20 seconds.
- In a small bowl whisk 1 egg, then add to the cheesecake batter and mix on low speed to just lightly combine. Repeat with the second egg. Remember to be careful to not over-mix!
- Remove the crust from the freezer or the oven and pour the batter evenly over the crust. Spread out the mixture and gently tap to remove any air bubbles. Cover tightly with foil.
- Pour 1-½ cups of cold tap water into the inner pot of the pressure cooker. Place the metal trivet in the inner pot. Place the cheesecake pan on top of the trivet, using a foil sling under the pan if desired. Close the lid, be sure the vent knob is sealed, and set it to cook on high pressure using the pressure cook or manual button for 35 minutes, or 45 minutes if covered with foil. Once the cooking time has elapsed, allow the pressure to release naturally FULLY.
- Once cook time has elapsed, let the pressure release naturally. Check the cheesecake to see if the middle is set. If the cheesecake isn’t quite done, return the lid and cook at High Pressure for an additional 5 minutes, followed by a full natural release of pressure.
- Carefully remove the cheesecake from the instant pot and allow it to rest for 10 minutes. Remove foil. If any moisture is present, dab it with a paper towel.
- Cover the cheesecake with a clean kitchen, which helps prevent condensation from forming on the cheesecake, and then a layer of plastic wrap or foil. Refrigerate for at least 12 hours, or overnight before serving.
- Remove the cheesecake from the refrigerator 30 minutes before serving and serve plain or with whipped cream.


Lekili
This was good but I'm glad I topped it with a chocolate ganache, There's a step missing in the directions, the chocolate mixture isn't mentioned. I added it before the eggs.
Kristen Chidsey
Hey there Lekili! I am glad you enjoyed the cheesecake and a chocolate ganache is always a good idea. The chocolate mixture should be added with the sour cream in step 4.
Karen Godbey
Kristen,
You totally rocked this Chocolate Cheesecake. The flavor was so clean and natural. The texture......luxuriously silky. That mouthfeel was so satisfying. The ease of creating....If you can read and follow directions, you can enjoy this HOMEMADE CHEESECAKE. I suggest whipping up this little luxury sometime after dinner, then pop it in the fridge once cooled on the counter. The next day, you will have self esteem through the roof! The reward factor on this 20 minutes of effort is the best ever. Using of the food processor also reduces the effort and the number of dishes to clean up afterwards.
I've been doing Instapot cheesecakes for about 6 months now and have gotten really good at them. This is the first time I tried your recipe. (I'm so glad I did, too!). I had one issue that I would like your advice on. I followed the directions exactly and used the Fat Daddio Cheesecake pan that is 7" x 3". I let it naturally release for about 20 minutes, and had it covered in foil. I gently dabbed up the moisture that collected around the edge of the cheesecake. Unfortunately, I could see that the middle was not set up in my opinion. It wasn't fully liquid, but there was movement there. I let it rest on the counter for 1.5 hours to room temp. Then placed in the fridge overnight for 10 hours. The center was thick like pudding in an area about 2"wide. The texture and firmness of the cheesecake is phenominal,... PHENOMINAL elsewhere. Your thoughts? My thoughts are that somehow there was excess liquid, or it should have cooked 5-10 min extra. But, how do you do that once naturally released??? Help please. Karen Godbey
Kristen Chidsey
Hi Karen! I am so glad you enjoyed the flavor and ease of this cheesecake. As for the cooking time, be sure your cheesecake is fully wrapped in foil to prevent excess moisture from forming on the cheesecake. I would also be sure to use cold water in bottom of the inner pot. If you did those things, I would suggest cooking for 50 minutes in the future to account for the jiggle you experienced--just like ovens, instant pots can cook differently. As for right now, you can enjoy as pudding texture (it is perfectly safe to eat) or try heating again for 5 minutes with a natural pressure release. I hope that helps! Next time you notice it is not set after cooking, I would immediately put back in inner pot for 5-10 minutes with another natural pressure release. I hope that helps.
Linda
Is there anyway to convert this to a regular oven? I don’t currently have a 7” spring form pan. I do have all the ingredients though.
Kristen Chidsey
Hi Linda! Here is my recipe for Oven Cheesecake. It will require a larger springform pan that you may have but will require more ingredients. I hope that helps!
Sherry
We don't like coffee so we omitted the coffee and used evaporate milk instead. It was so delicious. Thank you so much for this recipe.
Jenny
Loved the flavor. My family raved on it. I need help getting it to cut without making a mess. When I tried to cut it, the cheesecake stuck to the knife making it ugly and I ended up having to put it into chunks on the bottom of a 9x13 and covering with cool whip to make it look presentable. Do you have any tips on this? Thank you!
Kristen Chidsey
I am so glad you all enjoyed the flavor so much Jenny. As for cutting--try unflavored dental floss, or a super sharp knife dipped in hot water first and wipe off between slices. Also, be sure your cheesecake is fully chilled before slicing. Hope that helps!
BB
Any tips for using an 8.5 in springform pan? Maybe 1.5 times the recipe? Just don’t know how long it would take to cook thoroughly with those sorts of adjustments. Any thoughts? Thanks.
Kristen Chidsey
Hi there! First of all, you want to be sure that size pan fits into your Instant Pot. I would also be concerned that 1.5 times the ingredients may still be slightly too much. Instead, I would suggest using 1.25 times the ingredients and adding 10 minutes cook time. But without experimenting, please realize these are just my best estimates. I would love to hear the results if you try it out, as I am sure it can help others as well.
Raynne
Super easy, rich, and not quite as fattening as most cheesecakes. The coffee and sour cream I think give it that extra little something something😀
Kristen Chidsey
I am so glad you enjoyed the balance Raynne!
Morgan
I read the recipe like five times over and still can’t see where the sour cream goes in. I mean I assumed, obviously that it goes in the processor with the eggs and cheese And such, but just thought I’d let you know.
I have this in the instant pot right now, the batter tasted amazing. Can’t wait to eat it!
Kristen Chidsey
I just updated the recipe card! Thank you for pointing out that issue. I hope you enjoy!
Matt Taylor
Super easy chocolate cheesecake in the instant pot, love it!
Kristen Chidsey
So glad you loved this Matt!
Jen
I would definitely stick with the full fat ingredients. So much creamier and full of flavor too. I've always wanted to try this so thanks for sharing.
Kristen Chidsey
I agree the full fat makes the best cheesecake. So glad you enjoyed Jen!
Krissy
Oh my, this was so good. I loved the little bit of coffee flavor. I also loved how easy it was to make.
Kristen Chidsey
I agree, that coffee adds so much! Glad you enjoyed Krissy!