
This post may contain affiliate links. Please see our disclosure policy.
Instant Pot Coconut Milk Yogurt is a simple recipe using only 3 ingredients to make a creamy, thick, dairy-free yogurt. This dairy-free yogurt can be made vegan friendly and is a great alternative to anyone with dairy allergies.
Looking for more Vegan Instant Pot Recipes? Check out Instant Pot Beans, Instant Pot Vegetarian Chili, and Instant Pot Lentil Soup.
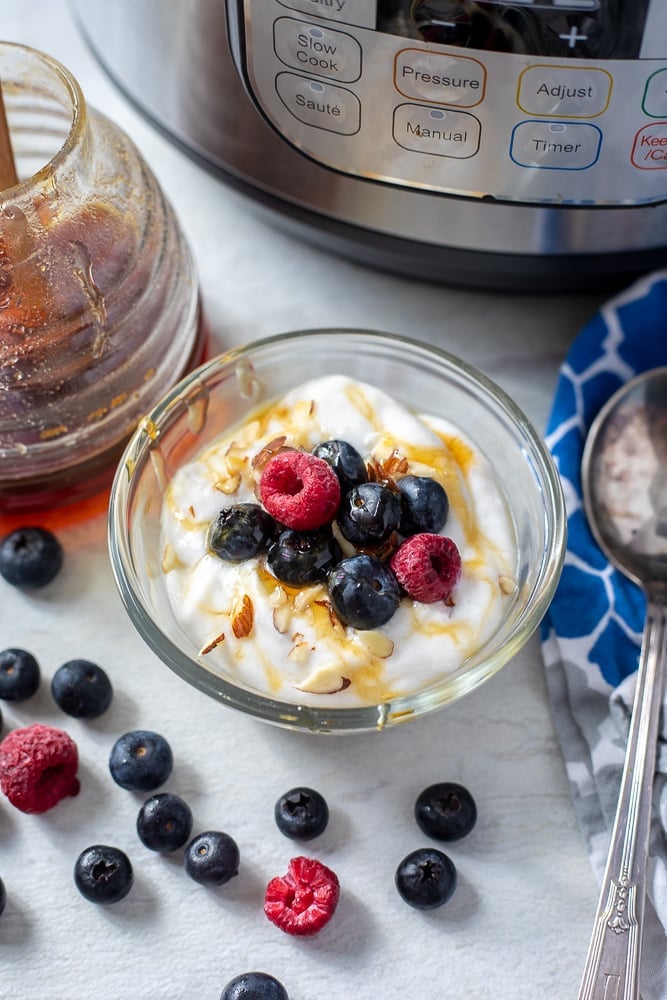
Instant Pot Coconut Milk Yogurt
After perfecting the recipe for Instant Pot Yogurt, I have been asked for years to create a dairy free version. After more failed attempts than I care to admit, I finally have perfected a recipe for Coconut Milk Yogurt.
I want to pause here and do a dance. Seriously!
This recipe is super simple. BUT it took forever to perfect a recipe for Instant Pot Dairy Free Yogurt.
I tried Almond Milk, Soy Milk, and Oat Milk. Fail. Fail. Fail.
All those dairy free versions of milk have added stabilizers--which wreak havoc on the yogurt process. I have had some success using homemade almond milk, but that process takes quite a long time and is also pretty finicky. One time I would have success, the next the yogurt would turn out watery.
However, when using canned full fat coconut milk, I have had success. Time and time again!
And I am so excited to finally share this recipe with you. Plus Coconut Milk Yogurt is creamy, rich, and decadent tasting--you are going to love it!
Ingredients for Coconut Milk Yogurt
There are only 3 ingredients in coconut milk yogurt. It is so crucial you follow my tips for which ingredients to use, as the results will change drastically if you change up the ingredients suggested. Trust me, I have tried all sorts of substitutions!
- Coconut Milk: You must use full fat canned coconut milk that only has the ingredients coconut, water, and guar gum. PERIOD! Do not use light canned coconut milk or coconut milk found in a shelf stable or refrigerated carton. I prefer an organic brand of full fat coconut milk.
- Yogurt Starter: You need live active cultures in order to make yogurt of any kind. You have a few options as to which starter you use. You can use a powdered yogurt starter or pre-made yogurt. If using pre-made yogurt, you will need to make sure that yogurt is PLAIN--not flavored or sweetened! And if you use a dairy yogurt as your starter, your yogurt will no longer be dairy free or vegan friendly. I recommend purchasing a vegan yogurt starter and then saving 1-2 tablespoons of your homemade coconut milk to use as the starter for your next batch of yogurt. This will save you money in the long run.
- Thickener: Dairy free yogurt will never get as thick as cow milk's yogurt, due to the difference in the protein structure of the liquid. So I find it is necessary to add in a thickener to achieve thick dairy free yogurt. I love using beef gelatin powder, but for a vegan friendly yogurt, use agar agar powder.
How to Make Coconut Milk Yogurt
Step One: Heat Up Coconut Milk
It is important to mention that canned coconut milk has already been pasteurized, so there is no need to heat the milk to 180 degrees. We can follow a very similar process to Instant Pot Cold Start Yogurt when making coconut milk yogurt.
However, we do need to heat the coconut milk up to about 110-115 degrees to dissolve the gelatin. This step also helps the fat from the coconut milk to emulsify into the liquid.
To heat the coconut milk up, hit the Yogurt function on your Instant Pot. Hit yogurt again until it reads boil. Pour in the coconut milk and gelatin or agar agar and whisk well to incorporate. Use a digital thermometer to watch the temperature of the yogurt. You want it to reach 110-115 degrees. Once that temperature has been reached, turn the Instant Pot OFF.
👉🏻Note: If using agar agar, you will want to heat the mixture to 180℉ to activate the agar agar, then let cool to 110-115℉ before incubating.
Step Two: Strain the Coconut Milk
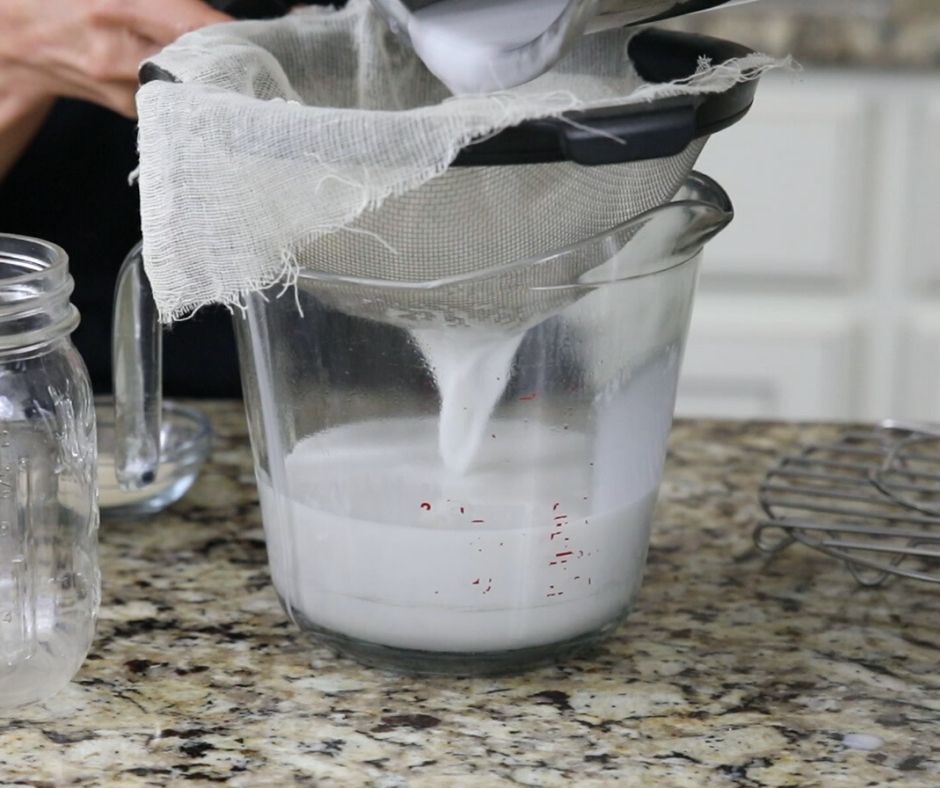
Once the coconut milk has reached a temperature of 110-115 degrees, strain the mixture over a mesh strainer lined with cheesecloth. This will help the yogurt be super smooth.
Then mix in the starter well into the milk mixture. You need ¼ teaspoon powdered starter for every 15 ounces of canned coconut milk or 1 tablespoon pre-made plain yogurt for every 15 ounces of canned coconut milk.
Step Three: Incubate Coconut Milk Yogurt
Now it is time to incubate the yogurt and let the magic happen.
There are a few options on how you can incubate your yogurt and options on how long you can incubate your yogurt. Let me break those down for you.
First, you can simply pour your yogurt mixture back into the inner pot of the Instant Pot and let incubate. You just want to keep in mind that once your yogurt is done incubating, you need to leave it undisturbed and refrigerate it for at least 8 hours before using. This means that your inner pot will be tied up for an additional 8 hours.
If you want the flexibility to use your inner pot while your yogurt sets up in the refrigerator, pour your milk mixture into a heat safe glass jar and then place that jar on the trivet inside your instant pot. You will also need to add in 1 cup of warm water (yogurt incubates at 110-115 degrees, so I like my water to be the same temperature.) Once the yogurt has incubated you can remove the glass jar and place in the refrigerator and your Instant Pot is ready to be used as desired.
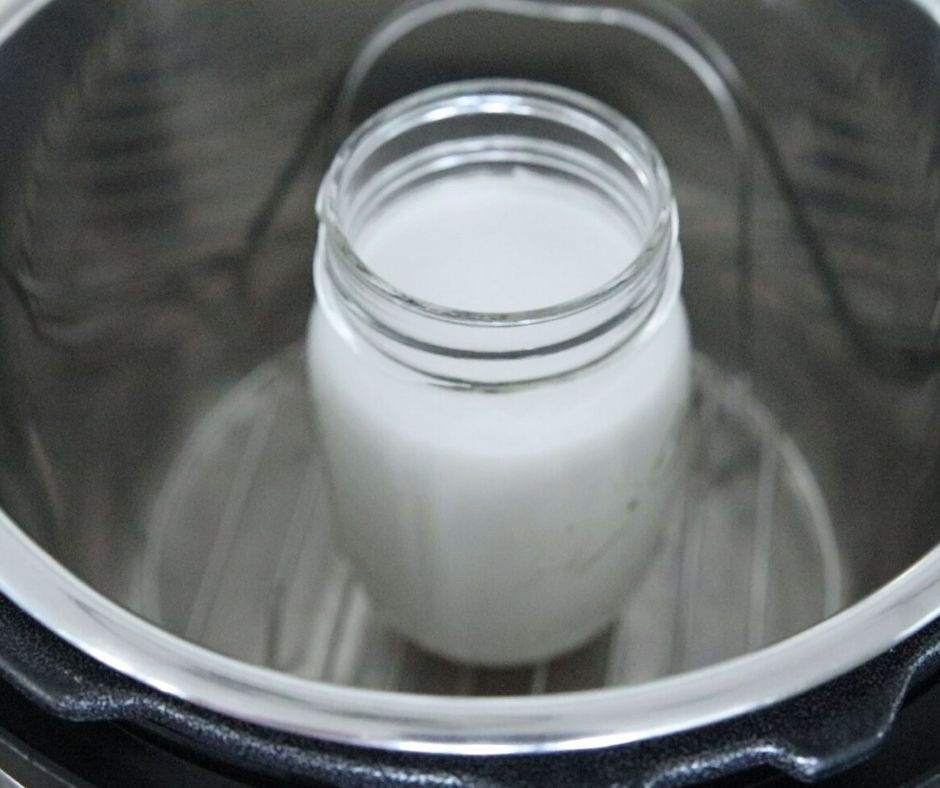
To incubate yogurt, you need to set the cycle for at least 8 hours and up to 24 hours. The longer the incubation the thicker and tangier the yogurt becomes and the more probiotics are developed. Personally, I prefer the texture and results of the yogurt after being incubated for 24 hours.
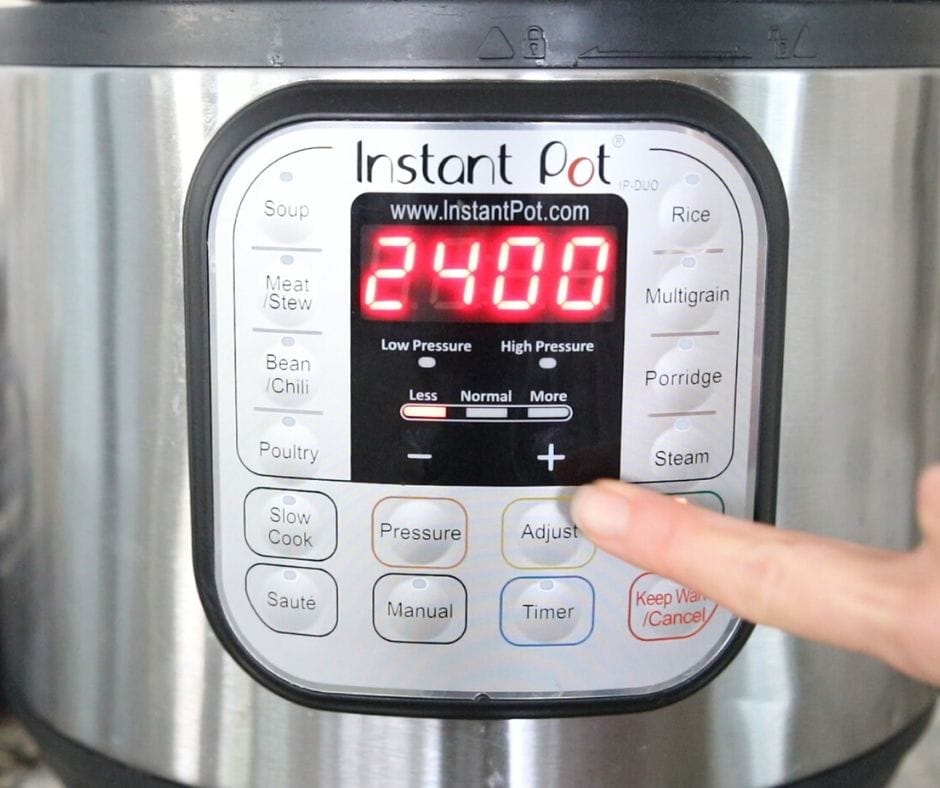
To set the incubation time, simply hit yogurt and then adjust button until the time reads 24:00. You can then use your +/- buttons to adjust the time if you desire a different amount of time for incubation.
Step Four: Refrigerate Dairy Free Yogurt
Once the yogurt has been incubated, remove from the Instant Pot and place the yogurt, undisturbed into the refrigerator for at least 8 hours. Do not worry if your yogurt is a bit thin at this point, it will thicken as it sets up in the fridge.
Step Five: Enjoy Homemade Dairy Free Yogurt
Once the yogurt has set up in the fridge, you may notice that the yogurt has separated. That is normal and due to the high fat content in the coconut milk. Simply whisk to incorporate and enjoy!
Questions/Tips for Making Coconut Milk Yogurt
What lid do you use when making yogurt?
A lot of people wonder if they need the lid on the Instant Pot when making homemade yogurt. And the answer is YES! The lid will trap the heat inside and keep the Instant Pot at the right temperature for incubating yogurt.
However, you do not need to seal your Instant Pot. So you can use a glass lid or the regular lid. There is no need to worry about which way your vent knob is pointed, as pressure will not be reached when making yogurt.
It is important to note that if using the regular lid, you want to make sure your sealing ring is clean (or use a separate one so it does not smell like chili or pot roast!) Technically you do not need the sealing ring at all to make yogurt, but condensation will form when making yogurt and if you do not have the sealing ring on your lid, some of that condensation will drip out. While it will catch in the condensation cup, it is a much neater process to just incubate yogurt with the sealing ring still intact.
How long does Coconut Milk Yogurt last?
You can store homemade coconut milk yogurt in the fridge for up to 7 days. You can also freeze coconut milk yogurt for 3 months, but the texture will not be the same, as the fat solids will separate as the yogurt defrosts. You can whisk the yogurt together after defrosted in a blender or food processor to smooth out, but coconut milk yogurt is best enjoyed fresh.
Can you save Homemade Yogurt to use as starter?
Yes, once you have completed one batch of homemade yogurt, you can set aside 1 or 2 tablespoons of the completed yogurt to use for your next batch of dairy free yogurt. You can store in the fridge for up to 5 days or freeze for up to 30 days. Just allow your yogurt to fully thaw before using to make another batch of homemade yogurt.
Important to Note: When using yogurt as your starter, you will need 1 tablespoon plain yogurt for every 15 ounces of coconut milk.
What if my yogurt is not smooth?
After your dairy free yogurt sets up in the fridge, it may separate due to the high fat content of the coconut milk. If whisking to incorporate the liquid into the yogurt does not result in a smooth consistency, pulse a few times in a blender or food processor to smooth out.
Instant Pot Essential Recipes
- Instant Pot Baked Potatoes
- Instant Pot Baked Sweet Potatoes
- Instant Pot Beans
- Instant Pot Brown Rice
Instant Pot Coconut Milk Yogurt

Video
Ingredients
- 1 (13.5 oz) can full fat coconut milk*, see notes
- ¼ teaspoon yogurt starter, or 1 tablespoon of plain coconut milk yogurt*
- 2 teaspoons beef gelatin, or powdered agar agar
Instructions
- Clean the inner pot well. Pour boiling water into the inner pot, let sit for a few minutes, and then discard the water and dry. This will help to ensure your instant pot is cleaned well and sanitized.
- Pour in 1 (13.5 oz) can full fat coconut milk* and 2 teaspoons beef gelatin and whisk well to incorporate. Turn the Instant Pot on by hitting the Yogurt function on your Instant Pot. Hit the yogurt button again until it reads boil.
- Continue to whisk the coconut milk, stopping to check the temperature of the coconut milk, using a digital thermometer. Once the milk reaches 110-115℉, hit cancel to turn the Instant Pot off. This should only take a couple of minutes. Note: If using agar agar, you will want to heat the mixture to 180℉ to activate the agar agar, then let cool to 110-115℉ before incubating.
- Strain the coconut milk mixture over a mesh strainer lined with cheesecloth.
- Whisk in ¼ teaspoon yogurt starter (or 1 tablespoon of plain coconut milk yogurt) until well combined.
- Pour the yogurt mixture back into the inner pot to incubate. Alternatively, you can pour your yogurt mixture into a heat-safe glass jar(s) and place it on the trivet of the Instant Pot. Just be sure to add 1 cup of warm water to the inner pot as well.
- Place the lid on the Instant Pot and then set the incubation time. To set the incubation time, hit the yogurt function and then adjust function until the time reads 24:00 (be sure the temperature is at normal and not low--if the temperature is at low, hit yogurt until normal is lit up. ) You can then use your +/- buttons to adjust the time if you desire a different amount of time for incubation.
- Once the yogurt has been incubated, remove from the Instant Pot and place the inner pot or jar of yogurt, undisturbed into the refrigerator for at least 8 hours.
- After the 8 hours, whisk the yogurt to incorporate the fat solids and liquids together and serve as desired. At this point, you can add in sweetener or your choice.
Notes
- You must use full fat canned coconut milk that only has the ingredients coconut, water, and guar gum. PERIOD! Do not use light canned coconut milk or coconut milk found in a shelf-stable or refrigerated carton. I prefer an organic brand of full-fat coconut milk.
- Once you have completed one batch of homemade yogurt, you can set aside 1 or 2 tablespoons of the completed yogurt to use for your next batch of dairy-free yogurt. Instead of using the powdered starter, whisk in 1 tablespoon of plain yogurt for every 15 ounces can of coconut milk.
- For creamy, tangy coconut milk yogurt, incubate for a full 24 hours. For thinner, less tangy yogurt set incubation time between 8 and 12 hours.
- To sweeten this coconut milk yogurt, I typically add in 1 tablespoon maple syrup and ½ teaspoon vanilla extract after the yogurt has set for 8 hours in the fridge.
This recipe can be doubled or tripled. - To keep vegan friendly, use agar agar as a thickener. Otherwise, beef gelatin is recommended.
- If your yogurt has a PINK hue to it, be sure to discard--that means it not safe to eat. This can happen if the instant pot was not cleaned well OR if the yogurt was incubated on LOW not NORMAL temperature.
Nutrition
Nutrition information is automatically calculated, so should only be used as an approximation.




I haven't tried this yet, but my two dairy free kids won't eat plain, even if it's thickened...how can I make it strawberry, blueberry or peach flavoured? Would i just make like, a sort of sauce or something with the fruit of choice and stir it in when it's done? I can't wait to try this!
Hi Crystal! I would wait to add any fruit until the yogurt has been made and chilled. You can stir in fresh diced fruit, fruit syrup, or even jam to flavor. Another option is, you can dice up the fruit, sprinkle with sugar, and let sit then spoon over yogurt if your kids like their yogurt on the sweeter side. I hope they enjoy!
My Instant pot has a yogurt button but only has low, medium and high temp- not normal.
What do I use?
Hi Amy! Can you tell me what model you are using so can I can give you accurate instructions?
How much yogurt does this make?
Hi Jade! This makes about 16 ounces.
Do you have a recommendation for increasing the protein in the yogurt?
Hi Teresa! For coconut milk yogurt, you can opt to stir protein powder into the yogurt after chilling.
Made this coconut milk version today for first time ever making yogurt. The steps and process were simple. However, after refrigeration, the consistency was more solid than liquid requiring a mixer to make smooth. Still has tiny clumps I can't smooth out. Taste is delicious and I'm enjoying it regardless. Incubation time was 24:00. Wondering if a shorter time would avoid those unmixable lumps.
Hi Barbara! I am glad you found the process to be simple. As for the consistency, it sounds like the fat in the coconut milk has solidified. Did you happen to use canned coconut cream? That will thicken up and solidify significantly. Regardless, you can process in a blender or food processor to help smooth 🙂
I’m not sure what happened but after the incubation period, and placing in the fridge overnight, it separates into 3 layers. My coconut milk fat was solid at the top. The gelerain layer was in the middle, and a curdled looking tangy layer was at the bottom. What happened? I used organic coconut cream from azure. Was that the issue cream and not milk.
Hi Jackie! Coconut cream has a much higher content of fat than coconut milk, so that would be the reason this occurred.
II’m confused. Does the coconut milk and agar have to get to 180 or 110?
If using agar agar, you will want to heat to 180 degrees for it to activate, otherwise this is not necessary.