This post may contain affiliate links. Please see our disclosure policy.
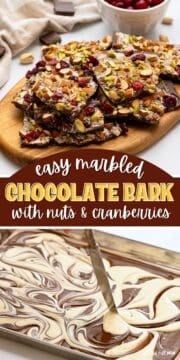
You won't believe just how easy it is to make gourmet chocolate bark at home! With chocolate and toppings of your choice, this easy chocolate bark recipe looks fancy but takes less than 10 minutes to make. Perfect for gifting, a last-minute dessert, or a treat all for yourself!

Kristen's Keys for Chocolate Bark
A few simple details make the process easier and help ensure your chocolate bark sets up beautifully and tastes incredible.
- Prep before melting chocolate. Melted chocolate waits for no one. Have the tray lined, the toppings ready, and your spatula and butter knife ready so you can swirl and sprinkle while the bark is still warm.
- Use real, high-quality chocolate. You can use any type of chocolate you like. Dark, semi-sweet, milk, or white chocolate. Just be sure to skip anything labeled candy coating and look for white chocolate made with cocoa butter (like Guittard white baking chips), rather than just oils. This will ensure your chocolate bark tastes as good as it looks. The chocolate, afterall, is the star!
- To swirl or not to swirl? For a show-stopping marbled chocolate bark, use both white and dark chocolate and swirl together. Otherwise, you can simply use just one variety of chocolate.
- Let the chocolate bark harden at room temperature. Cooling slowly keeps the chocolate from getting white streaks or condensation spots.
How to Make Chocolate Bark (Marbled or Not)
Think of this as me standing next to you in the kitchen, walking you through the process to make perfect chocolate bark.
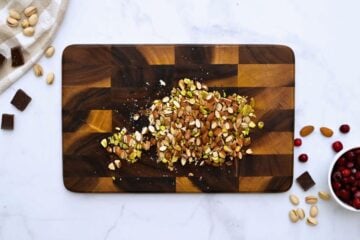
Step One: Prep Pan and Ingredients
To keep the process seamless, line your baking sheet with parchment paper, toast and chop nuts if needed, chop or crush any other toppings if needed (pretzels, candy canes, etc.), and gather all your supplies and other desired toppings (dried nuts, sprinkles, flaky sea salt, etc.)
👉🏻Adding nuts? Toast the nuts by baking them at 350°F for 6-8 minutes or cooking them over medium-low heat in a dry skillet for 3-4 minutes, until the nuts smell nutty. It's a tiny step that makes a big difference.

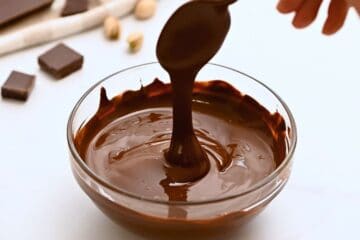
Step Two: Melt Chocolate
If you are using both white and regular chocolate, you will want to melt them consecutively in the microwave in clean heat-safe bowls. Otherwise, melt the chocolate of your choice as directed.
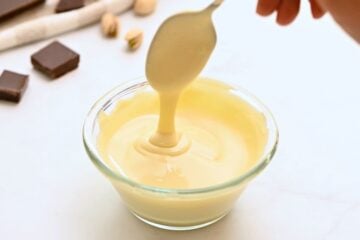
- Place the dark chocolate in a microwave-safe bowl. Heat in 30-second intervals, stirring after each interval. Stop when it's about 90% melted and stir until smooth. This keeps it from overheating and turning grainy.
- For the white chocolate, heat in 30-second intervals, stirring after each interval, until almost fully melted. White chocolate melts a bit faster, so keep an eye on it.


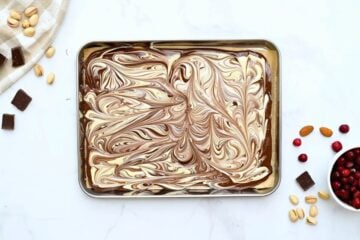
Step Three: Spread and Swirl
Quickly pour the dark chocolate onto the prepared sheet and spread into a rough 9×13-inch rectangle, about ¼-½ inch thick. If using, spoon the melted white chocolate over the top, then drag a skewer or knife through it to create a pretty marbled pattern.


Step Four: Add Toppings
Immediately sprinkle the chopped nuts, dried cranberries, and a pinch of flaky sea salt I(or any toppings of your choice) evenly over the chocolate. Gently press any larger pieces so they stick as the chocolate cools.

Step Five: Let Set
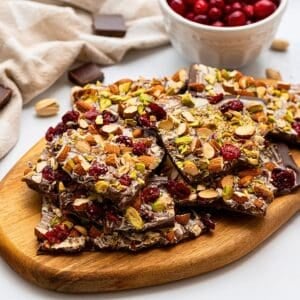
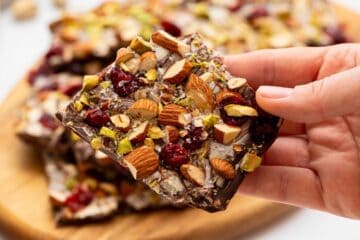
Let the bark harden at room temperature for 2-4 hours, until completely firm. Once set, snap the bark into big rustic chunks or cut into wedges. Both work and taste equally delicious.

Chocolate Bark Variations
You can adapt this bark endlessly depending on what you have on hand.
- Skip the Marbled Effect: Use a full 18-ounces of dark chocolate, semi-sweet chocolate, milk chocolate, or white chocolate to make this easy chocolate bark.
- Nuts: Swap the pistachios or almonds for cashews, walnuts, or pecans. Or omit altogether.
- Dried Fruit: Use dried cherries, chopped apricots, or even raisins instead of cranberries.
- Want it Sweeter? Use milk chocolate for the base.
- Optional Toppings: Add up to ¾ cup of any toppings you like. Some options include orange zest, pretzels, crushed peppermint, sprinkles, mini or chopped candies, or toffee bits. If you would like to add larger toppings, just be sure to chop or crush them up into smaller pieces.
- Holiday Bark: Use seasonal candies, sprinkles, or candy canes to make peppermint bark or Christmas bark.
More Easy Chocolate Desserts
Easy Chocolate Bark
Video
Ingredients
- ½ cup whole nuts, optional, any combination
- 12 ounces quality dark chocolate, chopped
- 6 ounces quality white chocolate, chopped
- ¼ cup dried cranberries, or dried fruit/candies of choice
- ½ teaspoon flaky sea salt, optional
Instructions
- If adding nuts, begin by toasting them. Preheat the oven to 350℉. Place the nuts on a rimmed baking tray that has been lined with parchment paper and bake for 6-8 minutes, or until fragrant and lightly golden. Alternatively, toast over medium-low heat in a dry skillet for 3-4 minutes. Let cool slightly and roughly chop.

- Line a separate rimmed baking sheet with parchment paper and set to the side. if needed, chop chocolate into small pieces and gather/prepare any other toppings as desired.
- Place the dark chocolate in a microwave-safe bowl and microwave in 30-second increments, stirring between each interval. The chocolate is done when it is about 90% melted, keep stirring, letting the residual heat melt the chocolate fully.
- Repeat the process with the white chocolate, using a separate bowl.
- Working quickly, spread the dark chocolate mixture out onto the prepared baking sheet, using an offset spatula to spread into roughly a 9x13-inch shape (about ¼-½ inch thick). Spoon the melted white chocolate randomly over the dark chocolate. Then use a wooden skewer or butter knife to swirl it together.
- Immediately sprinkle the chopped nuts and dried fruit, and flaky sea salt over the top of the chocolate. If needed, very lightly press the toppings into the chocolate
- Let the chocolate cool at room temperature for 2 to 4 hours, until completely hardened. Once the chocolate is completely hardened, use your hands to break it into large pieces, or cut into wedges.

Equipment
Notes
Nutrition is based on 18 ounces of chocolate without toppings added as those will vary.
Nutrition
Nutrition information is automatically calculated, so should only be used as an approximation.


Do you have to use dairy free chocolate?
Not at all--any chocolate you like works well Kristin!
Got it thanks!!!! 😃
This is so cute!! And I love that it's allergy-friendly. So perfect for a happy Halloween!
Thanks!! It is a perfect treat for everyone!
What a fun activity to do in the kitchen with the kids for Halloween. I bet I would have plenty of helpers for this recipe.
I bet you would 😉
How cute! So perfect for Halloween and simple to put together. I love the pairing with the spiders. My kids would love this.
The spiders make this SO fun for the kids!
Love Chocolate Barks... They are ridiculously easy yet so gourmet.
And who dosen't love ridiculously easy recipes?!
Love this idea for Halloween! I love how simple and effective it is, I'm sure the kids (and everyone else!!!) would love it!
My kids and their friends loved it, but I have to say the parents enjoyed it just as much 🙂