• Skip to primary navigation
  • Skip to main content
  • Skip to primary sidebar
A Mind "Full" Mom
  • Recipe Index
    • Breakfast Recipes
    • Main Courses
      • 30-Minute Meals
      • Easy Pork Recipes
      • Beef Recipes
      • Soup, Stew, and Chili Recipes
      • Sandwiches, Burgers, and Wraps
      • Vegetarian Recipes
    • Slow Cooker Recipes
    • Instant Pot
    • Appetizers
    • Beverage Recipes
    • Breads and Muffins
    • Allergy Friendly Recipes
      • Dairy Free
      • Gluten Free
      • Paleo
      • Vegan
      • Low Carb
    • Pasta
    • Snacks
    • Side Dishes
    • Desserts
  • Instant Pot
    • Start Here: Instant Pot 101
    • All Instant Pot Recipes
    • Healthy Instant Pot Recipes
    • Sign Up for Instant Pot Tips and Recipes
  • About Me
    • Contact
    • Work With Me
    • Cystic Fibrosis
  • Free Instant Pot Secrets
  • Free Meal Plans
menu icon
go to homepage
subscribe
search icon
Homepage link
  • Instant Pot
  • About Me
  • Free Instant Pot Secrets
  • Free Meal Plans
  • Subscribe to Newsletters
  • Recipes
    • Email
    • Facebook
    • Instagram
    • Pinterest
    • Twitter
  • ×

    Home » Real Food » Instant Pot » Instant Pot Yogurt

    Instant Pot Yogurt

    By Kristen Chidsey | 1,245 Comments | Published February 5, 2018 | Updated November 5, 2020 *This post may include amazon links. As an Amazon Associate, I earn from qualifying purchases.

    Pin
    Share
    Jump to Recipe Print Recipe
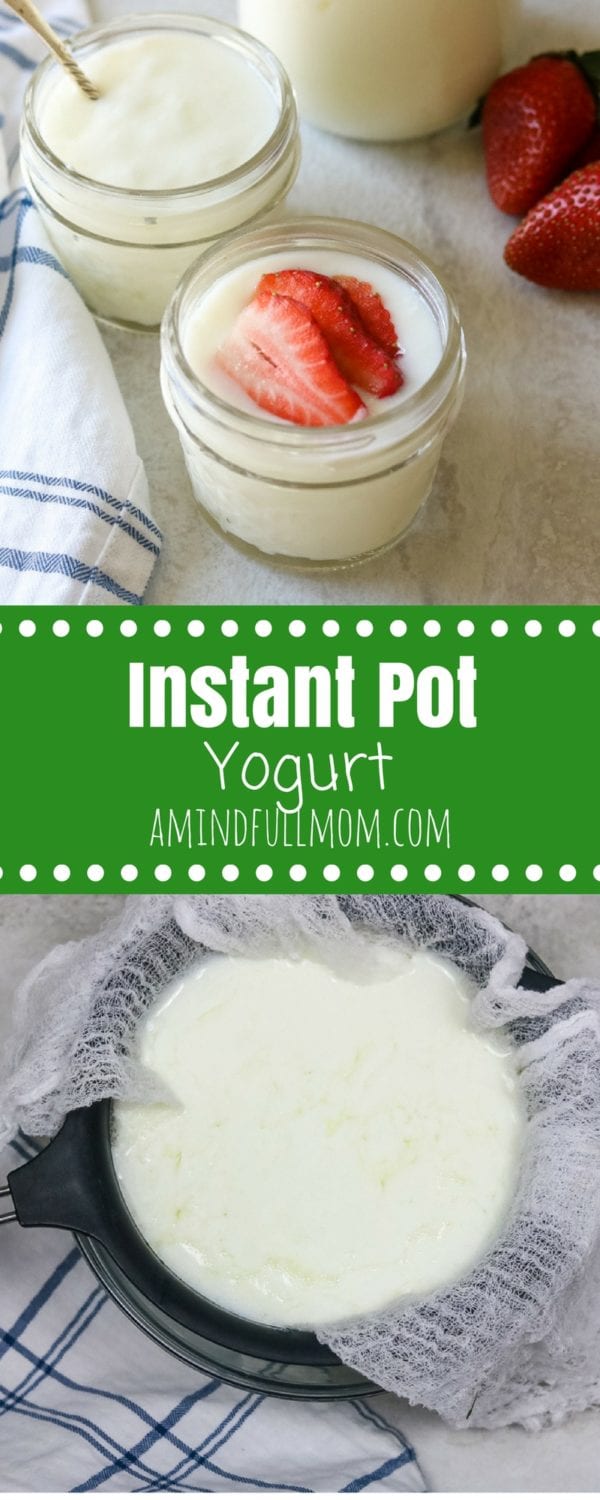
    Instant Pot Yogurt: Step by step directions for making yogurt in an electric pressure cooker. Includes directions for nonfat, full fat and Greek yogurt. Also ways to naturally sweeten yogurt. This is EVERYTHING you need to know about making Instant Pot Yogurt. 
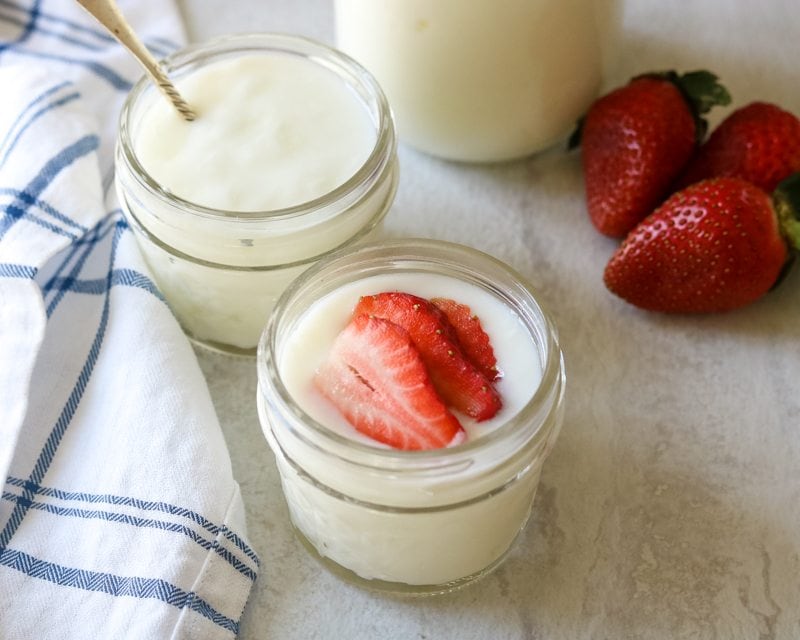
    Instant Pot Yogurt: Step by step directions for making yogurt in an electric pressure cooker. Includes directions for nonfat, full fat, and Greek yogurt. Also, ways to naturally sweeten yogurt. This is EVERYTHING you need to know about making Instant Pot Yogurt. 

    3 small glass jars filled with homemade yogurt. One topped with sliced strawberries

    I am all about making things at home when I can.

    I prefer to make fruit roll-ups, chicken stock, granola bars, and even rotisserie chicken.

    However, making yogurt at home, never appealed to me--and frankly overwhelmed me.

    I can purchase high-quality yogurt with simple, wholesome ingredients at every grocery store around me.

    But I was intrigued to try my hand at making yogurt shortly after getting my Instant Pot--and let me tell you, I am so glad I gave it a try.

    Instant Pot Yogurt
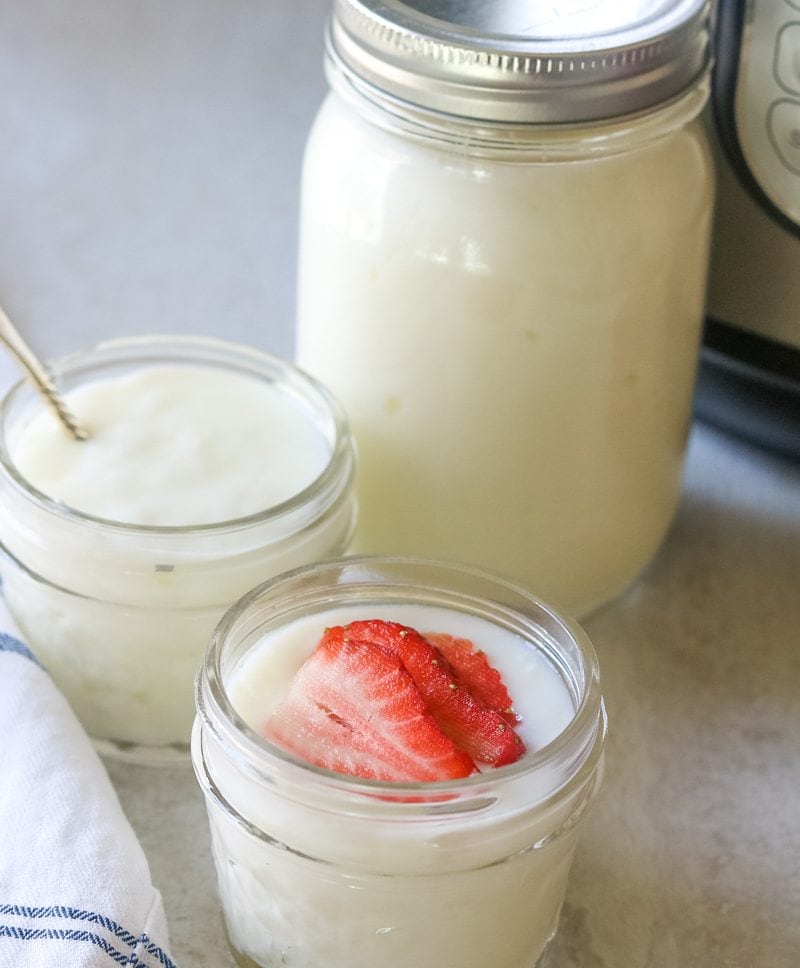
    Instant Pot in background with 3 jars of homeamde yogurt

    There are two reasons that I will no longer purchase yogurt at the store and make yogurt in my Instant Pot.

    • Taste
    • Cost

    You guys, homemade yogurt is so much creamier and less tangy than store-bought yogurt. The first time my kids had homemade yogurt they asked if I put sugar in the yogurt. Nope just plain yogurt--just a less tangy. But man, they loved it. And so did I.

    And the cost of making homemade yogurt is so much cheaper than store-bought yogurt. By making homemade yogurt you cut the cost in at least half!!!

    Now that you are intrigued, let's get started.

    Making yogurt at home is time-consuming, but NOT at all hard. With an instant pot, it is nearly fail-proof!

    How to make Homemade Instant Pot Yogurt

    Step One: Clean your Instant Pot. 

    • This sounds like a no-brainer. But I am not talking about simply washing your Instant Pot--you need to sanitize your inner pot.
    • You can prepare your inner pot for making yogurt by pouring boiling water in the inner pot and then discard the water.
    • This step can be skipped, but it helps drastically in the flavor of your yogurt--especially if you have been making a lot of Instant Pot Chili.
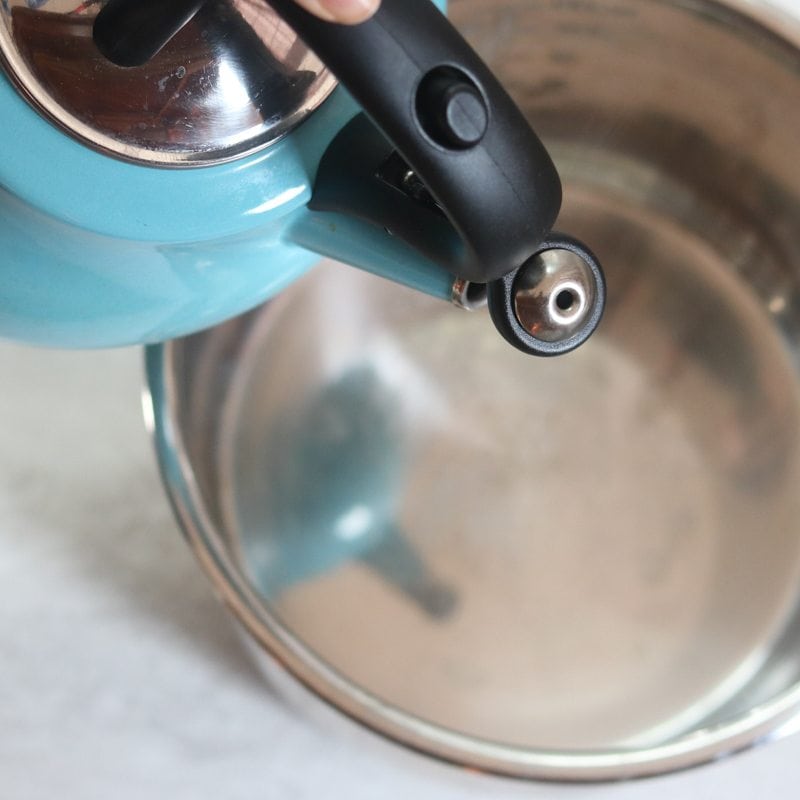
    Sanitizing inner pot of Instant Pot by pouring Boiling water over inner pot


    Step Two: Heat your Milk in your Instant Pot.

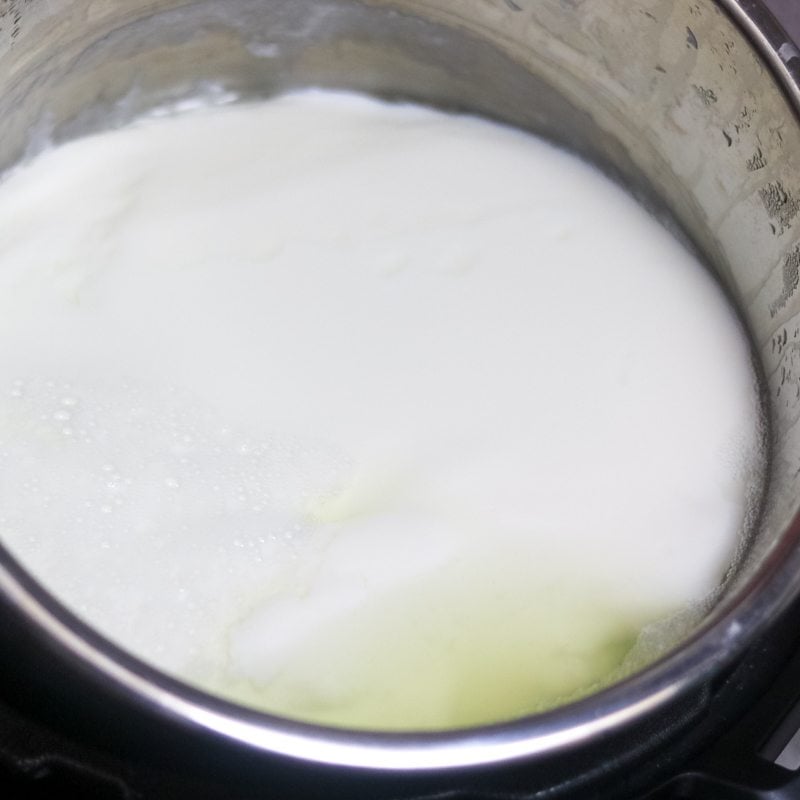
    • Pour ½ gallon milk into the inner pot of your electric pressure cooker, put the lid on the Instant Pot (vent can be sealed or not sealed in this function). Hit yogurt function and then the adjust button until it says Boil.
    • When the Instant Pot beeps that it is done, remove the lid and test the temperature to be sure the milk has reached 180 degrees.
    • I like to leave the inner pot in the Instant Pot for 5 minutes before removing it. This helps the yogurt thicken up a bit better.
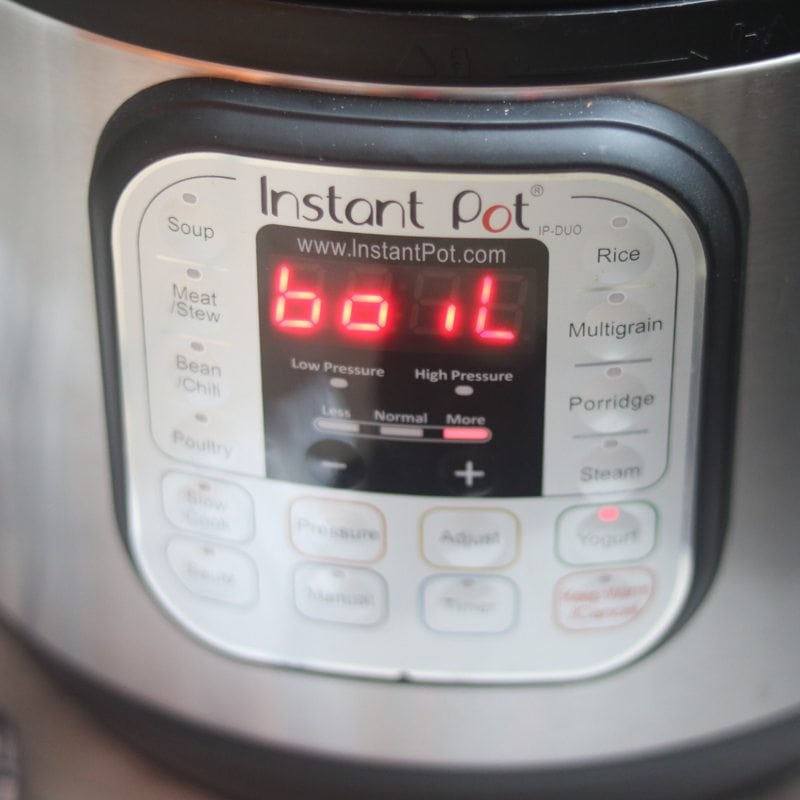
    Instant Pot with word Boil displayed


    Step Three: Cool the milk to approximately 105-115 degrees. 

    • Cooling the milk to this temperature takes about 1 hour if placed on the counter.
    • I like to speed the process up by placing the inner pot into a large mixing bowl in ice water. This takes about 15-20 minutes.
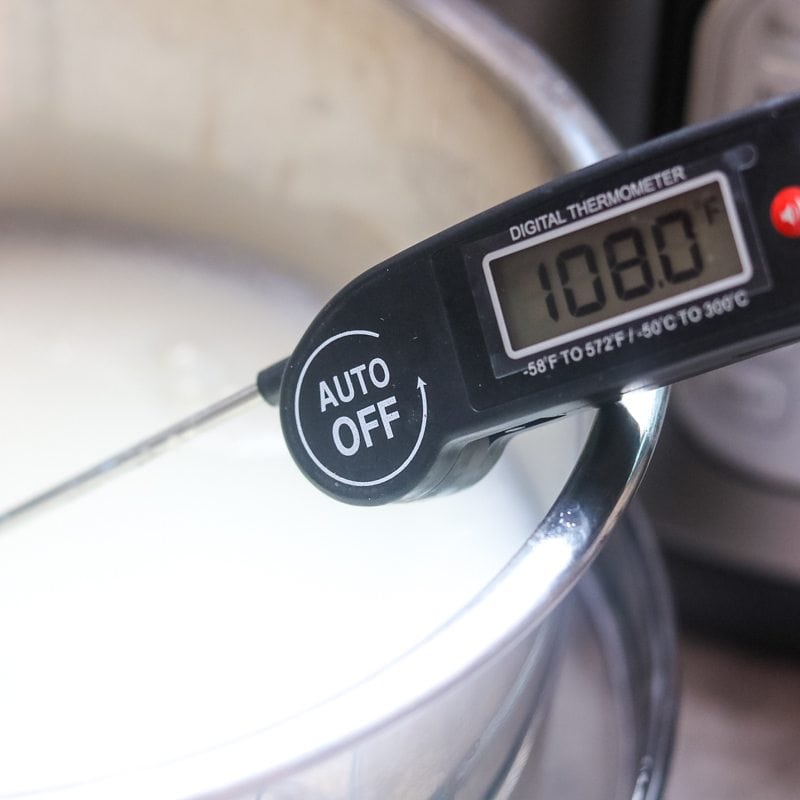
    Digital thermometer inserted into yogurt and reads 108 degrees

    Step Four: Remove the "skin" off the milk. 

    • Once your milk has reached the proper temperature, skim off the top layer of milk "skin" that has formed on top of the liquid.
    • This helps to give you the creamiest of yogurts.

    Step Five: Whisk in a yogurt starter.

    • Use either prepared yogurt or a yogurt starter and whisk into your prepared milk.
    • It is important to note that if using prepared yogurt you need to be sure it is plain yogurt with live and active cultures.
    • If your starter is sweetened or does not have live cultures, making yogurt at home will NOT work!

    Step Six: Allow your yogurt to Incubate.

    • To finish making your yogurt, place your inner pot back in your Instant Pot with lid on (again, it doesn't matter which way valve is set).
    • Hit Yogurt again button again.
    • Adjust until it reads 8:00 or 8 hours.
    • Then let the Instant Pot do its thing.

    Step Seven: Enjoy!

    • Transfer to glass jars or a plastic container.
    • Refrigerate and Enjoy!

    How to Make Yogurt without a Yogurt Button

    It is a bit harder to make yogurt without a yogurt button on a pressure cooker, but it is possible.

    • It is a bit harder, but it is possible.
    • Pour milk into the inner pot of pressure cooker.
    • Turn on the Sear/Saute function.
    • Heat milk to 180°F. Use a thermometer to check the temp often and be sure to stir very often so the milk does not scorch.
    • Once the milk reaches 180°F, turn off your pressure cooker.
    • Remove the inner pot and cool it to 108 degrees.
    • Once your milk has reached 108 stir starter yogurt and whisk until incorporated.
    • Put inner pot back in instant pot and place lid on the pressure cooker.
    • Wrap in a large towel, or two regular towels and incubate for at least 8 hours or 10 hours.

    How to Make Greek Yogurt

    • If you would like to make Greek yogurt instead of regular yogurt, follow all the instructions for homemade yogurt.
    • Once the yogurt is prepared, place a large strainer lined with cheesecloth over a large mixing bowl.
    • You may need to do this in batches depending on the size of your strainer.
    • Allow the yogurt to drain in the strainer overnight.
    • Scoop out the thick yogurt into containers to store and discard the cheesecloth.
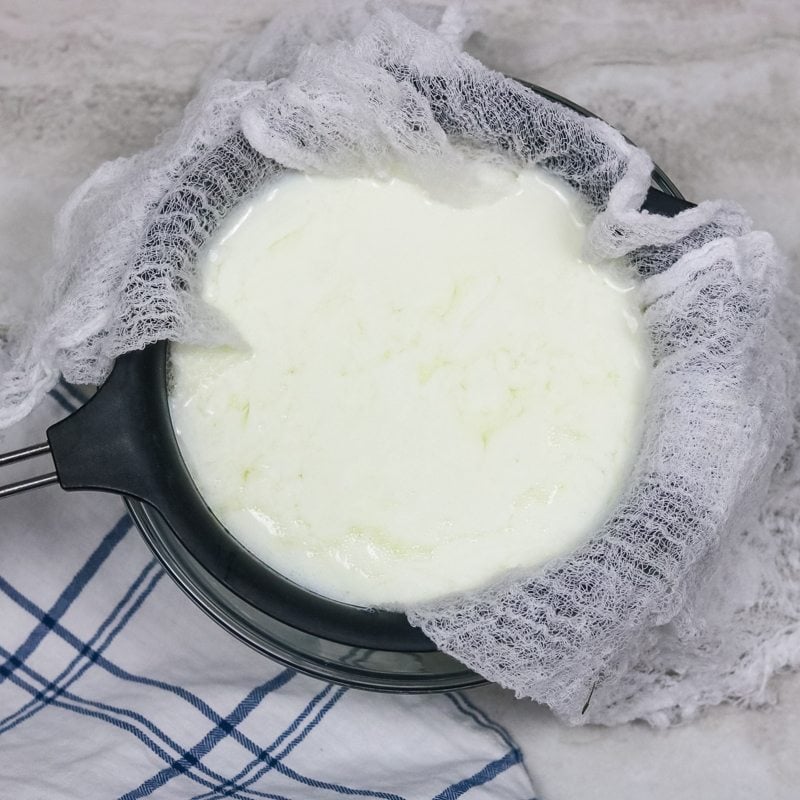
    Plain yogurt straining over cheesecloth

    What to do with the extra whey from the yogurt?

    • You can either discard the whey or you can use it in smoothies, oatmeal, protein shakes, etc. It will be filled with protein and probiotics.

    How to make Instant Pot Fat Free Yogurt

    Can you use skim milk to make yogurt in your electric pressure cooker?

    Yes, you can, with a few important tips.

    • I have found for nonfat yogurt, 3 tablespoons of yogurt added to ½ gallon milk works best.
    • Nonfat yogurt will have quite a bit more liquid on the top than yogurt made with full or reduced-fat milk.
    • Just carefully drain off the layer of liquid that forms on the yogurt and discard it.
    • As nonfat yogurt sits, the liquid will begin to separate again, just mix into the yogurt before serving.

    Inner pot being tilted to show that extra liquid created when making skim yogurt

    How long does Homemade Yogurt last?

    • Homemade yogurt should last for up to 10-14 days in your refrigerator.
    • Be sure to save 2 tablespoons of your homemade yogurt to make your next batch.

    How to Sweeten Homemade Yogurt

    I have found homemade yogurt to be so much smoother and a bit sweeter than store-bought yogurt and simply enjoy it topped with fresh berries or homemade granola.

    Homemade Vanilla Yogurt

    • Make yogurt as directed.
    • Mix in 1 tablespoon vanilla extract into prepared yogurt.
    • This will flavor the yogurt without any added sweeteners.

    **If you like your yogurt to be sweet, you can add in honey, maple syrup, or sugar adjusted to your desired level of sweetness. I would start with no more than ¼ cup, and increase by a tablespoon at a time. 

    A few tips for making yogurt at home

    • I use 1 tablespoon prepared yogurt for every quart of milk. Therefore for ½ gallon of milk, I whisk in 2 tablespoons of already prepared yogurt into my milk.
    • You can cut this recipe in half if you would like. If you have an 8-quart pressure cooker, you can also double this recipe for homemade yogurt.
    • Do NOT try to make homemade yogurt with flavored yogurt as your starter. You need to either use a yogurt starter or plain yogurt with active live cultures. How do you know if you store-bought yogurt has live cultures? The label on the yogurt will say Lactobacillus bulgaricus or  Streptococcus thermophilus.
    • A huge tip for making yogurt in the future is to FREEZE your starter immediately after fresh yogurt is made. I recommend using an ice cube tray. Each ice cube holds 1 tablespoon of yogurt so you will know exactly how much yogurt to defrost when making a new yogurt batch. Just be sure to thaw your yogurt cubes in the fridge to not alter the cultures in the yogurt.
    • If you would like tangier yogurt, set an incubation period to 10 hours instead of 8 hours.
    • If you need more tips on how to use your instant pot or are confused about some of the functions or pieces I mentioned, check out my Instant Pot 101. 
    • Get more easy, healthy instant pot recipes here.

    Homemade Yogurt is great in:

    • Yogurt Peanut Butter Dip
    • 2 Ingredient Homemade Gogurts
    • Peanut Butter Power Smoothie
    • Skinny Double Chocolate Zucchini Muffins
    • Skinny Spinach Artichoke Dip

    How to make yogurt at home in an Instant Pot:
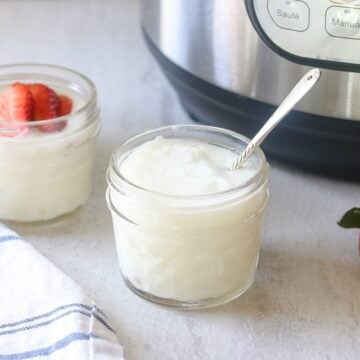
    jar of plain yogurt next to instant pot

    Homemade Yogurt

    Step by step directions to making Instant Pot Yogurt. 
    4.81 from 300 votes
    Print Pin Rate
    Course: Snack
    Cuisine: American
    Prep Time: 5 minutes
    Cook Time: 9 hours
    Total Time: 9 hours 5 minutes
    Servings: 16 people
    Calories: 89kcal
    Author: Kristen Chidsey

    Ingredients

    • ½ gallon milk
    • 2 tablespoons prepared yogurt with cultures
    Prevents your screen from going dark while preparing the recipe.

    Instructions

    • Pour milk into inner pot of Instant Pot. Push yogurt button until the screen reads "boil." (Usually you will need to hit the yogurt button two times) This will take about an hour. 
    • Once the Instant Pot beebs that the boil cycle is complete, carefully remove the lid and test the temperature. It should be around 180 degrees Fahrenheit. Let inner pot sit in instant pot for 5 minutes and then remove inner pot. 
    • Allow the milk to cool to 105-115 degrees. This will take an hour on the counter top or about 15 minutes if you place your inner pot into an ice bath. 
    • Gently skim off the "skin" on the yogurt and discard.  
    • Whisk in the prepared yogurt. 
    • Place inner pot (be sure to dry off well if you had in ice bath),put lid on and press yogurt button again and then adjust until screen reads 8:00. (The pressure should also read normal--if it reads less, hit adjust again until normal is lit up.)
    • Once yogurt beeps that it is complete, remove the inner pot from the inner pot and cover with plastic wrap. Refrigerate for 8 hours before transfering to individual containers.
    • This is a great time to freeze some yogurt for future yogurt making. 

    Equipment Needed

    • Electric Pressure Cooker with Yogurt Function

    Notes

    • Instead of prepared yogurt as your starter, you can use a yogurt starter. Just follow directions to determine how much starter to add to ½ gallon milk (each brand is a bit different.)
    • You can use any percentage of fat to make homemade yogurt.
    • To make Greek yogurt, strain the yogurt in a strainer lined with cheesecloth overnight in the fridge (be sure to place over large mixing bowl while draining.)
    • Homemade yogurt should last for about 10-14 days. 
    • If sweetening yogurt, I have found it is best to add in sweeteners/vanilla after the yogurt has set up in the fridge for at least 8 hours, or after straining.
    • If you find your milk is not reaching 180 degrees after the boil cycle, you can turn to saute function for a few minutes, watching VERY closely to help it reach to 180 degrees.
    • Nutritional values are approximate and have been calculated using 2% milk. The serving size is approximately 4 ounces. 

    Nutrition

    Calories: 89kcal | Carbohydrates: 5g | Protein: 3g | Fat: 2g | Saturated Fat: 1g | Cholesterol: 9mg | Sodium: 55mg | Potassium: 165mg | Sugar: 5g | Vitamin A: 120IU | Vitamin C: 0.2mg | Calcium: 142mg
    Liked this Recipe? Tag me Today!Snap a picture and tag #amindfullmom on Instagram - I would love to see!


    Pin
    Share
    « Chocolate Strawberry Smoothie
    Slow Cooker Chile Verde »

    About Kristen Chidsey

    Hi, I am Kristen, creator of A Mind "Full" Mom. I believe that making a wholesome family meal does not need to be hard or expensive! I love nothing more than to share with you delicious solutions for your hungry family.

    Reader Interactions

    Comments

    1. Harold

      March 31, 2022 at 1:02 pm

      Kristen,
      First try to make instant pot yogurt. I used whole milk, boiled, incubated for 8 Hrs (on LOW), refrigerated for 8 Hrs. Had soup! Read through all Comments, added 2 Tbsp more starter, incubated again for 8 Hrs on normal, refrigerated again for 8 Hrs, at that time the yogurt was GOOD. There was a small amount of whey on the top, so decided to stir it up... I now have SOUP again? A very nice drink but not yogurt. Can you tell me what happened? We will enjoy our drink, and I plan to start a new batch of yogurt to.
      Thank You
      Harold

      Reply
      • Kristen Chidsey

        March 31, 2022 at 2:18 pm

        Hi Harold! The first attempt did not turn out because you incubated on low not normal. After the incubation, it is best to cover and refrigerate for 8 hours before stirring.

        Reply
      • Amy

        April 02, 2022 at 1:19 am

        5 stars
        Hello,
        I have a strange question, is it possible to add condensed milk right after the milk is boiled, so it can be dissolved, and then add culture and incubate. I remembered in the old days my mom used to make yogurt by mixing condensed milk with boiling water, then add yogurt starter and then incubate.

        Reply
        • Kristen Chidsey

          April 02, 2022 at 6:18 am

          Hi Amy! Yes, it is possible to add sweetened condensed milk and is a great way to add sweetness to the yogurt. I would add after the milk has been boiled--keep in mind the milk may not need as long to cool then. Enjoy!

          Reply
    2. Marianne

      March 29, 2022 at 11:34 am

      5 stars
      This is so easy! And now it's my go-to recipe. Thanks, Kristen!

      Reply
    3. Delie

      March 29, 2022 at 6:48 am

      5 stars
      Thank you for this recipe! This is going to be a big money saver for me! I decided to risk making this without a kitchen thermometer, so I was a little apprehensive. I let it cool on the counter for 55 minutes instead of an hour because the house was cold. I also used 3 Tbsp nonfat yogurt for a starter. It worked beautifully! I love having healthier yogurt to feed to my almost-one-year-old daughter. Now it's one of her favorite foods!
      I do have a question about the incubation: Is it necessary to refrigerate it as soon as the 8 hours are up? Would it mess things up if I decided to leave the house (or sleep :)) at that time?

      Reply
      • Kristen Chidsey

        March 29, 2022 at 6:56 am

        Hi Delie! Thanks for sharing your success (even without a thermometer). I am so happy to hear it worked well for you! And yes, I would not leave your yogurt in the Instant Pot for more than 1 hour after the incubation time is up for safety concerns.

        Reply
    4. Carol

      March 22, 2022 at 10:47 am

      I absolutely love the way your video explains every detail of making yogurt in the Instant Pot. Ive been using my ip for years and making yogurt but occasionally it doesn’t thicken. Now that I’ve found you and your video Im sure every batch will be perfect. Thank you!!!

      Reply
      • Kristen Chidsey

        March 22, 2022 at 11:05 am

        I absolutely LOVE hearing my video has helped you perfect making yogurt. Thanks for sharing.

        Reply
        • carol

          March 23, 2022 at 12:24 pm

          5 stars
          Hello Kristen
          My first batch of yogurt turned out Perfect!! Way better than any Ive made in the past. Much thicker and No whey!!! So that means More yogurt!! Your tips made a huge difference; will definitely be using your recipe from now. Thank you.

          Reply
          • Kristen Chidsey

            March 23, 2022 at 5:42 pm

            I love hearing that Carol! Thank you for sharing!

            Reply
      • Carmen

        June 02, 2022 at 9:41 am

        When making Greek yogurt, do I strain the yogurt after cooking 8 hrs in the instant pot or after it has sat in the refrigerator for 8 hrs? Thanks.

        Reply
        • Kristen Chidsey

          June 02, 2022 at 3:16 pm

          Hi Carmen! After it has sat in the refrigerator for 8 hours.

          Reply
    5. Jenna

      March 18, 2022 at 9:21 am

      Hi there! I’ve been using your recipe for about a year and I love it! I’m wondering though if it will work with a smaller quantity. We just don’t seem to be getting through all the yogurt before it turns. Thanks in advance!

      Reply
      • Kristen Chidsey

        March 18, 2022 at 9:47 am

        Hi Jenna! I am so happy to hear this recipe is a staple! Feel free to cut this recipe in half with the same results. Alternatively, you can freeze half the yogurt to defrost and use at another time.

        Reply
    6. Tiffany

      February 19, 2022 at 12:08 pm

      Mine is super runny. Does it set up after in the fridge? Should I try it again?

      Reply
      • Kristen Chidsey

        February 19, 2022 at 2:16 pm

        Hi Tiffany! I am sorry your yogurt did not set up well. First of all, you want to be sure your milk reaches the right temperatures 180 and then to 115 before incubating. You also want to ensure your incubation is set to NORMAL not LOW. And to let it sit up for 8 hours in the fridge. If all those steps were followed and still runny, I would suggest incubating again with another 2 tablespoons of starter.

        Reply
    7. Amber

      February 11, 2022 at 12:49 pm

      4 stars
      After boiling, when it cools into the 90’s is it still okay to mix yogurt starter in and hit yogurt button for 8 hours?

      Reply
      • Kristen Chidsey

        February 11, 2022 at 2:25 pm

        I have found it works best to be closer to 105 degrees. I would try to reheat a bit to bring it closer to that temperature and then mix in the starter. It can work at 90 degrees, but can be finicky for many.

        Reply
    8. Kayla Williams

      January 21, 2022 at 11:47 am

      HI Kristen,

      I am wondering if this recipe might work with lactose free milk as an option? I don't see why not, but I am hesitant to try it in the event I waste the ingredients.

      Reply
      • Kristen Chidsey

        January 21, 2022 at 2:15 pm

        I have used Fairlife lactose free many times with success if that helps!

        Reply
    9. Kristin

      January 15, 2022 at 9:18 pm

      Hi Kristen! I'm not sure where I went wrong, but using your cold method and ultra-filtered milk, I ended up with more of a runny kefir consistency? I used 1/2 gallon Trader Joes ultra-filtered milk (same as Fairlife?), a plain greek yogurt starter with live cultures, and let if cook overnight for 8 hours. Then set in the fridge without stirring for another 8 hours. Any ideas what happened? Thanks!

      Reply
      • Kristen Chidsey

        January 16, 2022 at 7:10 am

        Hi Kristin! I am sorry this happened. It may be that your incubation temperature was at less, not normal. If it reads less, hit adjust again until normal is lit up.

        Reply
      • Natalie

        February 08, 2022 at 11:49 am

        I think I had a similar problem to one of the more recent comments. But I checked my setting when it reads 8:00 and it says normal. It’s been in the fridge overnight and very runny. Can I try to yogurt setting again or is it ruined?

        Reply
        • Kristen Chidsey

          February 08, 2022 at 2:07 pm

          I would try it again Natalie, since it sounds like it was incubated on normal--it should be safe. Just be sure to add new starter 🙂

          Reply
    10. Bethanie Musser

      December 29, 2021 at 2:13 pm

      I made this recipe for Greek Yogurt with whole milk - LOVED it! Have shared with many, many people! 🙂

      I've read that homemade yogurt incubated for a longer time has shown to reduce how many carbs are in the yogurt - but I saw a comment to incubate for 10 hours for tangier flavor. I would like lower carb but not so much tang. Do you have any suggestions?

      Thanks!

      Reply
      • Kristen Chidsey

        December 29, 2021 at 5:32 pm

        Hi Bethanie! I love hearing that you enjoy this recipe. As for lowering carbs, you are right that incubating for 10 hours will slightly reduce the amount of sugars, but it can be a bit tangier. I don't have any suggestions to overcome that--sorry!

        Reply
    « Older Comments
    Newer Comments »

    Leave a Reply Cancel reply

    Your email address will not be published. Required fields are marked *

    Recipe Rating


    This site uses Akismet to reduce spam. Learn how your comment data is processed.

    Primary Sidebar

    Meet A Mind "Full" Mom

    welcomeHi! I'm Kristen. I want to welcome you into my kitchen and my REAL, imperfect life. Let me share with you tips and tricks to help you make healthy eating a reality for your family in the chaos of life and on the constraints of a budget. Read more

    Instant Pot Favorites

    jar of plain yogurt next to instant pot

    Instant Pot Yogurt

    Perfect Hard Boiled Eggs Sliced Open on cutting board

    Instant Pot Hard Boiled Eggs

    Shredded Pot Roast with carrots and Potatoes in white bowl next to Instant Pot.

    Instant Pot Pot Roast

    Whole Chicken on cutting board

    Instant Pot Rotisserie Chicken

    Bowl of Cold Start Yogurt

    Instant Pot Cold Start Yogurt

    Inner pot of instant pot filled dried beans

    Instant Pot Beans

    4 chicken breasts cooked inside instant pot.

    Instant Pot Chicken Breast (Fresh or Frozen)

    How to use the instant pot as a slow cooker

    How to Use Your Instant Pot as a Slow Cooker

    Reader Favorites

    Bowl of Baked Meatballs.

    The Best Baked Meatballs

    slice of egg cheese overnight breakfast casserole with sausage

    Hashbrown Breakfast Casserole

    Creamy and Cheesy Chicken and Rice in yellow casserole dish

    Creamy and Cheesy Chicken and Rice

    Baked Potato on White Plate

    Instant Pot Baked Potatoes

    Chili seasonings labled on wooden board

    DIY Chili Seasoning

    Plate of chicken and bok choy stir fry topped with cilantro.

    Stir-Fried Chicken and Bok Choy

    Platter of Instant Pot Wings next to ranch dressing

    Instant Pot Chicken Wings

    Bowl of slow cooker oatmeal topped with maple syrup and nuts

    Slow Cooker Maple Brown Sugar Oatmeal

    Taco Meat in skillet with wooden spoon

    The Best Taco Meat Recipe

    Homemade Chicken Tenders on platter.

    Homemade Chicken Tenders

    FEATURED ON

    featured

    Footer

    Featured on:

    Websites AMind"Full"Mom has been featured on

    ↑ back to top

    About

    • Privacy Policy

    Newsletter

    • Sign Up! for emails and updates

    Contact

    • Contact
    • Work with me

    DISCLAIMER: THE SITE DOES NOT PROVIDE MEDICAL ADVICE AND IS FOR INFORMATION PURPOSES ONLY. IT IS NOT INTENDED TO BE A SUBSTITUTE FOR PROFESSIONAL MEDICAL ADVICE OR TREATMENT. AFFILIATE LINKS TO PRODUCTS I GENUINELY LOVE ARE OFTEN INCORPORATED IN MY POSTS. THANK YOU FOR YOUR SUPPORT.

    Copyright © 2020 · A MIND "FULL" MOM