
This post may contain affiliate links. Please see our disclosure policy.

These creamy grits are a true Southern staple! Made with stone-ground grits, butter, and cream, they are rich, cozy, and surprisingly simple to make.
Whether you pair these homemade grits with grilled shrimp skewers or blackened mahi mahi or alongside homemade breakfast sausage and honey lime fruit salad for a hearty breakfast, they turn an ordinary meal into something that feels just a little extra special.

Kristen's Keys to Creamy Grits
Paying attention to these tips helps to ensure your grits have the best texture and flavor.
- Use stone-ground grits, not instant. They take longer to cook, but the flavor is deeper and the texture is naturally creamier because the corn is less processed.
- Use stock over water. Unless you want to sweeten your grits, start with store-bought or homemade chicken stock or homemade vegetable broth to build instant flavor.
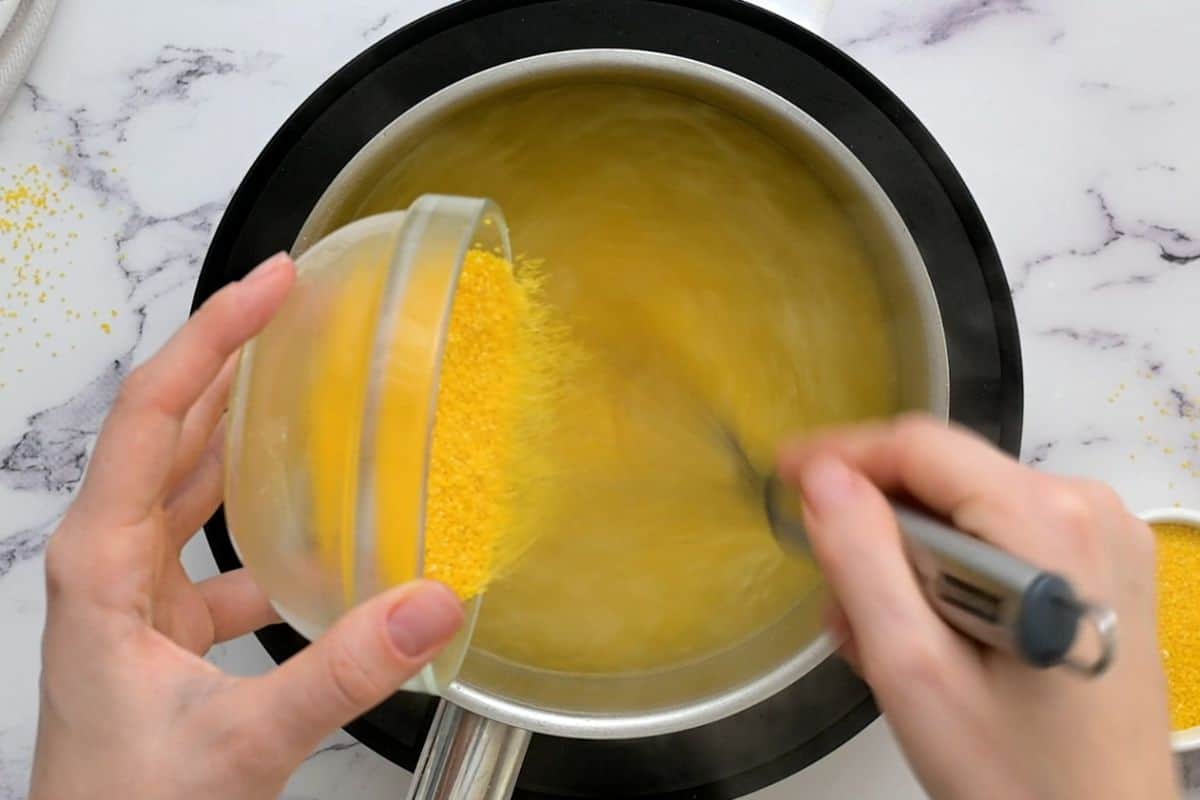
- Whisk as you pour. Slowly stream the grits into boiling liquid while whisking to prevent lumps. Once lumps form, they're stubborn.
- Cook low and slow. Keep the heat at a gentle simmer and whisk every 3-4 minutes. This prevents sticking and keeps the texture smooth.
- Finish with fat at the end. Butter and cream stirred in after cooking give you that silky finish without separating or turning greasy.
How to Make Creamy Grits
Think of this as me in your kitchen teaching you a few tricks of the trade as we go.
Step One: Combine Grits with Liquid
In a heavy-bottomed saucepan, bring the chicken stock (or vegetable broth) to a boil. Once boiling, gradually pour the stone-ground grits into the boiling liquid while whisking constantly. Take your time to prevent lumpy grits.
Step Two: Simmer Until Tender
Lower the heat, cover the pot, and simmer for 30-40 minutes, whisking often. I recommend removing the lid every 3-4 minutes, to whisk the grits vigorously. This is really important to keep the grits uber smooth.
If the grits get too thick before they are tender, add a splash of water or broth and keep going.
Step Three: Add Butter & Cream
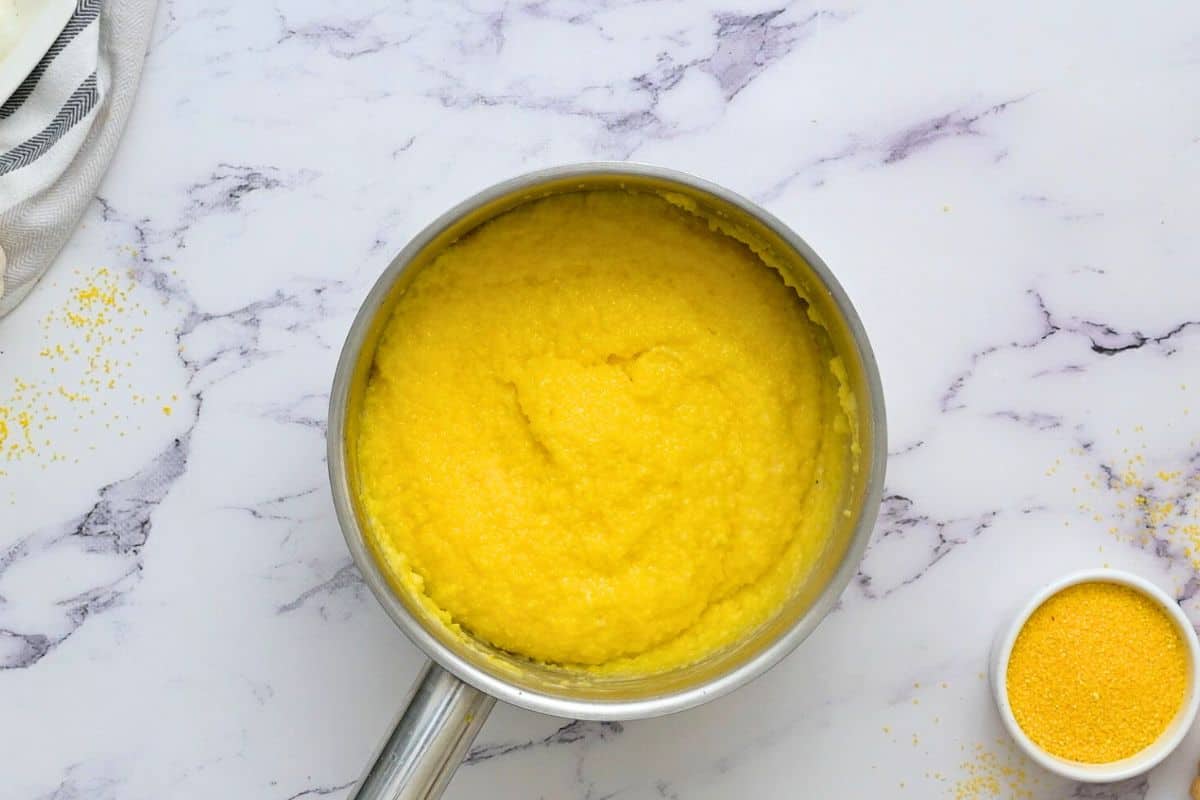
Once tender, remove from heat and stir in butter and cream for a rich and creamy finish. Season with salt and pepper to taste. If desiring cheesy grits, which is never a bad thing, this is the time to stir in the shredded cheese as well.
Step Four: Serve Immediately
Grits thicken as they cool -- that's just the starch doing its thing. Serve right away for the creamiest texture.
But if you happened to let them sit too long, loosen them up by whisking in a splash of warm milk or broth.

Serving Suggestions
Grits are suited to being served any time of the day. Try them out in any of the delicious combinations below.
- Make a Savory Breakfast Bowl: Top with homemade sausage gravy, oven baked bacon, or an oven poached egg.
- Round Out Dinner: Serve alongside Crockpot BBQ Chicken Legs or Slow Cooker Pulled Pork for a comforting dinner that feels straight out of a Southern diner.
- Keep it Classic: Top with Grilled Shrimp Skewers or Air Fryer Shrimp for a simple spin on shrimp and grits.
- Use to Soak Up Gravy: Spoon Instant Pot Short Ribs or Instant Pot Beef Bourguignon over the grits to soak up every bite of the rich gravy.
- Make a Vegetarian Bowl: Top with Southern Succotash for a surprisingly satisfying meal.
- Try Something Unique: Serve grilled chicken kabobs with cilantro pesto over the grits. Sweet, spicy, creamy and fresh all on one plate!
Variations on Grits
- Classic Plain Grits: Use water instead of broth and skip the cheese. Finish with butter, salt, and a splash of cream.
- Ultra Creamy Version: Replace 2 cups of the broth with whole milk. Watch carefully and whisk often so the milk doesn't scorch.
- Sweet Grits: Use water (or equal parts water and whole milk), then stir in ¼-⅓ cup maple syrup or brown sugar, 4 tablespoons butter, and 2 tablespoons cream once tender.
- Cheesy Grits: Add up to 1 cup freshly grated sharp cheddar at the end. Freshly grated melts smoother than pre-shredded (those anti-caking agents can make it grainy).
FAQs on Homemade Grits
There is a wide variety of grits sold at most grocery stores. For this recipe, you can use white or yellow stone-ground grits, not products labeled cornmeal, polenta, quick-cooking grits, or instant grits. I have found it easier to find yellow corn grits at most grocery stores.
Some traditional methods soak and skim the hulls before cooking. With most modern store-bought stone-ground grits, this step adds extra work with very little payoff. I skip it.
Grits are naturally gluten-free. However, you MUST check your package to guarantee that they are labeled gluten-free, as some brands are manufactured in a way that has cross-contamination with gluten. You also want to ensure your stock/broth is gluten-free.
Allow the grits to cool, then transfer them to an airtight container. Store them in the refrigerator for up to 3 days. To reheat, place the leftover grits in a heavy-bottomed saucepan with a splash of milk, stock, or water. Bring to a simmer over medium heat, whisking frequently, adding more liquid as needed, to allow the grits to loosen up and warm through.
More Favorite Southern-Inspired Recipes
Creamy Grits

Video
Ingredients
- 4 cups liquid, low-sodium chicken stock, vegetable broth, or water
- 1 cup stone-ground grits , white or yellow
- 2 teaspoons minced garlic, optional
- 4 tablespoons unsalted butter
- 2 tablespoons heavy cream, + more to thin
- 1 cup extra-sharp shredded cheddar cheese, optional
- salt and pepper to taste
Instructions
- In a medium saucepan, bring 4 cups liquid to a boil over medium-high heat. Tip: Use broth for savory grits and water for sweet or plain grits.
- Once boiling, add 2 teaspoons minced garlic if using, then slowly whisk in 1 cup stone-ground grits , whisking constantly.
- Reduce the heat to low and cover the pan with a tight-fitting lid. Remove the lid every couple of minutes to give the mixture a good whisk, which will prevent lumps from forming. Cook until the grits are tender and the liquid is mostly evaporated. This will take about 20-25 minutes. If your liquid evaporates before your grits are tender, add in ¼ cup more liquid as needed.
- Remove the saucepan from the heat and stir in the 4 tablespoons unsalted butter, 2 tablespoons heavy cream, and 1 cup extra-sharp shredded cheddar cheese if using. If needed, add an additional tablespoon or two of cream to thin. Add salt and pepper to taste and serve immediately.
Notes
Nutrition
Nutrition information is automatically calculated, so should only be used as an approximation.




I haven’t even made them yet but it’s Going to happen soon!!! I live in the south too.
You’re the only go-to online cooking advisor i need. Your posts & gmails are super great❤️
Aww, thank you so very much! I hope you enjoy the grits!
The very best grits I have ever made, thanks Kristen. I use grits by Palmetto Farms.
You are so welcome! Thanks for taking the time to leave a review and comment Monty!