This post may contain affiliate links. Please see our disclosure policy.
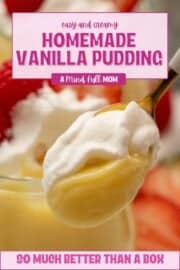
With simple ingredients and minutes of prep, this Homemade Vanilla Pudding recipe puts boxed mixes to shame. It is rich, creamy, silky, and surprisingly simple to make.

The Best Vanilla Pudding

When it comes to pudding, it is super tempting to grab a box of instant pudding mix. However, when it comes to taste (and ingredients!), nothing compares to homemade! With pure vanilla and no weird aftertaste, homemade vanilla pudding is rich, silky, and oh so creamy!
Even better? It is exceptionally easy to make vanilla pudding from scratch. We are talking less than 10 minutes of hands-on prep!
Whether you're layering it into a fancy little trifle with berries and fresh whipped cream, using it to make the best banana pudding ever, or just sneaking spoonfuls straight from the bowl (we've all been there), this creamy, dreamy vanilla pudding always hits the spot.
Happy Cooking! xo Kristen
Notes on Ingredients
No food coloring or preservatives here! Just seven simple ingredients are all you need to make the best homemade vanilla pudding.

- Milk: Whole milk is best. Lower fat or skim milk will result in pudding that while delicious, won't be as thick or creamy.
- Egg Yolks: Help to richen AND thicken the pudding.
- Vanilla: For the most prominent, rich, warming vanilla flavor, use pure vanilla extract for classic vanilla pudding or vanilla bean paste for deeper vanilla flavor with flecks of vanilla beans throughout your pudding. Do no use imitation vanilla or a product labeled vanilla flavoring.
- Cornstarch: To thicken. Arrowroot powder and tapioca starch can be used in place of cornstarch; see recipe notes for replacement ratios.
- Salt: Just a pinch! It will help to enhance the flavors and balance the sweetness.
- Butter: Finishing vanilla pudding with a bit of unsalted butter adds a rich, nutty undertones and gives the pudding a velvety, glossy consistency.
Dairy-Free?
To make vanilla pudding without dairy, I would recommend replacing butter with your favorite non-dairy butter. For the milk, any non-dairy milk will work as a replacement, but for thick, creamy results, I highly recommend using canned coconut milk.
How to Make Vanilla Pudding From Scratch
The following tips are provided to help you achieve perfect results. You will find the ingredient quantities and detailed instructions in the recipe card at the bottom of this post.
- Combine cornstarch and sugar. Whisk the cornstarch, sugar, and salt together in a medium saucepan until the cornstarch and salt are evenly distributed throughout the sugar.
- Add milk and egg yolks. Slowly drizzle the milk into the sugar mixture, whisking constantly to combine. I like to use a glass measuring cup to help make pouring the milk easy and mess free. Add the egg yolks, and whisk to combine.

- Cook pudding. Cook the milk mixture over medium-low heat, whisking often. Once the bubbles begin to form around the edges of the pot, begin to whisk constantly, until the pudding has thickened enough to coat the back of spoon.

- Add butter and vanilla. Remove the saucepan from the heat and add in the vanilla and butter, stirring until the the butter has melted into the pudding and is fully incorporated.
- Strain. While optional, I recommend straining the pudding through a fine-mesh strainer or sieve to ensure the creamiest, silkiest results. It is an extra step and an extra dish to wash--but it is worth it.

- Chill. While you can eat the pudding warm (that is what I use to do with my grandma as a child), the consistency AND flavor intensifies after chilling. So grab a spoonful warm for yourself then chill to enjoy the vanilla pudding in its best form once chilled.
- Serve. Grab a spoon and dig in or top with fresh whipped cream and berries for a super simple, yet super delicious nostalgic dessert.

Key Tips from Kristen
Important Tips for Chilling
- Portion the pudding before chilling. In order for the pudding to keep its desired thick consistency, it is best to portion the pudding into individual servings before chilling. Transfer the strained pudding to mini trifle cups or custard bowls, cover, and chill.
- Prevent skin on surface of pudding. Press plastic wrap directly onto the surface of the pudding, ensuring the entire surface is covered before chilling. Alternatively, you can use parchment paper if opposed to plastic wrap. I do this with my no-bake key lime pie as well.
More Homemade Desserts
Did you make this recipe?
If you enjoyed this recipe, please leave a comment with a 5-star review at the bottom of the post. Thank you!
Vanilla Pudding Recipe

Video
Ingredients
- ½ cup granulated sugar
- 3 tablespoons cornstarch
- ⅛ teaspoon table salt
- 2 cups whole milk
- 2 large egg yolks
- 1 ½ teaspoons vanilla extract, or vanilla bean paste
- 1 tablespoon unsalted butter, optional
Instructions
- In a medium saucepan whisk together sugar, cornstarch, and salt. VERY slowly drizzle in 2 cups whole milk, whisking to combine. Add 2 large egg yolks and whisk again until everything is combined.

- Cook the milk mixture over medium-low heat, whisking every minute or so, until bubbly throughout and the mixture begins to thicken. This will take about 6-8 minutes. Once bubbling, whisk and cook for 1-2 minutes to begin to thicken. Once the mixture coats the back of a wooden spoon, you know it is just the right consistency.
- Remove from the heat, and using a wooden spoon or spatula, stir in vanilla and butter.
- Place a fine-mesh strainer over a large mixing bowl and pour the pudding through the strainer.
- Cool for 5 minutes then transfer the pudding to individual serving dishes.Top each with a layer of plastic wrap touching the top of the pudding to prevent a skin from forming.
- Chill for 30 minutes before serving as desired.


Notes
Nutrition
Nutrition information is automatically calculated, so should only be used as an approximation.


Do you have a chocolate pudding recipe?
Hi Becky! I don't have one published at this time. I would start by adding 1/3 cup of sifted cocoa powder to sugar and cornstarch mixture. I would also stir in a handful of chocolate chips after tempering the eggs for rich, chocolate flavor.